Quantcast
Channel: Linux tutorials Archives | Unixmen
Viewing all 1264 articles
Browse latest View live

Creation of Virtual Machine in Linux using KVM

$
0
0

KVM the Kernel based Virtual Machine is an open source virtualization infrastructure for the Linux Kernel. It requires a processor with hardware virtualization extension and has been ported to FreeBSD and Illumos at the form of loadable kernel modules. A large set of operating systems work with KVM with many versions of Linux, BSD, Solaris Windows, ReactOS, Plan 9 and AROS Research Operating. KVM is proven to be far faster and smoother at running virtual machines than any other virtualization platform.

In this article we will list the features of the KVM and how we can use it to create a virtual machine under RedHat based-distributions.

KVM features:

Using KVM, we can run multiple virtual machines running unmodified Linux or Windows images. Each virtual machine has private virtualized hardware: a network card, disk, graphics adapter, etc. It is developed by Red Hat Corporation to provide a virtualization solution and services on the Linux operating system platform. KVM is designed over the primary Linux OS kernel.

KVM continues to add innovative features that address virtualization demands. It has a large set of features where we can list the following ones:

  • KVM is a type of hypervisor that enables, emulates and provides for the creation of virtual machines on operating systems
  • KVM can be installed on all x86 processors and provide separate instruction set extensions for Intel and AMD processors.
  • KVM supports multiple different guest operating system images including Linux Kernel, Windows, BSD and Solaris.
  • It also allocates separate virtualized computing resources for each virtual machine such as the processor, storage, memory, etc.
  • It has a Virtual CPU hot add capability.

Prerequisites:

KVM only works if your CPU has hardware virtualization support – either Intel VT-x or AMD-V. To determine whether your CPU includes these features, use the following command:

# grep -e 'vmx' /proc/cpuinfo

Use the following command to check that the KVM modules are loaded in the kernel:

# lsmod | grep kvm

Now you will need to have a root account or non-root user with the “sudo” privileges. So use the following command to up-date the system:

# yum update

And the following command to check that Selinux is at the permissive mode.

# setenforce 0

Installation of the KVM:

We will start this section by installing the “qemu-kvm” and “qemu-img” packages using the following command:

# yum install qemu-kvm qemu-img

Now we will install the “virt-manager”, “libvirt-client”, “virt-install”, “libvirt” tools to administrate our platform using the following command:

# yum install virt-manager libvirt libvirt-python libvirt-client

And also there are other required packages for the RHEL/CentOS must be installed like: “Virtualization-client”, Virtualization platform” and virtualization tools where we will use the following command to install them:

#yum groupinstall virtualization-client virtualization-platform virtualization-tools

Use the following command to restart the daemon “libvirtd”:

#systemctl restart libvirtd

Then use the following command to verify the state of the daemon:

#systemctl status libvirtd

Now we will start the creation of our virtual machine. We will use the “virt-manager” tool to manage our virtual platform:

#virt-manager

Now from the “file” tab, select “add connection”, then check “connect to remote host” option then provide Hostname/IP of the remote server. Now you have to select the directory in which you will store your files and folders. So we will create the Volume Disk, you have to return to our localhost and select “details” and then “storage” tab. Then press “New Volume” button and chose a name and size for your new volume disk. The allocation size is the actual size for your disk which will be allocated immediately from your physical disk after finishing the steps.

You have to verify now the path of the new disk image by using the following command:

# ls -l /var/lib/libvirt/images
-rw-------. 1 root root 10737418240 Apr 14 18:51 virtimag.img

In the main window now hit the button “VM” select the installation method to create the virtual machine. And you have two options either to use the CDROM/DVD or the ISO image to specify which local will install media.  In our article we will use the ISO image. The storage has return back, we will use the virtual disk which we have created early to install virtual machine on it.

If you like to change some configuration or doing some customization just check “Customize configuration before install” option. Then click finish and wait seconds, control console will appear for your Guest OS to manage it

Conclusion:

In this article we gave you an introduction to the KVM, how to manage your virtual platform and how to deploy your virtual machine.

Source and Reference

---------------------------------------------------------------------
Creation of Virtual Machine in Linux using KVM


How To Upgrade To Ubuntu 15.04 Vivid Vervet From Ubuntu 14.10 Utopic Unicorn

$
0
0

It’s just two more days for the Ubuntu 15.04 release. Yes, the final version of Ubuntu 15.04, codenamed Vivid Vervet will be available for download on coming April 23. As you may know, Ubuntu 15.04 final beta is already out a couple of weeks before. For more details, refer the following link.

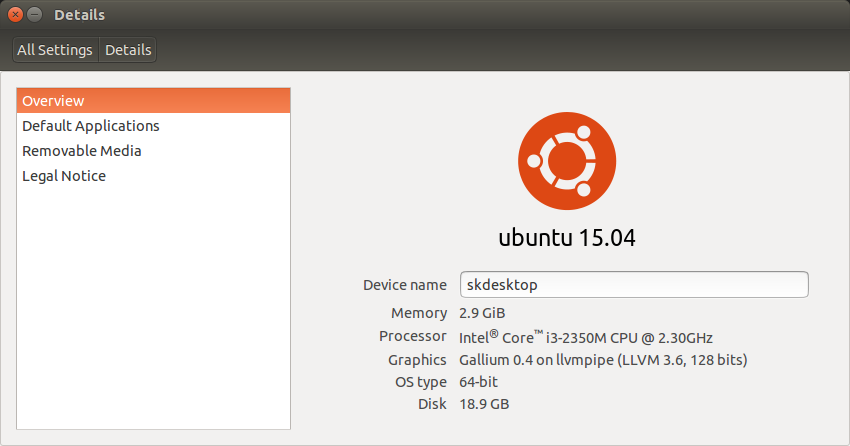
This tutorial describes how to upgrade to Ubuntu 15.04 Vivid Vervet from Ubuntu 14.10 Utopic Unicorn. Please note that you can’t directly upgrade from Ubuntu 14.04 to Ubuntu 15.04. We can upgrade from one version to another latest version. First, you should upgrade from 14.04 to 14.10, and then upgrade from 14.10 to 15.04. Clear? Good. Now, Let us start the upgrade process.

Though, the steps provided below are compatible for Ubuntu 15.04, It might work for other Ubuntu derivatives, including Lubuntu/Kubuntu/Xubuntu 15.04 as well.

A word of caution: Before upgrading, backup all your important data to any external device like USB drive or CD/DVD.

Desktop Upgrade

Before going to upgrade, we need to update the system. Open up the Terminal and enter the following commands.

sudo apt-get update && sudo apt-get dist-upgrade

The above command will download and install the available latest packages.

Reboot your system to finish installing updates.

Now, enter the following command to upgrade to new available version.

sudo update-manager -d

Software Updater window will show up and it is going to search for the available new release.

After a few seconds, you will see a screen like below that saying: “However, Ubuntu 15.04 is available now (you have 14.10)”. Click on the button Upgrade to start upgrading to Ubuntu 14.10.

Software Updater_001

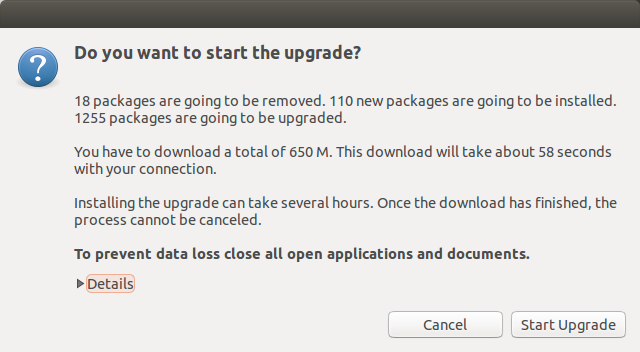
The Software Updater will ask you to confirm still you want to upgrade. Click Start Upgrade to begin Ubuntu 15.04 upgrade process.

Release Notes_002

Please Note: Ubuntu 15.04 is still in beta. It is not recommended for production systems. The final stable version will be released on April 23.

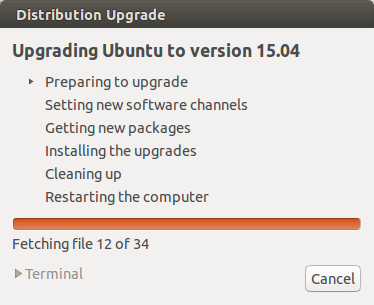
Now, the Software Updater will prepare to start setting up new software channels.

Distribution Upgrade_003

After a few minutes, the software updater will notify you the details the number of packages are going to be removed, and number of packages are going to be installed. Click Start upgrade to continue. Make sure you have good and stable Internet connection.

Untitled window_004

Now, the updater will start to getting new packages. It will take a while depending upon your Internet connection speed.

Distribution Upgrade_005

Distribution Upgrade_006

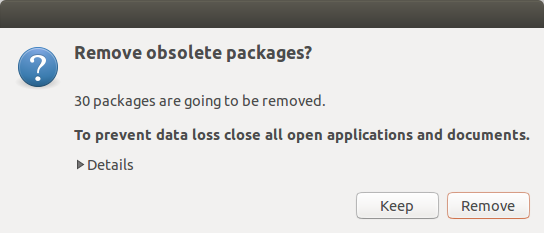
After a while, you’ll be asked to remove unnecessary applications. Click Remove to continue.

Untitled window_008

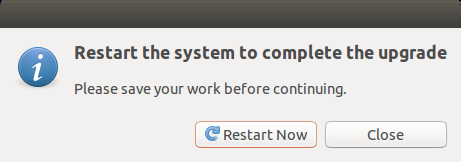
Finally, click Restart to complete the upgrade.

Untitled window_009

Congratulations! Now, you have successfully upgraded to Ubuntu 15.04.

Details_010

That’s it.. Start using the new Ubuntu version.

Server Upgrade

To upgrade from Ubuntu 14.10 server to Ubuntu 15.04 server, do the following steps.

Install the update-manager-core package if it is not already installed:

sudo apt-get install update-manager-core

Edit the file /etc/update-manager/release-upgrades,

sudo nano /etc/update-manager/release-upgrades

and set Prompt=normal or Prompt=lts as shown below.

# Default behavior for the release upgrader.

[DEFAULT]
# Default prompting behavior, valid options:
#
#  never  - Never check for a new release.
#  normal - Check to see if a new release is available.  If more than one new
#           release is found, the release upgrader will attempt to upgrade to
#           the release that immediately succeeds the currently-running
#           release.
#  lts    - Check to see if a new LTS release is available.  The upgrader
#           will attempt to upgrade to the first LTS release available after
#           the currently-running one.  Note that this option should not be
#           used if the currently-running release is not itself an LTS
#           release, since in that case the upgrader won't be able to
#           determine if a newer release is available.
Prompt=normal

Normal – Check to see if a new release is available. If more than one new release is found, the release upgrader will attempt to upgrade to the release that immediately succeeds the currently-running release.

LTS – Check to see if a new LTS release is available. The upgrader will attempt to upgrade to the first LTS release available after the currently-running one. Note that this option should not be used if the currently-running release is not itself an LTS release, since in that case the upgrader won’t be able to determine if a newer release is available.

As you may know, Ubuntu 15.04 is not a LTS version. So, I entered normal.

Now, it is time to upgrade your server system to latest version using the following command:

sudo do-release-upgrade -d

Follow the on-screen instructions. Reboot the server. That’s it.

Cheers!!

---------------------------------------------------------------------
How To Upgrade To Ubuntu 15.04 Vivid Vervet From Ubuntu 14.10 Utopic Unicorn

Installation Of WordPress With OpenLiteSpeed

$
0
0

WordPress is a free and open-source blogging tool and a content management system (CMS) based on PHP and MySQL. It was released in 2003 under the second version of the GPL license. This tool combines simplicity for users and publishers which makes it flexible and easy to use. It is the most popular blogging system in use on the web at more than 60 million websites. WordPress is a powerful semantic publishing platform, it has a large set of features designed to help users to be a publisher on the internet as easy, pleasant and appealing as possible.

In this article, we will show you how to install WordPress instance using the OpenLiteSpeed web server.

To install OpenLiteSpeed, refer the following link.

WordPress features

We will start our article by listing some of the features that come as standard with WordPress:

  • WordPress is characterized by its simplicity, it so easy and quick to be online an start publishing.
  • You can create any type of website: a personal blog, a photoblog, a business website, a professional portfolio, a magazine or news website and many others. You can modify your website themes and extend them with plugins.
  • WordPress is easy to install and upgrade. You can manage your content, create draft, schedule publication and look at your post revisions.
  • You can make your content public or private, and secure posts and pages with a password.
  • WordPress supports an extended version of the Blogger API, MetaWeblog API and the MovableType API.

Create Database and Database user for WordPress

It is required to have a non-root user system with the “sudo” privileges before starting the installation. Also you must have an installed MySQL and OpenLiteSpeed systems.

Now we will start our installation, so we will create a database and database user for WordPress using the following command:

$ mysql -u root -p

You will be asked to enter the MariaDB administrative password, so we will be at the MariaDB prompt. Use the following command to create a database for our application by calling it “datawordp” (this is our choice you can choose other name)

CREATE DATABASE datawordp;

Now we will create a database user using the following command where we called it “datawordpuser”:

GRANT ALL ON datawordp.* TO datawordpuser@localhost IDENTIFIED BY 'Enter_your_password';

Don’t forget to choose a password and to replace “Enter_your_password” in the command above.

Use the following command to flush the made changes:

FLUSH PRIVILEGES;

Now exit the MariaDB prompt using the following command:

exit

Installation of the required extensions

After creating the database and the database user, and for the installation of the WordPress we will need to install some additional extensions. You will need just to type the following command:

$ sudo yum install lsphp56-gd lsphp56-process lsphp56-mbstring

The needed extensions are included in OpenLiteSpeed’s repository which will be after the installation available in your web server’s PHP instance.

Installation and configuration of the WordPress

We need now to modify the default virtual host that is presented in the openLiteSpeed configuration to be able to use it for the WordPress installation. So we will use the following command to log into the OpenLitespeed’s administrative interface:

https://your_server_domain_or_IP:7080

Select the “Virtual Hosts” from the “Configuration” item in the admin interface. Then click on the “View/edit” link which will enable you to edit the configuration of the virtual host.

After that, we will allow the index.php processing and we will do as fellow: click on the “General” tab for the virtual host and then clock on te “edit” button. Add the “index.php” before “index.html” in the field of valid index files to allow PHP index files. Then clock save.

Now we will start the installation and configuration of the WordPress. Click on the “rewrite” tab of the virtual host, then click on the “edit” button of the “rewrite control” table. Choose “yes” within the “enable rewrite” option. Click save and then you will be moved to the main rewrite menu. So click on the “edit” button for the rewrite rules table. Delete the existing rules and use the following to replace them:

RewriteRule ^/index\.php$ - [L]
RewriteCond %{REQUEST_FILENAME} !-f
RewriteCond %{REQUEST_FILENAME} !-d
RewriteRule . /index.php [L]

Then click the save button.

To know that the WordPress has its own authentication system, and the OpenLiteSpeed has also some password protected areas. So it is important to remove the unused password protection. And we will do as fellow:

We start by clicking on the “security” tab, then click “delete” link next to “SampleProtectedArea” within the “Realms list” table. You will be asked to confirm the deletion so click the “yes” button. Then click on the “context” tab and delete the /protected/ context and confirm those changes by clicking on the “yes” button again.

Now under the “actions” item of the OpenLiteSpeed interface select the “Graceful Restart”:

12

Then you can check if you have any error in the “home” page. If there are some errors click on the “actions” and then “server log viewer” to get more information and know the reasons of those errors.

Before making the installation of the WordPress we have to clean up our virtual host and document root directories. So start by using the following command to delete the virtual host root directory:

$ cd /usr/local/lsws/DEFAULT

Then use the following command to remove the existing scripts in the “contexts” tab:

$ sudo rm cgi-bin/* fcgi-bin/*

And if the “fastcgi-bin/*” is already deleted in the previous section so you will get a warning. Then use the following command to remove the password and group files:

$ sudo rm conf/ht*

Type the following command to clear the contents of the document root directory:

$ sudo rm -rf html/*

Now we are ready to install the WordPress. Type the following command to start:

$ cd ~$ wget https://wordpress.org/latest.tar.gz

Extract the downloaded archive and give your directory by using the following commands:

$ tar xzvf latest.tar.gz$ cd wordpress

Then use the following command to copy the WordPress configuration file to “wp-config.php”.

$ cp wp-config-sample.php wp-config.php

Now use an editor to open the configuration file by using the following command:

$ vi wp-config.php

Find the settings for DB_name and DB_user and DB_password and change it as fellow:

// ** MySQL settings - You can get this info from your web host ** /
//** The name of the database for WordPress */
define('DB_NAME','datawordp'); 

/** MySQL database username */
define('DB_USER','datawordpuser'); 

/** MySQL database password */
define('DB_PASSWORD','Enter_your_password');

Save and close the file after making the changes.

Now we will use the following command to copy the files into our document root:

$ sudo cp -r ~/wordpress/* /usr/local/lsws/DEFAULT/html/

Use the following command to give permission of the entire directory structure to the user who runs the web server:

$ sudo chown -R nobody:nobody /usr/local/lsws/DEFAULT/html

After the installation we can get access to WordPress by going to our server’s domain or IP address using the following command:

http://your_server_domain_or_IP

and if you hadn’t switched to the port 80 during the OpenLiteSpeed installation, you can use the following command:

http://your_server_domain_or_IP:8088

You will get the first page of the WordPress installation asking you to select your language. So after choosing the language type continue. Then you will be asked to enter some information such: an administrative username, password, admin email account, a title of the site. After finishing this configuration you will be able to login using your created account and then you will be redirected to the WordPress admin dashboard, enabling you to configure your site which means that you have finished your installation.

Conclusion

In this article we showed you how to configure and install WordPress using the OpenLiteSpeed web server. This is beneficial for users who don’t have access to an SSH session that make their administration and modification easier.

---------------------------------------------------------------------
Installation Of WordPress With OpenLiteSpeed

Top Things To Do After Installing Ubuntu 15.04

$
0
0

Ubuntu 15.04 final beta is already out couple of weeks before. The final version of Ubuntu 15.04 will be released on coming April 23, 2015. Check the release notes for more details.

This comprehensive tutorial describes how can we enhance Ubuntu 15.04, and other older versions such as Ubuntu 14.10/14.04/13.10/13.04/12.10/12.04 etc., further for day to day activities. Also, this article will show you some interesting insights and ideas about what you can and should do after a successful installation of Ubuntu latest desktop version.

If you already use previous release of Ubuntu, and want to upgrade to the current latest version, then please refer the below link.

1. Preparing your Ubuntu desktop

1.1 Update System

The first and foremost thing to do is update/upgrade software repositories and make sure your systems contains latest versions of all software.

To do that, run:

sudo apt-get update && sudo apt-get upgrade

1.2 Install Antivirus

Sounds crazy. But, you must know, Linux is not completely virus-free distribution. Your system might got affected sometimes by viruses.

To install and configure Antivirus, refer the following link.

If sound is not working, check our previous post to resolve the issue.

2. Configure And Tweak Ubuntu

2.1 Disable Unity Dash Online Search feature

Whenever you type in Unity Dash to search for an application or a file in your computer, your search terms will be automatically sent to third parties such as Amazon, and the third parties will display the relevant results, mostly ads, depending upon your search terms. If you don’t like this feature, and feel this is really annoying, you can disable it.

To disable the Unity online search feature, refer the following link.

2.2 Enable Workspaces

Starting from Ubuntu 13.04 version, moving between workspace feature has been disabled by default. So, you can’t switch to other workspaces by using the key combinations: CTRL+ALT+[Left/Right/Up/Down] Arrow keys. Refer the following link to neable Work spaces in Ubuntu.

2.3 Ubuntu Tweak

Ubuntu Tweak is a must have application for Ubuntu and it’s derivatives. It is an application to configure Ubuntu easier for everyone. It provides many useful desktop and system options that the default desktop environment doesn’t provide. Using Ubuntu Tweak you can install all needed applications with a simple click, you can change the window buttons from Left to right…etc.

Read our previous to know how to install and use Ubuntu Tweak.

Also, read our Interview with Ding Zhou of Ubuntu Tweak.

2.4 Ubuntu After Install

Like Ubuntu Tweak, there is an another similar tool called “Ubuntu After install” available. Ubuntu After Install is a tool that can be used to install some of the best and essential software after installing the Ubuntu desktop. It has a bunch of useful applications, and will automate the installation process on a newly installed machine to get near perfect desktop. I would not say a complete desktop for all users, but a near perfect desktop. This tool saves your time and effort, and installs all latest versions of softwares by automatically adding the respective PPA’s to keep the installed softwares up to date on your Ubuntu system.

For more details about installation and usage of Ubuntu After Install, check the following link.

2.5 PostInstallerF

PostInstallerF is a small, lightweight, useful tool that can be used to install 100+ essential softwares, Games, audio/video codecs, and third-party repositories which are not included by default in Fedora, Ubuntu and Manjaro.

The above tools are just enough to configure a perfect Ubuntu desktop for daily usage. These tools comes with bundle of several essential and daily usage applications. So, you can omit almost 75% of this article steps.

If you want to install all softwares step by step, follow the below steps.

3. Desktop Environments

3.1 Cinnamon

Cinnamon is a GNOME 3 fork that allow you to have a panel at the bottom with a classic Menu, this is useful for people that want to use Ubuntu with a classic Bottom Menu.

Cinnamon latest version for Ubuntu 14.04 is not yet ported to the stable PPA, however we can install it using nightly builds which is not recommended for the production system.

If you want to install the most recent version of cinnamon, then follow the steps below.

sudo apt-get install cinnamon-desktop-environment

Logout from the current session and select Cinnamon as your desktop session at the user login prompt. Now you’ll able to get the Cinnamon Desktop Environment.

Menu_003

3.2 Gnome

To install GNOME 3 in Ubuntu 14.10, enter the following command:

sudo apt-get install gnome-shell ubuntu-gnome-desktop

During installation, the installer will ask you to select the login manager of your choice (LightDM is the default Unity manager and GDM is the GNOME default — Both will work).

3.3 LXQt

LXQt is the Qt port and the upcoming version of LXDE, the Lightweight Desktop Environment. It is the product of the merge between the LXDE-Qt and the Razor-qt projects: A lightweight, modular, blazing-fast and user-friendly desktop environment.

3.4 MATE Desktop

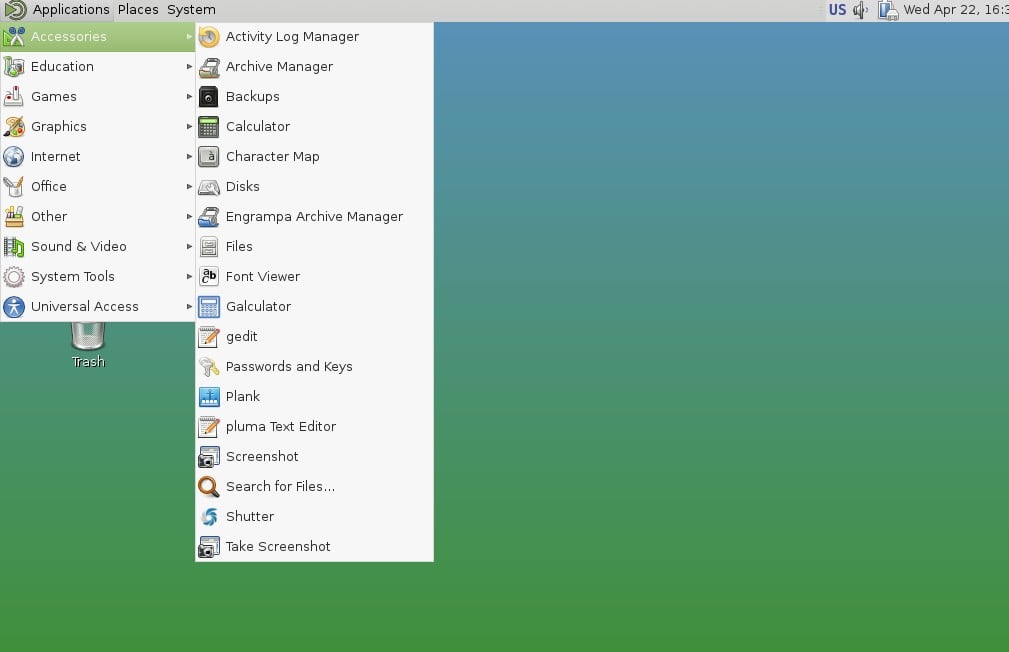
The MATE Desktop Environment is the continuation of GNOME 2. It provides an intuitive and attractive desktop environment using traditional metaphors for Linux and other Unix-like operating systems.

To install MATE desktop in Ubuntu, run:

sudo apt-get install ubuntu-mate-desktop

Ubuntu 15.04 MATE desktop

4. Configure Online Accounts

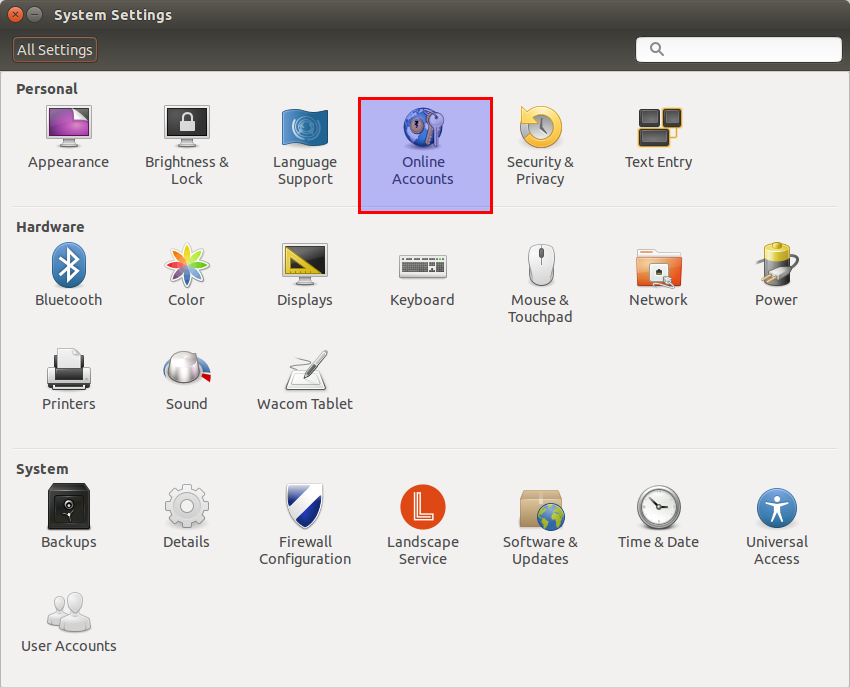
Want to setup your online accounts (Facebook, twitter.. etc.) on your Ubuntu system? Click on the gear button on the top right corner and select System Settings.

Menu_005

Then, select Online Accounts (see below).

System Settings_001

Now setup your online accounts and get notifications in Ubuntu. For example, if you want to add your Facebook account, click on the Facebook icon.

Online Accounts_007

Enter your facebook username and password, and click Log in to authorize.

Online Accounts_009

5. System Monitoring & Eye Candy Tools

5.1 Conky

Conky is a free, light-weight system monitor for X, that displays any information on your desktop. There are many nice themes available for conky that can display clock, CPU usage, RAM usage, swap, disk, net and more. Check our previous post for installation and configuration of conky in Ubuntu.

5.2 Don’t like the default icons, Wanna try some cool icons?

Try the following cool Icon collections.

Want to change the default icons to something that match your taste? Check this nice collection of icons for Ubuntu (PPA included).

6. Multimedia

6.1 VLC Media Player

VLC is the best media player for Linux it play almost everything, it has many features that you can not find in any other media player, read this post if you want to know what VLC can do: 25 things you can do with VLC Media player!

You can install VLC from Ubuntu Software Center or via terminal by using the following command:

sudo apt-get install vlc

Or install the most recent version 2.1.1 using the following PPA.

sudo add-apt-repository ppa:videolan/stable-daily
sudo apt-get update
sudo apt-get install vlc

6.2 Kodi

Kodi, formerly known as XBMC, is an award-winning free and open source (GPL) software media player and entertainment hub for digital media. XBMC is available for Linux, OS X, Windows, and the original Xbox. While XBMC functions very well as a standard media player application for your computer, it has been designed to be the perfect companion for your HTPC. Supporting an almost endless range of remote controls, and combined with its beautiful interface and powerful skinning engine, XBMC feels very natural to use from the couch and is the ideal solution for your home theater.

Open terminal and copy the following commands:

sudo apt-get install xbmc

6.3 Openshot video editor

Openshot, the best existing actually for Linux. You can install Openshot from Ubuntu Software Center, but if you want to install the latest release, you can do that by adding the following repositories:

sudo add-apt-repository ppa:openshot.developers/ppa
sudo apt-get update
sudo apt-get install openshot openshot-doc

6.4 Handbrake

Check our previous article to know about the powerful video encoder called “Handbrake”.

6.5 HotShots

HotShots is an application for capturing screens and saving them in a variety of image formats as well as adding annotations and graphical data (arrows, lines, texts,…). You can also upload your creations to the web (FTP/some web services).

6.6 LIVES

LIVES is a nice open source video editor and VJ tool.

6.7 Minitube

Minitube is a YouTube Desktop client to play your YouTube videos in your desktop/laptop without having to create a YouTube account. You can watch 1080p HD videos without any stuttering. It provides you a TV like experience and consumes less CPU resources, because it does not use Flash Player.

6.8 Cheese

Cheese uses your webcam to take photos and videos, applies fancy special effects and lets you share the fun with others. To install cheese on your Ubuntu desktop, enter the following command:

sudo apt-get install cheese

6.9 DigiKam

digiKam is an advanced digital photo management application for Linux, Windows, and Mac-OSX. It can be used by Photographers to view, manage, edit, enhance, organize, tag, and share photographs under Linux systems.

You can easily install it using command:

sudo apt-get install digikam

6.10 Gimp

If you want to edit images daily on a professional level or just a hobbyist, GIMP comes in handy.

sudo apt-get install gimp gimp-data gimp-plugin-registry gimp-data-extras

7. Install Common Codecs And Enable DVD playback

Perhaps, installing a few common codecs might give you better playback for your media files.

sudo apt-get install gstreamer0.10-plugins-ugly gxine libdvdread4 icedax tagtool easytag id3tool lame nautilus-script-audio-convert libmad0 mpg321 gstreamer1.0-libav

To play encrypted DVDs, the libdvdcss2 package is essential. libdvdcss is a simple library designed for accessing DVDs like a block device without having to bother about the decryption.

sudo /usr/share/doc/libdvdread4/./install-css.sh

7.1 Enable Flash Support On Browsers

For Ubuntu 32 bit & 64 bit: To be able to watch some videos and see flash website in your browser (Firefox/Chrome), you need to install flash plugin, go to Ubuntu Software Center and search word “flash” and install it.

Alternatively enter the following command to install flash plugins.

sudo apt-get install flashplugin-installer

8. Torrent Softwares

Transmission bitTorrent client comes preinstalled with Ubuntu 14.10 by default. If you’re looking for some other torrent clients, you may try either one of the following.

8.1 uTorrent

uTorrent is a lightweight and efficient BitTorrent client for Linux, Windows OS and Mac OS. The installation of uTorrent in Linux is different from Windows and Mac OS. In Linux, uTorrent runs as a web server. You will access uTorrent from your browser. You should start the uTorrent server in order to access it from your browser.

Check our previous article to know more about uTorrent.

8.2 Deluge

The Deluge application was designed to be a full-featured torrent client. Deluge uses libtorrent in its back-end and PyGTK for its user interface and is currently usable on POSIX-compliant operating systems. It is intended to bring a native, full-featured client to GTK desktop environments such as GNOME and Xfce. An official Windows port is also available.

Open terminal and type the following commands:

sudo apt-get install deluge

9. Messengers

Here is the list of recommended Messengers for your system. Don’t install everything. Install one by one and pick up the right one for your requirement and delete the rest.

9.1 Pidgin

The best messenger client and 30 plugins, you can do voice and video chat with friends.

To install Pidgin, enter the following command:

$ sudo apt-get install pidgin

9.2 Telegram

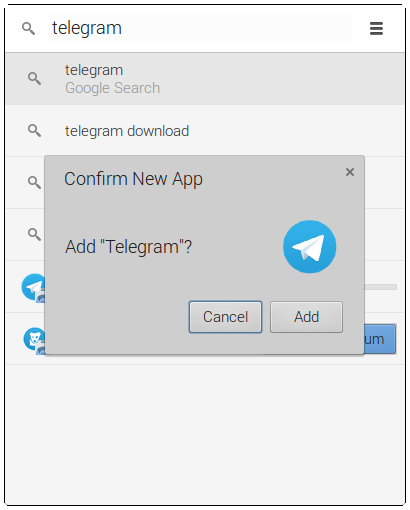
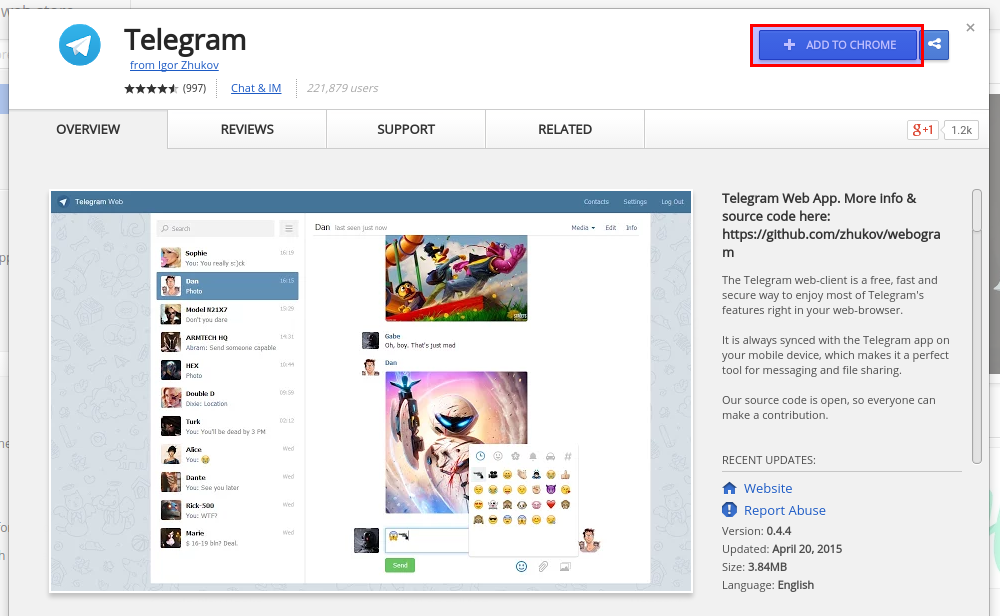
Telegram is a popular free Instant messenger application that can be used to chat with your friends all over the world.

9.3 Facebook Messenger

Refer our following link to install Facebook messenger in Ubuntu.

9.4 Skype

Skype is a popular free voice over IP and instant messenger that can be used to text, video and voice calls over Internet.

If you’re want to install Skype, check our previous post.

9.5 aMSN

aMSN is a free windows Live Messenger clone. aMSN attempts to emulate the look and feel of Windows Live Messenger, and supports many of its features.

aMSN has many features which are not present in Windows Live Messenger. Users can set alarms, are able to see others who have removed them from their contact list, and are able to open many profiles at once. It is also very customizable, with extensions and themes available at the main site.

To install aMsn, enter the following command in your terminal.

$ sudo apt-get install amsn

9.6 Jitsi

Jitsi is an open source and multi platform audio/video Internet phone and instant messenger written in Java. It supports some of the most popular instant messaging and telephony protocols such as SIP, Jabber/XMPP (and hence Facebook and Google Talk), AIM, ICQ, MSN, Yahoo! Messenger.

For details about Jitsi please check our previous article in the following link.

10. Gaming & Emulators

10.1 Steam

As you may know, Steam is an ultimate gaming platform developed by Valve corporation. Steam is available for GNU Linux, Mac OS X and Windows. Recently, Valve has developed and released SteamOS, a Linux based distribution built around Steam client. You can either download and install SteamOS on your system, or just download and install the steam client to play games on your existing operating system.

To install Steam On Ubuntu 14.04, enter the following command:

sudo apt-get install steam

Click Ok to continue.

sk@sk: ~_008

Accept the License agreement.

sk@sk: ~_009

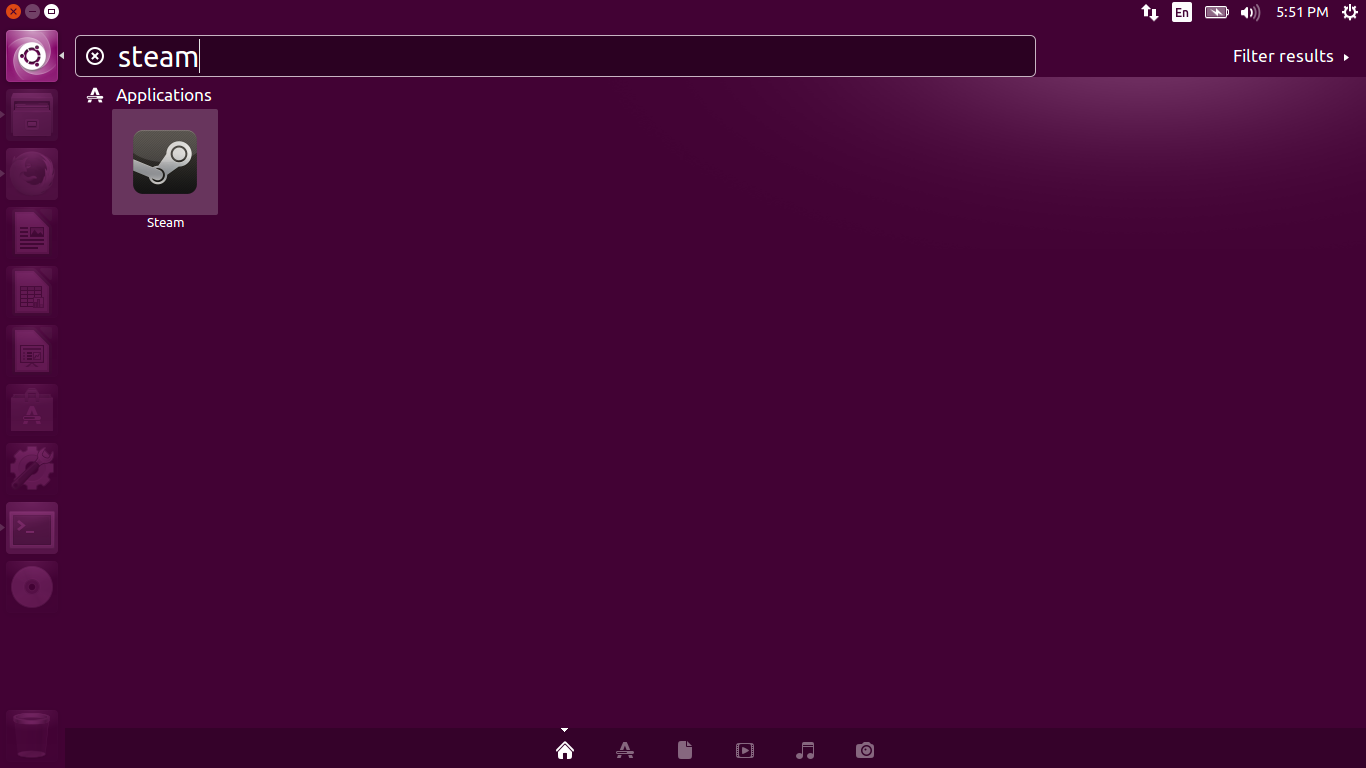
Now, the steam will be installed on your system. Launch it either from Dash or Menu.

Menu_003

At the first launch, Steam will check for updates and download and install them if updates available.

Steam_011

After updating Steam, you can enter into steam and start playing games.

Steam_012

If you don’t have an account, create it using the CREATE NEW ACCOUNT link.

This is how my Steam dashboard looks.

Steam_013

10.2 Wine

Wine enables Linux, Mac, FreeBSD, and Solaris users to run Windows applications without a copy of Microsoft Windows. Wine is free software under constant development. Other platforms may benefit as well.

sudo apt-get install wine

11. File Sharing Tools

11.1 Samba

In order to share folders in Ubuntu with other Linux and windows machines in your network, you will need to install and configure Samba share, for instructions how to configure Samba in Ubuntu check our previous post.

11.2 Gigola

Gigola is an another option to share files between Linux and Windows systems. Unlike Samba, we can use Gigola to send files between Linux-to-Linux and Linux-to-Windows systems.

Learn more about Gigola from the below link.

12. Extras & Miscellaneous

12.1 Install Archive Management Apps

Install the following packages will allow you to deal with almost all and any zip formated files.

sudo apt-get install unace unrar zip unzip p7zip-full p7zip-rar sharutils rar uudeview mpack arj cabextract file-roller

12.2 Install Java

Java is fast, secure, and reliable programming and computing platform. There are lots of applications and websites that will not work unless you have Java installed, and more are created every day. To install java simply run the following command from your terminal.

sudo apt-get install openjdk-7-jdk

If you want to try oracle-java 7, try the following steps.

First you need to remove OpenJDK for this run the following command from your terminal:

sudo apt-get purge openjdk*

Now you can install Java 7 by adding the following repository:

sudo add-apt-repository ppa:webupd8team/java
sudo apt-get update
sudo apt-get install oracle-java7-installer

To remove Java 7, run this in terminal:

 sudo apt-get remove oracle-java7-installer

12.3 FileZilla

Filezilla is one of the best ftp client for Linux.

Install it via command line:

sudo apt-get install filezilla

12.4 Dropbox

Dropbox is a free service that lets you bring all your photos, docs, and videos anywhere. This means that any file you save to your Dropbox will automatically save to all your computers, phones and even to the Dropbox website.

12.5 Oracle VirtualBox

If you want to run another OS in a virtual machine, install Virtualbox.

For installation, follow the instructions in our previous post.

12.6 Install Compiz

To install Compiz use the following command:

sudo apt-get install compiz compizconfig-settings-manager compiz-plugins

12.7 Install Touchpad-indicator

Have problems with Touchpad while typing? Why don’t you try Touchpad-indicator, which is used to disable Touchpad while typing, or while connecting an external mouse? Check the following link for more details.

12.8 Boot UP Manager(BUM)

Boot-Up Manager is a Perl-Gtk2 application to manage runlevels configuration of any Ubuntu/Debian derivative systems. Using this program we can easily start and stop boot-up scripts, without the necessity to handle through complex symbolic links and permissions.

For more details about BUM, check our previous article in the following link.

12.9 TLP

TLP is an advanced power management tool for Linux that gives the settings and tweaks to enhance your existing power management automatically without the need to know every technical details. It is purely a command-line tool and doesn’t have a GUI. It should work on almost all laptops.

For more details about TLP, check our previous article in the following link.

12.10 Laptop Mode Tools

Laptop Mode Tools is a package that can be used to extend your laptop battery life in many ways. It enhances the battery life by enabling the Laptop mode feature of Linux Kernel, which lets down the hard drive spin of  your Laptop.

For more details, refer the following link.

12.11 BleachBit

BleachBit deletes the unnecessary files, free up cache, delete cookies, clear internet history, shred temporary files, delete logs, and discard junk you didn’t know was there. This tool can be used in both Windows OS and Linux systems. And it will support the following applications such as Firefox, Internet Explorer, Adobe Flash, Google Chrome, Opera, Safari and more. It not only deletes the files, but it includes some advanced features such as shredding files to prevent recovery, wiping free disk space to hide traces of files deleted by other applications, and vacuuming Firefox to make it faster.

For more details about BleachBit, check our previous article in the following link.

12.12 TypeCatcher

TypeCatcher is an Open Source application developed by Andrew Starr-Bochicchio. It allows you to easily download and install Google webfonts for off-line use.

For more details, refer the following link.

12.13 WinUSB

WinUSB is simple, open source graphical tool to create Windows installer bootable USB disks using ISO images, or real CD/DVD installer disks in Ubuntu and it’s derivatives. Using WinUSB, we can create startup disks for Windows Vista, 7, 8, and Windows PE.

Refer the following link to know more about WinUSB.

12.14 MultiSystem

MultiSystem is a small, Open Source freeware to create a multiboot usb drives from Linux systems. Using this utility, we can create any number of bootable Linux distributions in a USB drive.

12.15 OpenTeacher

OpenTeacher is an opensource application that helps you learn a foreign language vocabulary. Just enter some answers and questions in your native and foreign language or download them from internet, and OpenTeacher will test and let you know your vocabulary test result.

13. Desktop Tweaks And Effects

13.1 Variety

Variety is a wallpaper changer for Ubuntu which is feature-full, yet slim and very easy to use. It can automatically download wallpapers from various online sources such as Flickr, Wallbase.cc, World sunlight map (a live wallpaper that changes as the day progresses), Wallpapers.net, NASA Astronomy Picture of the Day, Desktoppr.co etc.

To install it under Ubuntu follow our previous post instructions.

13.2 Wallch

Wallch is an application that can be used to change your Ubuntu (Ubuntu derivatives) desktop wallpapers automatically at a particular period of time.

To install it under Ubuntu follow our previous post instructions.

13.3 Plank

Plank is a simple, and very lightweight dock for Ubuntu and it’s derivatives.

For more details, refer the following link.

13.4 Disable Overlay Scrollbars

Don’t like Overlay scrollbars, then disable it as shown in the following link.

13.4 Enable Username On Indicator Panel

You will notice that your name is not displayed on the indicator bar, in the right top corner of the desktop. If you still want enable it; this is very easy to do.

14. Package Management

14.1 App Grid

App Grid is a light weight alternative for Ubuntu Software Center. It allows you to filter applications by installed, pending, categories, name and rating. It is released under proprietary license and is available for Ubuntu 12.04, 12.10, 13.04 and 13.10.

For more details about App Grid, check our previous article in the following link.

14.2 Aptik

Aptik is a tool that can be used to simplify the re-installation of packages after doing a clean installation of an Ubuntu-based distribution. It can be used while re-installing or upgrading to the next Ubuntu/Linux Mint release.

For more details, refer the following article.

14.3 Apt-fast

Apt-fast is a “shell script wrapper” for apt-get and aptitude that can drastically improve APT download times by downloading packages with multiple connections per package. apt-fast uses aria2c or axel download managers to speed up the APT download time. Just like the traditional apt-get package manager, apt-fast supports almost all apt-get functions such as install, remove, update, upgrade, dist-upgrade etc. And one more notable feature is it supports proxy too.

Note: apt-fast PPA is not updated to 14.10 yet.

The installation and usage instructions can be found in the following link.

14.4 Apt-proz & ProZilla

apt-proz is a shell script similar to apt-fast that increases the download speed of apt-get and aptitude by many times (at least for the developer!). While apt-fast uses Axel or aria2c download manager, apt-proz uses ProZilla download accelerator instead.

ProZilla is a full featured command line download accelerator for Linux operating systems. It downloads a files by splitting into multiple pieces and downloads them simultaneously form multiple connections. It supports pause/resume, http/ftp protocols.

Note: apt-proz PPA is not updated to 14.10 yet.

You can find more details of the above tools in the following link.

14.5 Y PPA Manager

Y PPA Manager is a GUI tool to easily add PPAs, search a package in all Launchpad PPAs, remove duplicate PPAs (only works with separate .list files), backup PPAs and other PPA-related tasks. Check out the Launchpad page for a complete features list.

sudo add-apt-repository ppa:webupd8team/y-ppa-manager
sudo apt-get update
sudo apt-get install y-ppa-manager

Y-PPA-Manager can be launched either from Dash or Menu.

15. System Backup & Restore Applications

After completing all above things, you might get a perfect desktop. Now, it’s time to backup the system settings. In case of any problems, you can safely restore your system to earlier working state. Do this step after you got a perfect desktop.

15.1 Systemback

Systemback is an open source, system backup and restore application. Using Systemback, we can easily create backups of system and users configuration files. In case of problems, we can easily restore the previous state of the system. There are extra features like system copying, system installation and Live system creation.

Refer the following link to install and configure Systemback on Ubuntu.

15.2 TimeShift

Timeshift a application that provides functionality similar to the System Restore feature in Windows and the Time Machine tool in Mac OS. TimeShift protects your system by taking incremental snapshots of the file system at regular intervals. These snapshots can be restored later to bring your system to the exact state it was in at the time when the snapshot was taken.

For more details, refer the following link.

This one is last important and useful trick. I forgot or lost my Ubuntu desktop password? What to do? No worries. The following article describes how to reset password.

That’s all. At this stage, you’ll have a perfect and full fledged Ubuntu 15.04 Desktop.

Note: Some packages may not install or work in Ubuntu 15.04, because it is still in beta stage. You have to wait for few days to get stable packages.

Cheers!!

---------------------------------------------------------------------
Top Things To Do After Installing Ubuntu 15.04

Ubuntu 15.04 Final Version And It’s Official Flavours Have Been Released

$
0
0


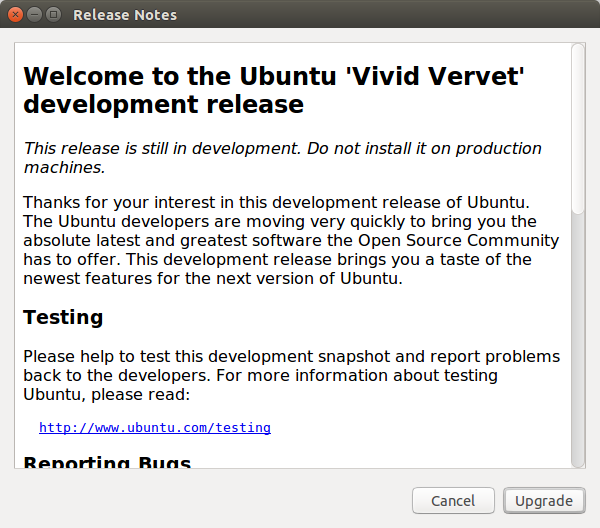
Brace yourself Ubuntu lovers!! Yes, the final stable version of Ubuntu 15.04, code named Vivid Vervet, is now ready for download. This release includes images from not only the Ubuntu Desktop, Server, Cloud, and Core products, but also the Kubuntu, Lubuntu, Ubuntu GNOME, Ubuntu Kylin, Ubuntu Studio and Xubuntu flavours. Ubuntu 15.04 will be supported for 9 months for Ubuntu Desktop, Ubuntu Server, Ubuntu Core, Kubuntu, Ubuntu Kylin along with all other flavours.

Note: There is no official announcement yet from Ubuntu. But, the stable images are already uploaded and available for download.

What’s new?

Unfortunately, Ubuntu 15.04 doesn’t have any major new features, or performance improvements. It almost has the same features that the Ubuntu 14.xx versions had. Only a small amount of bug fixes, changes and feature improvements has added in this version.

Here is what’s new in Ubuntu 15.04.

  • Linux 3.19.2 kernel ;
  • systemd as default init ;
  • Gnome 3.14 ;
  • Unity 7.3 ;
  • LIM, Locally Integrated Menus, are enabled by default ;
  • Compiz 0.9.12 ;
  • Firefox 36 ;
  • Chromium 41 ;
  • Libreoffice 4.4 ;
  • MySQL 5.6 ;
  • MariaDB 10.0 ;
  • Percona Server 5.6;
  • Percona XtraDB Cluster5.6 ;
  • Pulseaudio 6 ;
  • Android NDK support and bumped Android Studio to latest version ;
  • Other new IDEs: IDEA and pycharm ;
  • Golang compiler support ;
  • Firefox developer edition ;
  • Dartlang editor ;
  • Stencyl game development platform ;
  • Numerous usability improvements and accessibility (ppa, doc) ;
  • LXC 1.1 ;
  • LXD 0.17 ;
  • libvirt 1.2.12 ;
  • qemu 2.2 ;
  • cloud-init 0.7.7 ;
  • docker 1.5.0 ;
  • Updated HA related package updates, such as corosync, haproxy, pacemaker ;
  • And many.

One of the newly added notable feature is LXD. Ubuntu 15.04 is the first Ubuntu release to feature LXD. LXD has been developped to provide a fast, reliable and scalable way to manage system containers across the network. It’s entirely image based, secure by default, supports snapshots, live migration and offers a simple yet powerful REST API.

LXD ships with two clients:

  • lxc, a command line client for small and medium size deployments where the operator doesn’t mind or prefers manual control.
  • nova-compute-lxd, an OpenStack Nova plugin which makes managing containers as simple as managing virtual machines.

For more details, refer the Ubuntu 15.04 official release notes.

We expected that Unity 8 will come with this version. But the fact is it is not yet ready. No new Graphic server, no feature improvements. Only few things are added and polished in this version. I think it is better to stick with Ubuntu 14.04 LTS for a while till Canonical come up with some new features in their upcoming releases. As we all know, Ubuntu got nothing new since 12.10. There were not much new things in the Ubuntu desktop and server versions for the last three year.

Story behind codename ‘Vivid Vervet’

Usually, the Ubuntu developers are following a naming strategy. They will use an “adjective” followed by an “animal name” to name the every Ubuntu distribution. So, the Code name for Ubuntu 15.04 comes with the adjective “Vivid” which means obvious or apparent, and the animal name in the code name is Vervet. The vervet monkey (Chlorocebus pygerythrus), or simply vervet, is an Old World monkey of the family Cercopithecidae native to Africa.

vervet

And the Version number 15.04 indicates the year and month of the each Ubuntu release. In this case 15.04, 15 denotes the year 2015, and 04 denotes the month which is April(4th month of the year).

Download Ubuntu 15.04

Ubuntu Desktop and Server:

Ubuntu Cloud Server:

Ubuntu Netboot:

Ubuntu Core:

Kubuntu:

Lubuntu:

Ubuntu Studio:

Ubuntu GNOME:

UbuntuKylin:

Ubuntu MATE:

Xubuntu:

Upgrade to Ubuntu 15.04 from Ubuntu 14.xx

I had Ubuntu 14.xx version in my system. How can I upgrade it to 15.04? No worries. Refer the following link to upgrade to Ubuntu 15.04 from Ubuntu 14.xx versions.

I Installed Ubuntu 15.04, now what?

Well, I got my Ubuntu 15.04 running in system, now what? Refer the following link to tweak your Ubuntu to get a perfect desktop for daily usage. The following comprehensive tutorial includes list of 15 top things to do after installing Ubuntu.

Cheers!

---------------------------------------------------------------------
Ubuntu 15.04 Final Version And It’s Official Flavours Have Been Released

How To Install Ubuntu 15.04 Desktop And Server

$
0
0


Ubuntu 15.04 final and its official flavours have been released on April 23, 2015. It comes with plenty of updated applications and few new features, improvements, and bug fixes. Find out what’s new in Ubuntu 15.04 in the release notes.

Install Ubuntu 15.04 desktop

Download Ubuntu 15.04 desktop from here. Create a bootable DVD or USB and boot your system.

The Ubuntu live DVD will give you two choices. You can try Ubuntu without making any changes to your computer using the downloaded ISO, or you can install alongside your current operating system, or you can replace the current OS with Ubuntu.

In this tutorial, we’re going to do fresh single boot installation.

When the installer wizard appears, click ‘Install Ubuntu’ link to continue.

Ubuntu 15.04 desktop [Running] - Oracle VM VirtualBox_001

Make sure that your system,

  • has at least 6.6 GB free space ;
  • is plugged into power source ;
  • is connected to Internet.

Also, the installer allows you to download and install the updates and third party softwares such as Flash, Mp3 etc., while installing Ubuntu. If you want to install them, click on the respective check boxes and continue.

Ubuntu 15.04 desktop [Running] - Oracle VM VirtualBox_002

Now, you must select any of the following option.

  1. Erase and install Ubuntu – This will completely delete all your files and operating systems in your hard drive. If you want to do a fresh installation, this is the ideal choice.
  2. Encrypt the new Ubuntu installation for security – Everything will be encrypted, and you’ll be asked to choose a security key later.
  3. Use LVM with new Ubuntu installation – If you want snapshots and partition resizing features, you can select this option.
  4. Something else – This is the manual method to create or resize partitions. Also, this method allows to create multiple partitions with different sizes.

Since I don’t have any installed operating system in my hard drive, I selected ‘Erase disk and install Ubuntu’ option.

Ubuntu 15.04 Desktop [Running] - Oracle VM VirtualBox_003

The installer will ask you a confirmation message. Click Continue.

Ubuntu 15.04 Desktop [Running] - Oracle VM VirtualBox_004

Select your Timezone. If your system is connected to Internet, then the installer will automatically select your correct timezone.

Ubuntu 15.04 Desktop [Running] - Oracle VM VirtualBox_005

Select the keyboard layout.

Ubuntu 15.04 Desktop [Running] - Oracle VM VirtualBox_006

Enter your name, computer’s name, username, and password.

Ubuntu 15.04 Desktop [Running] - Oracle VM VirtualBox_007

Well, now the installation should start. It will take a few minutes. Be relax and grab a cup of coffee.

Ubuntu 15.04 Desktop [Running] - Oracle VM VirtualBox_008

After the installation over, click Restart Now button.

Ubuntu 15.04 Desktop [Running] - Oracle VM VirtualBox_009

After rebooting, you’ll be greeted with the following log on screen. Enter your password to log in.

Ubuntu 15.04 Desktop [Running] - Oracle VM VirtualBox_011

Congratulations! We have successfully installed Ubuntu 15.04.

The first thing you should do after logging in to your system is to update it. Run the following command from the terminal to update the system.

sudo apt-get update && sudo apt-get upgrade

Alternatively, you can update the system using Ubuntu update graphical application.

Desktop_001

Wait, we haven’t finished yet. Read the list of 15 things to do after installing Ubuntu 15.04. This comprehensive guide will give you the details of what you should do after a fresh installation of Ubuntu to get a perfect desktop for daily usage. Go on, and Enjoy.

Install Ubuntu 15.04 server

Download Ubuntu 15.04 server from here. and create a bootable medium. Boot your server with Ubuntu 15.04 media.

Select language.

Ubuntu 15.04 server [Running] - Oracle VM VirtualBox_001

select Install Ubuntu Server and press Enter.

Ubuntu 15.04 server [Running] - Oracle VM VirtualBox_002

Choose the language to be used for the installation. Also, the selected language will be the default language for the installed system. Here, I choose English.

Ubuntu 15.04 server [Running] - Oracle VM VirtualBox_003

Select the Country you live in and press Enter.

Ubuntu 15.04 server [Running] - Oracle VM VirtualBox_004

You may want to detect your keyboard layout. This can be done by pressing a series of keys in your keyboard. If you don’t want it, press No (which is default).

Ubuntu 15.04 server [Running] - Oracle VM VirtualBox_005

Configure keyboard layout as per your country. As you may know, the layout for keyboard varies per country.

Ubuntu 15.04 server [Running] - Oracle VM VirtualBox_006

Select the layout that matching the keyboard for this machine.

Ubuntu 15.04 server [Running] - Oracle VM VirtualBox_007

Now, the installer will try to configure such as your hostname, network etc. If you have DHCP server on your network, the IP address for your server will automatically be assigned, or else you have to set IP manually.

First, setup hostname:

Ubuntu 15.04 server [Running] - Oracle VM VirtualBox_019

Enter the full name of the user.

Ubuntu 15.04 server [Running] - Oracle VM VirtualBox_009

Setup username:

Ubuntu 15.04 server [Running] - Oracle VM VirtualBox_010

Choose the password for the User account.

Ubuntu 15.04 server [Running] - Oracle VM VirtualBox_011

You may like to encrypt your home directory, so that the files and folders in the home directory will remain private. Other users can’t view your home directory even if your computer is stolen, there are less chances to access your files.

Ubuntu 15.04 server [Running] - Oracle VM VirtualBox_012

Make sure your Timezone is correct. If it is not, click on the Go Back button and select the correct timezone.

Ubuntu 15.04 server [Running] - Oracle VM VirtualBox_013

Select the partitioning method.You can allow the installer to partition your hard drive automatically, or you can do it manually by yourself. If you’re not power user, then let the installer to take care of the partitioning process automatically.

There will be four kind of partitioning methods. You can choose any one of your choice.

Ubuntu 15.04 server [Running] - Oracle VM VirtualBox_014

If you have more than one hard drive in your system, select the disk to partition. Be careful your drive will completely be erased. Make sure you don’t have any important data in it.

Ubuntu 15.04 server [Running] - Oracle VM VirtualBox_015

Click Yes to write the partition changes and continue.

Ubuntu 15.04 server [Running] - Oracle VM VirtualBox_016

The installation will start now.

Ubuntu 15.04 server [Running] - Oracle VM VirtualBox_017

After few minutes, you’ll be asked to enter the Proxy URL to connect to the Internet. If you don’t have any proxy servers in your network, leave it empty and click Continue.

Ubuntu 15.04 server [Running] - Oracle VM VirtualBox_018

This is important. Because, we have to keep our server up to date to avoid all kind of security loopholes. Here, you should choose how to manage upgrades on your server.

By default, you have to download and install manually. Also, you can choose to have this system automatically download and install security updates, or you can choose to manage this server over the web using Canonical’s  Landscape service.

Landscape allows you to manage thousands of Ubuntu machines as easily as one, making it far more cost-effective to support large and growing networks of desktops, servers and cloud instances. The Landscape systems management tool helps you monitor, manage and update your entire Ubuntu infrastructure from a single interface. Part of Canonical’s Ubuntu Advantage support service, Landscape brings you intuitive systems management tools combined with world-class support.

As I am just testing Ubuntu 15.04 server, I don’t need any automatic updates. So, I selected the ‘No automatic updates’ option.

Ubuntu 15.04 server [Running] - Oracle VM VirtualBox_020

We almost have reached the end of installation process. At this moment, only the minimal(Core) Ubuntu system will be installed. If you want install to additional features, like OpenSSH, DNS, Mail, and Database server etc., you can choose any one or more of the following software bundles.

Here, I just want to install SSH server along with core system, So, I selected the OpenSSH server option. Because, SSH server will be helpful to access your Ubuntu server from a remote system.

Ubuntu 15.04 server [Running] - Oracle VM VirtualBox_021

Select ‘Yes’ and press Enter to install the GRUB boot loader to the master boot record.

Ubuntu 15.04 server [Running] - Oracle VM VirtualBox_022

Finally, remove your installation medium and click Continue to finish the installation.

Ubuntu 15.04 server [Running] - Oracle VM VirtualBox_023

Congratulations! We’ve successfully installed Ubuntu 15.04 server.

Log in to your server with correct username and password which we created earlier during installation.

Ubuntu 15.04 server [Running] - Oracle VM VirtualBox_024

You know what to do after installing Ubuntu, right? Yes, first of all update your server.

To do that, run:

sudo apt-get update && sudo apt-get upgrade

That’s it.

Happy weekend! Cheers!

---------------------------------------------------------------------
How To Install Ubuntu 15.04 Desktop And Server

Debian 8, Codenamed Jessie, Is Out – Installation Instructions

$
0
0


Debian development team gave a pleasant surprise yesterday. Yes! After a two long years of consistent development, Debian 8 has been released with much more improvements and new packages. As you may know, Debian is the foundation for many Linux distributions, including Ubuntu. Since Ubuntu 15.04 came with no big improvements, Debian 8 hits the market with a lot more software than its predecessor wheezy. Debian 8 includes over 12253 new packages, for a total of over 43512 packages. Most of the software in the distribution has been updated over 24573 software packages (this is 66% of all packages in wheezy). Also, a significant number of packages (over 5441, 14% of the packages in wheezy) have for various reasons been removed from the distribution.

The other big surprise is even the Microsoft, the big competitor of Linux, is celebrating Debian’s new release. It is obvious that the Microsoft is doing this for popularity and advertisement for their Azure’s cloud computing platform, but it’s good to hear that Microsoft is celebrating the release of Debian 8.

Debian 8 supports many architectures, including:

  • 32-bit and 64-bit PC ;
  • 64-bit ARM ;
  • ARM EABI ;
  • ARMv7 ;
  • MIPS ;
  • PowerPC ;
  • 64-bit little-endian PowerPC ;
  • IBM System z.

Also, it introduces two more new architectures, namely:

  • arm64, 64-bit port for ARM machines ;
  • ppc64el, 64-bit little-endian port for POWER machines.

What’s new?

Debian again ships with several desktop applications and environments. Among others it now includes the following packages.

  • Kernel 3.16 ;
  • GNOME 3.14 ;
  • KDE 4.11 ;
  • Xfce 4.10 ;
  • LXDE ;
  • LibreOffice 4.3 ;
  • Calligra 2.8 ;
  • GNUcash 2.6 ;
  • GNUmeric 1.12 ;
  • Abiword 3.0 ;
  • Evolution 3.12 ;
  • Apache 2.4.10 ;
  • Bind 9.9 ;
  • Exim 4.84 ;
  • OpenLDAP 2.4.40 ;
  • OpenSSH 6.7p1 ;
  • Perl 5.20 ;
  • PHP 5.6 ;
  • MySQL 5.5 ;
  • MariaDB 10.0 ;
  • PostgreSQL 9.4 ;
  • OpenJDK 7 is the default Java run time ;
  • OpenJDK 8 will be available from jessie-backports ;
  • Tomcat 7 and Tomcat 8 are supported and Tomcat 6 was removed ;
  • Python 3.4 ;
  • Samba 4.1 ;
  • And many.

Debian 8 switches back to GNOME as it’s default Desktop environment. You may know in Debian 7 Wheezy, XFCE was the default DE. The new GNOME desktop brings many new features and usability improvements. The design of the GNOME shell has been updated. The bottom message tray is larger, easier to use and less prone to appear accidentally. A new system status area in the upper right corner puts all useful settings in the same place. Also, GNOME now supports high resolution devices, and support for touch screens has been fully integrated.

Also, Systemd is the default init system in Debian 8. The older versions had SysV as default init system. The Ubuntu 15.04 and RHEL 7 and its cloning distributions has just switched to Systemd as their default init system. The legacy secure sockets layer protocol SSLv3 has been disabled in this release. Many system cryptography libraries as well as servers and client applications have been compiled or configured without support for this protocol.

For more details, refer the Official Debian 8 release notes.

Install Debian 8

Download Debian 8 from here. Also, for cloud users Debian also offers pre-built OpenStack images ready to use. If you want a Debian ISO with proprietary drivers, you can download them from the following links.

After downloading the Debian 8 ISO, create a bootable CD/DVD or USB drive. Boot your system with the Debian 8 installation medium.

The boot menu will show the list of possible installation methods. Some menu has additional installation options. The Advanced options, for example, in the boot menu will give specific installation options.

Here, We will do basic graphical installation. Click on the Graphical install button to continue.

Debian 8 Jessie [Running] - Oracle VM VirtualBox_001

Next, select the language to be used for the installation process. English will be selected by default. You can choose any language of your choice. The selected language will be the default language for the installed system.

Debian 8 Jessie [Running] - Oracle VM VirtualBox_002

Select the country you live in.

Debian 8 Jessie [Running] - Oracle VM VirtualBox_003

Now, let’s configure the keyboard. Select the keymap to use.

Debian 8 Jessie [Running] - Oracle VM VirtualBox_004

Enter the hostname for your system.

Debian 8 Jessie [Running] - Oracle VM VirtualBox_005

Note: I have a DHCP server enabled in my local network. If you don’t have one, you’ll be asked to configure your network interfaces.

Next, we need to set the ‘root’ user password for our Debian server. I recommend you to use any strong that contains combination of letters, numbers, special characters.

Debian 8 Jessie [Running] - Oracle VM VirtualBox_006

Next, we have to create a non-administrative user account. Enter the real name of the user.

Debian 8 Jessie [Running] - Oracle VM VirtualBox_007

Enter the user name for your account.

Debian 8 Jessie [Running] - Oracle VM VirtualBox_008

Enter the password for the user account. As I told before, a good password is the combination of special characters, numbers, and letters etc.

Debian 8 Jessie [Running] - Oracle VM VirtualBox_009

Here comes the important part. Now, we need to partition our hard drive to install Debian.

Now, you must select any of the following option.

  1. Guided – Use entire disk: This is the default partitioning method. The installer will automatically create the required partitions for you. This is the ideal choice for newbies.
  2. Guided – Use entire disk and set up LVM: In this method the entire disk will be used, and you can additionally setup LVM. If you want snapshots and partition resizing features, you can select this option.
  3. Guided – Use entire disk and set up encrypted LVM: This also same as above method. The only difference is the LVM partitions will be encrypted.
  4. Manual: This is the manual method to create or resize partitions. Also, this method allows to create multiple partitions with different sizes.

Here, I go with default choice, which is Guided – use entire disk.

Debian 8 Jessie [Running] - Oracle VM VirtualBox_010

If you have more than one hard drive, select the correct drive that you want to partition and install Debian.

Debian 8 Jessie [Running] - Oracle VM VirtualBox_011

Select the Partition scheme. If you are a newbie, It is best to go with default choices.

Debian 8 Jessie [Running] - Oracle VM VirtualBox_012

Next, the installer will give the overview of your currently configured partitions and mount points. If you want to modify them, click on the Go Back button and do the changes. Else, Click Continue.

Debian 8 Jessie [Running] - Oracle VM VirtualBox_013

Select Yes to write the changes of partitions.

Debian 8 Jessie [Running] - Oracle VM VirtualBox_014

Let the installer to complete the base system installation. This won’t take too long.

Debian 8 Jessie [Running] - Oracle VM VirtualBox_015

This is another important section of the installation process. Now, We have to configure the package manager to scan another CD or DVD.

As you may know, Debian distribution now ships on 9 to 10 binary DVDs or 75 to 85 binary CDs (depending on the architecture) and 10 source DVDs or 59 source CDs. Additionally, there is a multi-arch DVD, with a subset of the release for the amd64 and i386 architectures, along with the source code.

If you have another CD or DVD insert it and select Yes, or else click No to continue. In my case, I do have only the installation media, so I skipped this step by clicking on the No button.

Debian 8 Jessie [Running] - Oracle VM VirtualBox_016

Next, the installer will ask you to select the nearest mirror to install additional packages in future. If you all set of Debian binary images, you can skip this step.

As I only have installation media, I want to use Network mirror for additional package installation.

Debian 8 Jessie [Running] - Oracle VM VirtualBox_017

Select the nearest Debian mirror archive country.

Debian 8 Jessie [Running] - Oracle VM VirtualBox_018

Select Debian archive mirror.

Debian 8 Jessie [Running] - Oracle VM VirtualBox_019

If you use any proxy server to connect to Internet, enter the proxy server URL. Else, leave it a blank and click Continue.

Debian 8 Jessie [Running] - Oracle VM VirtualBox_020

Now, the installer will configure your Debian mirror. If the mirror doesn’t work, click the Go Back button and choose the different mirror.

Debian 8 Jessie [Running] - Oracle VM VirtualBox_021

After few minutes later, popularity-contest wizard will be displayed. if you want to notify the statistics about the most used packages, select Yes. This will help the Debian developers to make some decisions such as which packages should go on the first distribution CD/DVD.

If you don’t want to notify, simply Select No, and click Continue.

Debian 8 Jessie [Running] - Oracle VM VirtualBox_022

We have reached the end of the installation process. At this stage, only the core system will be installed. If you want to install additional components, select them from the following list.

Debian 8 Jessie [Running] - Oracle VM VirtualBox_024

Be patient for while. The installer will pull and install all required packages that you have selected in previous steps.

Debian 8 Jessie [Running] - Oracle VM VirtualBox_025

Select Yes to install Grub boot loader.

Debian 8 Jessie [Running] - Oracle VM VirtualBox_026

Select the Device for boot loader installation.

Debian 8 Jessie [Running] - Oracle VM VirtualBox_027

Finally, remove your installation medium, and hit the Continue button to finish the installation.

Debian 8 Jessie [Running] - Oracle VM VirtualBox_028

That’s it. Here we’re. Log in to your newly installed Debian system.

Debian 8 Jessie [Running] - Oracle VM VirtualBox_029

Debian 8 Jessie [Running] - Oracle VM VirtualBox_030

Cool. Starting using your newly installed Debian 8 system.

Cheers!

---------------------------------------------------------------------
Debian 8, Codenamed Jessie, Is Out – Installation Instructions

How To Integrate Apache2 With Tomcat 7 Using mod_jk Connector

$
0
0


Apache is the most popular available web server. A web server is used basically to accept requests from clients and send responses to those requests. It gets an URL, translates it to a filename (for static requests), and sends that file back over the internet from the local disk, or it translates it to a program name, executes it, and then sends the output of that program back over the internet to the requesting party. If the web server was not able to process and complete the request, it instead returns an error message.

In this article we will list the features of Apache, and how we can integrate it with Tomcat8 and Tomcat7 using the mod_jk connector.

Features of Apache

As we said Apache is the most popular available web server. The reasons behind its popularity are the following features:

  • It is free tool that you can download and install it easily.
  • It is open source web server so you can easily see the code, adjust it, optimize it, and fix errors and security holes. New features and modules can be also added.
  • It can be used for small websites of one or two pages, or huge websites of hundreds and thousands of pages, serving millions of regular visitors each month. It can serve both static and dynamic content.
  • Improved caching modules (mod_cache, mod_disk_cache, mod_mem_cache).
  • Apache 2 supports the Internet protocol IPv6.

Tomcat directory

${tomcat_home} is the root directory of tomcat. Your Tomcat installation should have the following subdirectories:

  • ${tomcat_home}\conf – Where you can place various configuration files
  • ${tomcat_home}\webapps – Containing example applications
  • ${tomcat_home}\bin – Where you place web server plugins

Mod_jk module

The mod_jk can be obtained in two formats: binary and source. Depending on the platform you are running your web server on, a binary version of mod_jk may be available. It is recommended to use the binary version if it is available.

The mod_jk module was developed and tested on:

  • Linux, FreeBSD, AIX, HP-UX, MacOS X, Solaris and should work on major Unix’s platforms supporting Apache 1.3 and/or 2.x
  • 0-i386 SP4/SP5/SP6a (should be able to work with other service packs), Win2K and WinXP and Win98
  • Cygwin (until you have an apache server and autoconf/automake support tools)
  • Netware
  • i5/OS V5R4 (System I) with Apache HTTP Server 2.0.58. Be sure to have the latest Apache PTF installed.
  • Tomcat 3.2 to Tomcat 8.

The mod_jk requires two entities:

  • mod_jk.xxx – The Apache HTTP Server module, depending on your operating system, it will be mod_jk.so, mod_jk.nlm or MOD_JK.SRVPGM.
  • workers.properties – A file that describes the host and used ports by the workers (Tomcat processes). A sample workers.properties can be found under the conf directory in the source download.

Also as with other Apache HTTP Server modules, mod_jk should be first installed on the modules directory of your Apache webserver: /usr/lib/apache and you should update your httpd.conf file.

Installation

It is required to have a non-root user system with the “sudo” privileges before starting the installation. Now we will start our installation, so we will install Apache2 and Tomcat using the following command:

sudo apt-get install apache2
sudo apt-get install tomcat7
sudo apt-get install tomcat7-admin

And now we will create a test application for Tomcat using the following commands:

 cd /var/lib/tomcat7/webapps
 sudo mkdir tomcat-demo
 sudo mkdir tomcat-demo/goodmoring
 sudo vim tomcat-demo/helloworld/index.jsp

And paste the following code:

<HTML> 
 <HEAD>  
  <TITLE>Good Morning</TITLE> 
 </HEAD> 
 <BODY>  
  <H1>Good Morning</H1>   
  Today is: <%= new java.util.Date().toString() %> 
 </BODY>
</HTML>

Everything is okay, good now we will install and configure the mod_jk using the following command:

sudo apt-get install libapache2-mod-jk

We have to start by enabling the redirect port 8443 on Tomcat using the following command:

sudo vim /etc/tomcat7/server.xml

And we will uncomment the following line:

<Connector port="8009" protocol="AJP/1.3" redirectPort="8443" />

After that, we will create our workers.properties file for Apache using the following command:

sudo vim /etc/apache2/workers.properties

Paste the following text:

# Define 1 real worker using ajp13 
 worker.list=worker 
 # Set properties for worker (ajp13) 
 worker.worker.type=ajp13 
 worker.worker.host=localhost
 worker.worker.port=8009

Now we will use the following command to let Apache use this worker:

sudo vim /etc/apache2/mods-available/jk.conf

And we will change the JkWorkersFile property to the following one;

/etc/apache2/workers.properties

Finally to configure the URL Apache should pass through the Tomcat

sudo vim /etc/apache2/sites-enabled/000-default

And we will add the following line in the configurtation file:

<VirtualHost *:80>
.......................................
.......................................
JkMount /tomcat-demo* worker1
</VirtualHost *:80>

You can now restart the servers using the following commands to check their functionality:

 sudo /etc/init.d/tomcat7 restart
 sudo /etc/init.d/apache2 restart

Conclusion

In this article we showed you how to configure and install Apache2 and Tomcat 7 using the mod_jk connector.

---------------------------------------------------------------------
How To Integrate Apache2 With Tomcat 7 Using mod_jk Connector


How To Install LAMP Stack On Ubuntu 15.04

$
0
0


LAMP is a combination of operating system and open-source software stack. The acronym LAMP came from the first letters of Linux, Apache HTTP Server, MySQL or MariaDB database, and PHP/Perl/Python. This tutorial describes how to install LAMP stack on Ubuntu 15.04, and previous versions such as Ubuntu 14.10/14.04/13.10 etc.

Install LAMP Stack On Ubuntu

1. Install Apache

Apache is an open-source multi-platform web server. It provides a full range of web server features including CGI, SSL and virtual domains.

To install Apache, enter:

sudo apt-get install apache2
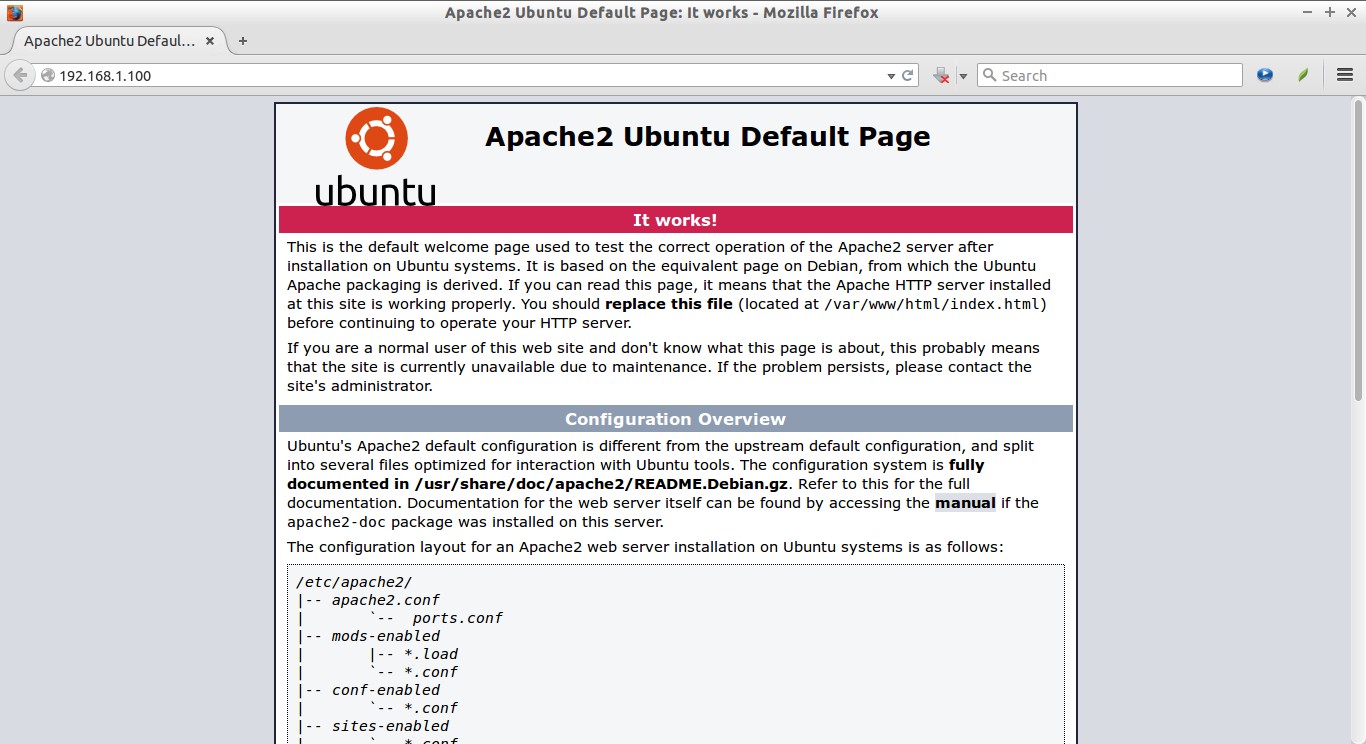
Test Apache:

Open your web browser and navigate to http://localhost/ or http://server-ip-address/.

Apache2 Ubuntu Default Page: It works - Mozilla Firefox_012

2. Install MySQL

MySQL is a relational database management system (RDBMS) that runs as a server providing multi-user access to a number of databases, though SQLite probably has more total embedded deployments

sudo apt-get install mysql-server mysql-client

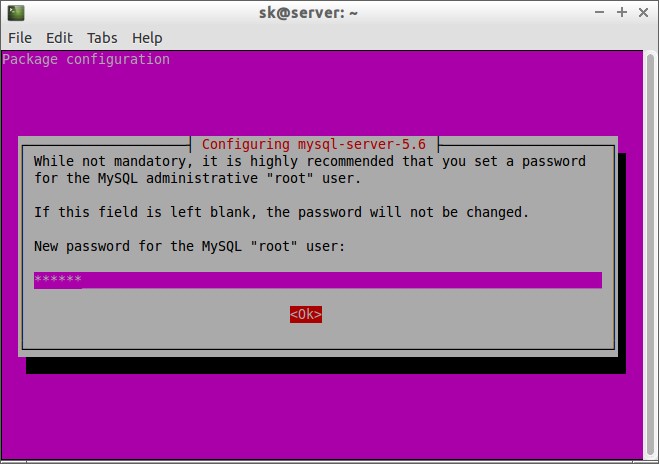
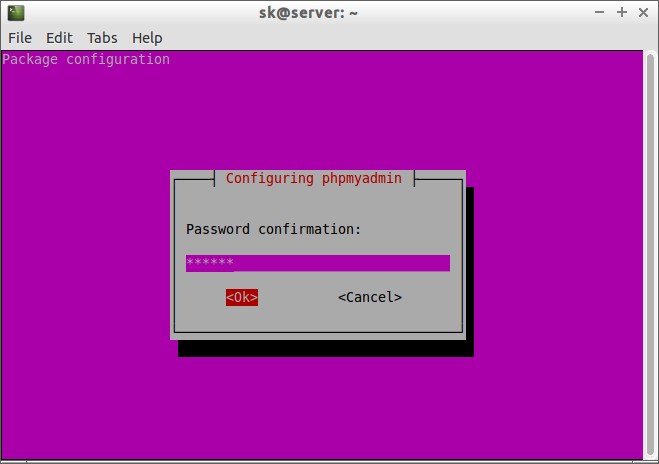
During installation, you’ll be asked to setup the MySQL “root” user password. Enter the password and click Ok.

sk@server: ~_001

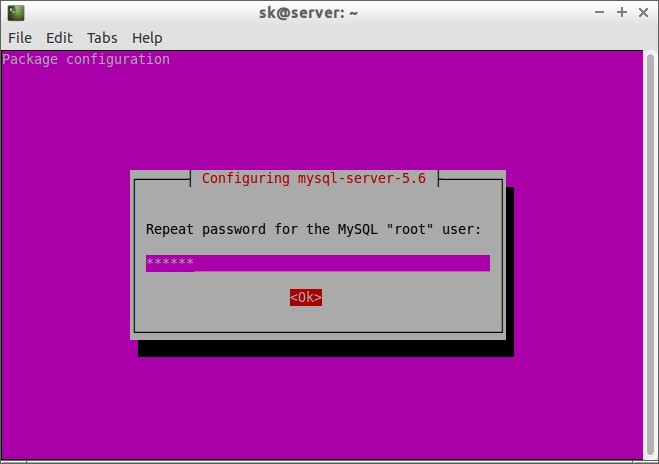
Re-enter the password.

sk@server: ~_002

MySQL is installed now.

You can verify the MySQL server status using command:

On Ubuntu 15.04:

sudo systemctl status mysql

On Ubuntu 14.10 and previous versions:

sudo service mysql status

Sample output:

● mysql.service - MySQL Community Server
   Loaded: loaded (/lib/systemd/system/mysql.service; enabled; vendor preset: enabled)
   Active: active (running) since Wed 2015-04-29 13:33:09 IST; 7s ago
 Main PID: 3740 (mysqld_safe)
   CGroup: /system.slice/mysql.service
           ├─3740 /bin/sh /usr/bin/mysqld_safe
           └─4087 /usr/sbin/mysqld --basedir=/usr --datadir=/var/lib/mysql --...

Apr 29 13:33:08 server systemd[1]: Starting MySQL Community Server...
Apr 29 13:33:08 server mysqld_safe[3740]: 150429 13:33:08 mysqld_safe Can't ....
Apr 29 13:33:08 server mysqld_safe[3740]: 150429 13:33:08 mysqld_safe Loggin....
Apr 29 13:33:08 server mysqld_safe[3740]: 150429 13:33:08 mysqld_safe Starti...l
Apr 29 13:33:09 server systemd[1]: Started MySQL Community Server.
Hint: Some lines were ellipsized, use -l to show in full.

3. Install MariaDB

If you don’t want to use MySQL community edition, use MariaDB.

MariaDB is a drop in replacement for MySQL. It is a robust, scalable and reliable SQL server that comes rich set of enhancements.

First you have to remove existing MySQL packages if any. To completely uninstall MySQL along with its configuration files, enter the following commands one by one:

sudo systemctl stop mysql
sudo apt-get remove --purge mysql-server mysql-client mysql-common
sudo apt-get autoremove
sudo apt-get autoclean
sudo rm -rf /var/lib/mysql/
sudo rm -rf /etc/mysql/

After removing MySQL, run the following command to install MariaDB.

sudo apt-get install mariadb-server

Alternatively, you can install it using MariaDB repository if you want to try most recent version of MariaDB. Run the following commands to add PPA. As of writing this, MariaDB PPA is not yet updated to Ubuntu 15.04. However, we can use the repository of Ubuntu 14.10 instead.

sudo apt-get install software-properties-common
sudo apt-key adv --recv-keys --keyserver hkp://keyserver.ubuntu.com:80 0xcbcb082a1bb943db
sudo add-apt-repository 'deb http://ftp.kaist.ac.kr/mariadb/repo/10.0/ubuntu utopic main'

Update the software sources list and install MariaDB using following commands:

sudo apt-get update
sudo apt-get install mariadb-server

During installation you will be asked to set mysql ‘root’ user password. Enter the password twice, and complete the installation.

Note: In Ubuntu 15.04, MariaDB won’t ask you to set root user password during installation.

Also, you can’t set password using command:

mysql_secure_installation

It will throw the following error.

ERROR 1698 (28000): Access denied for user 'root'@'localhost'

To fix this error, log in to mysql prompt without password as root user:

sudo mysql -u root

Then, run the following commands one by one in the mysql prompt:

use mysql;
update user set plugin='' where User='root';
flush privileges;
\q

That’s it. Now, set database administrative “root” user password using command. Press Enter and go with the default settings.

mysql_secure_installation

Sample output:

NOTE: RUNNING ALL PARTS OF THIS SCRIPT IS RECOMMENDED FOR ALL MariaDB
      SERVERS IN PRODUCTION USE!  PLEASE READ EACH STEP CAREFULLY!

In order to log into MariaDB to secure it, we'll need the current
password for the root user.  If you've just installed MariaDB, and
you haven't set the root password yet, the password will be blank,
so you should just press enter here.

Enter current password for root (enter for none): 
OK, successfully used password, moving on...

Setting the root password ensures that nobody can log into the MariaDB
root user without the proper authorisation.

Set root password? [Y/n] y
New password: 
Re-enter new password: 
Password updated successfully!
Reloading privilege tables..
 ... Success!

By default, a MariaDB installation has an anonymous user, allowing anyone
to log into MariaDB without having to have a user account created for
them.  This is intended only for testing, and to make the installation
go a bit smoother.  You should remove them before moving into a
production environment.

Remove anonymous users? [Y/n] 
 ... Success!

Normally, root should only be allowed to connect from 'localhost'.  This
ensures that someone cannot guess at the root password from the network.

Disallow root login remotely? [Y/n] 
 ... Success!

By default, MariaDB comes with a database named 'test' that anyone can
access.  This is also intended only for testing, and should be removed
before moving into a production environment.

Remove test database and access to it? [Y/n] 
 - Dropping test database...
ERROR 1008 (HY000) at line 1: Can't drop database 'test'; database doesn't exist
 ... Failed!  Not critical, keep moving...
 - Removing privileges on test database...
 ... Success!

Reloading the privilege tables will ensure that all changes made so far
will take effect immediately.

Reload privilege tables now? [Y/n] 
 ... Success!

Cleaning up...

All done!  If you've completed all of the above steps, your MariaDB
installation should now be secure.

Thanks for using MariaDB!

Check if mariadb is running or not, using the following command:

sudo service mysql status

Sample output:

● mysql.service - LSB: Start and stop the mysql database server daemon
   Loaded: loaded (/etc/init.d/mysql)
   Active: active (running) since Wed 2015-04-29 13:57:57 IST; 15min ago
     Docs: man:systemd-sysv-generator(8)
   CGroup: /system.slice/mysql.service
           ├─2527 /bin/bash /usr/bin/mysqld_safe
           ├─2528 logger -p daemon.err -t /etc/init.d/mysql -i
           └─2684 /usr/sbin/mysqld --basedir=/usr --datadir=/var/lib/mysql --...

Apr 29 13:57:58 server /etc/mysql/debian-start[2735]: mysql.servers          ...
Apr 29 13:57:58 server /etc/mysql/debian-start[2735]: mysql.table_stats      ...
Apr 29 13:57:58 server /etc/mysql/debian-start[2735]: mysql.tables_priv      ...
Apr 29 13:57:58 server /etc/mysql/debian-start[2735]: mysql.time_zone        ...
Apr 29 13:57:58 server /etc/mysql/debian-start[2735]: mysql.time_zone_leap_se...
Apr 29 13:57:58 server /etc/mysql/debian-start[2735]: mysql.time_zone_name   ...
Apr 29 13:57:58 server /etc/mysql/debian-start[2735]: mysql.time_zone_transit...
Apr 29 13:57:58 server /etc/mysql/debian-start[2735]: mysql.user             ...
Apr 29 13:57:58 server /etc/mysql/debian-start[2790]: Triggering myisam-recov...
Hint: Some lines were ellipsized, use -l to show in full.

4. Install PHP

PHP (recursive acronym for PHP: Hypertext Preprocessor) is a widely used open-source general purpose scripting language that is especially suited for web development and can be embedded into HTML.

Install PHP with following command:

sudo apt-get install php5 php5-mysql libapache2-mod-php5

To test PHP, create a sample “testphp.php” file in Apache document root folder.

sudo nano /var/www/html/testphp.php

Add the following lines.

<?php
phpinfo();
?>

Restart apache2 service.

On Ubuntu 15.04:

sudo systemctl restart apache2

On Ubuntu 14.10 and lower versions:

sudo service apache2 restart

Navigate to http://server-ip-address/testphp.php. It will display all the details about php such as version, build date and commands etc.

phpinfo() - Mozilla Firefox_003

If you want to install all php modules at once, enter the command sudo apt-get install php* and restart the apache2 service. To verify the modules, open web browser and navigate to http://server-ip-address/testphp.php. You will able to see all installed php modules.

5. Manage MySQL Databases (Optional)

Install phpMyAdmin

phpMyAdmin is a free open-source web interface tool used to manage your MySQL databases. It is available in the Official Debian repositories. So install it with command:

sudo apt-get install phpmyadmin

Select the Web server that should be automatically configured to run phpMyAdmin. In my case, it is apache2.

sk@server: ~_004

The phpMyAdmin must have a database installed and configured before it can be used. This can be optionally handled by dbconfig-common.

Select ‘Yes’ to configure database for phpmyadmin wjth dbconfig-common.

sk@server: ~_006

Enter password of the database’s administrative user.

sk@server: ~_007

Enter MySQL application password phpmyadmin.

sk@server: ~_008

Re-enter the password.

sk@server: ~_009

Success! phpMyAdmin installation is installed.

Additional Note: if you followed all steps carefully, phpMyAdmin should work just fine. In case phpMyAdmin is not working, please do the following steps.

Open terminal, and type:

sudo nano /etc/apache2/apache2.conf

Add the following line at the end.

Include /etc/phpmyadmin/apache.conf

Save and Exit. Restart apache service:

On Ubuntu 15.04:

sudo systemctl restart apache2

On Ubuntu 14.10 and lower versions:

sudo /etc/init.d/apache2 restart

6. Access phpMyAdmin Web Console

Now, you can access the phpmyadmin console by navigating to http://server-ip-address/phpmyadmin/ from your browser.

Enter your MySQL username and password which you have given in previous steps. In my case its “root” and “ubuntu”.

phpMyAdmin - Mozilla Firefox_010

You will be redirected to PhpMyAdmin main web interface.

192.168.1.100 - localhost | phpMyAdmin 4.2.12deb2 - Mozilla Firefox_011

From here, you can manage your MySQL databases from phpMyAdmin web interface.

That’s it. Your LAMP stack is ready to use.

---------------------------------------------------------------------
How To Install LAMP Stack On Ubuntu 15.04

Configure High Availability with Corosync and Pacemaker

$
0
0


All the techniques and methods used to improve the availability of a system or a service and increase the fault tolerance are called High Availability, such example of fault we can mention: hardware redundancy, clustering, replication of data at hot physically (RAID 1 and RAID 5) or in software (Snapshots, DRBD), or crisis scenarios (degraded mode, emergency plan). In a large company, it can lead to a position of responsibility at full time. You will see a picture to implement a facet of this problem in this article: an active / passive cluster that ensures the availability of an application service.

Concerning GNU / Linux, in this article two software that could manage a cluster infrastructure were tested:

  • Heartbeat which has its proofs but it is limited: no cluster from more than 2 nodes, no management of resources and rules to switch from one node to another.
  • Corosync and Pacemaker: It is the choice of the Red Hat distribution and which be outlined later in this article.

We had mounted a representative model composed by two virtual machines Debian Wheezy with 4 network interfaces that runs an Apache service which is accessed by an IP address managed by the cluster.

The following picture represents the network diagram:

picture

The eth0 and eth1 interfaces are part of a logical link aggregation and they help the cluster to check the status of the other nodes. They constitute a private network with the other nodes in the network 10.20.13.0/255.255.255.252. The interfaces eth2 and eth3 are part of another logical aggregation, they provide service at  outside in the 192.168.1.0/24 network.

The logical aggregation (also called bonding) provides an additional redundancy. If the network adaptor eth0 burn out, the traffic still pass through eth1. It can be configured in active / passive mode or in load-balancing mode.

Here is the configuration of the interfaces on the vm-node1 machine in “/etc/network/interfaces/”:

auto bond0
iface bond0 inet static
  address 10.20.13.1
  netmask 255.255.255.252
  bond_mode active-backup
  bond_miimon 100
  bond_downdelay 200
  bond_updelay 200
  slaves eth0 eth1
auto bond1
iface bond1 inet static
  address 192.168.1.61
  netmask 255.255.255.0
  gateway 192.168.1.1
  bond_mode active-backup
  bond_miimon 100
  bond_downdelay 200
  bond_updelay 200
  slaves eth2 eth3

And the configuration of the bonding in “/etc/modprobe.d/bonding”:

alias bond0 bonding 
alias bond1 bonding

The network configuration of the vm-node2 machine is symmetrical with bond0 in 10.20.13.2 and bond1 in 192.168.1.62. When the network configuration is dine, we can handle the cluster. First you need to install Corosync and Pacemaker on Debian, you will do as follow:

apt-get install corosyncpacemaker

Then configure Corosync. It manages the cluster infrastructure, which means the state of the nodes and their functioning in group. For this, we have to generate a key for authentication which will be shared by all nodes in the cluster. The corosync-keygen utility to generate this key from pseudo-random keystrokes which must then be secured and copied to other nodes.

# generation of the key from vm-node1
corosync-keygen
mvauthkey/etc/corosync/authkey
chownroot:root/etc/corosync/authkey
chmod400/etc/corosync/authkey
 
# copy of the key to vm-node2
scp/etc/corosync/authkeyroot@10.20.13.2:/etc/corosync/authkey

Corosync proposes the concept of connection rings to enable the communication between nodes. As part of the model, we defined two rings: ring0, the default communication ring that uses the private network and ring1, a backup ring that passes through the switches with the rest of the traffic. Corosync lets you define the rings in terms of IP / netmask rather than defining IP addresses. This is significant because the same configuration file can be deployed on all nodes without changing anything.

totem {   
    version:2    
    
    #How long before declaring a token lost(ms)   
    token:3000    

    #How many token retransmits before forming a new configuration   
    token_retransmits_before_loss_const:10    

    #How long to wait for joining messages in the membership protocol(ms)   
    join:60    

    #How long to wait for consensus to be achieved before starting a new round of membership configuration(ms)    consensus:3600    

    #Turn off the virtual synchrony filter   
    vsftype:none    

    #Number of messages that may be sent by one processor on receipt of the token   
    max_messages:20    

    #Limit generated nodeids to 31-bits(positive signed integers)   
    clear_node_high_bit:yes    

    #Disable encryption   
    secauth:off    

    #How many threads to use for encryption/decryption   
    threads:0    

    #Optionally assign a fixed nodeid(integer)   
    #nodeid:1234    

    #This specifies the mode of redundant ring,which may be none,active,or passive.   
    rrp_mode:passive    

    interface {       
        ringnumber:0       
        bindnetaddr:10.20.13.0       
        mcastaddr:226.94.1.1       
        mcastport:5405   
    }   

    interface {       
        ringnumber:1       
        bindnetaddr:192.168.1.0       
        mcastaddr:226.94.1.1       
        mcastport:5407   
     }
} 

amf {   
     mode:disabled
} 

service {   
     #Load the Pacemaker Cluster Resource Manager   
     ver:       0   
     name:     pacemaker
} 

aisexec {   
    user:  root   
    group: root
} 

logging {   
    fileline:off   
    to_stderr:yes   
    to_logfile:no   
    to_syslog:yes   
    syslog_facility:daemon   
    debug:off   
    timestamp:on   
    logger_subsys {       
          subsys:AMF       
          debug:off       
          tags:enter|leave|trace1|trace2|trace3|trace4|trace6   
    }
}

At this point, the cluster infrastructure is in place but it does not manage any resource. It is the role of Pacemaker.

It has the following operational constraints:

  1. resources (Apache service and the cluster IP address) running on the server vm-node1 in the normal case.
  2. Apache service and the cluster IP address must run on the same server if our service is unreachable.
  3. If the Apache service crashes on the primary server, it switches to the secondary server.
  4. if the primary server is attached over the Internet gateway, it switches to the secondary server.

Pacemaker provides some utility in text mode to interact.

  • CRM to manage all aspect configuration.
  • crm_mon displays the state of the cluster.

First we define the global configuration. Quenched STONITH (Shoot The Other Node In The Head) and the quorum. STONITH is the ability to kill the other node if it no longer meets the infra cluster.  And the quorum, it does not work on a cluster within 3 knots.

property stonith-enabled=false
property no-quorum-policy=ignore

We can now define our first resource: cluster IP address attached to the active node.

primitive vip ocf:heartbeat:IPaddr2 params ip=192.168.1.60 cidr_netmask=24nic="bond1"op monitor interval="10s"

Then the Apache resource, the critical service we want to provide in this model:

primitive httpd ocf:heartbeat:apache params configfile="/etc/apache2/apache2.conf"statusurl="http://localhost/server-status"op start timeout="60s"op stop timeout="60s"op monitor timeout="20s"

The starting and stopping of Apache are now managed by the cluster. So, we have now to remove the automatic start of the service:

update-rc.d-fremoveapache2

You will notice that goes beyond the definition of an Apache resource. The Pacemaker STATUSURL attribute allows to use the Apache status page to determine a rocker. So do not forget to configure this URL in Apache:

<Location/server-status>    
    SetHandler server-status    
    Order deny,allow    
    Deny from all    
    Allow from 127.0.0.1
</Location>

As we built the configuration step, crm_mon back perhaps there are some errors on certain resources because it was not operational. There is a failure counter that notifies us in case of warning. we can reset this timer  for the resource http using the following command:

crm resource clean up httpd

At this stage we have a cluster address and an HTTP resource, but not necessarily on the same node. vip resource will switch if the node is dropped down. The httpd resource will switch if the node is dropped or the apache service rises (monitoring by URL / server-status).

Let’s go further and force both resources to run on the same node:

colocation httpd-with-vip inf : httpd vip

And we would like to have this also in the normal case, the resources run on vm-node1, our primary node:

location preferred-node vip 100 : vm-node1

Finally, we add a scale condition. If the node doesn’t reach the gateway over the Internet, we want to move resources to the other node For this we define a resource at the ping type that runs on all nodes (through the concept of cloned resource). Then a vacation rule is added to switch if the active node does not see the bridge.

primitive ping-gateway ocf:pacemaker:ping params host_list="192.168.1.1"multiplier="1000"op monitor interval="10s"
clone cloned-ping-gateway ping-gateway
location vip-needs-gateway vip rule-inf:not_defined pingd or pingd lte 0

This is our operational model. and we hope that we help you to do it.

---------------------------------------------------------------------
Configure High Availability with Corosync and Pacemaker

How To Install XAMPP Stack On Ubuntu 15.04

$
0
0


XAMPP is a free, open source stack that contains Apache web server, MySQL database, PHP, and Perl. The main goal of XAMPP is to build an easy to install Apache environment for developers. Unlike LAMP, and LEMP stacks, It makes the developers so easy to have all packages installed at once in a couple of minutes. XAMMP is acronym of X(Cross platform), Apache, MySQL, PHP, and Perl.

In this handy tutorial, let us see how to install XAMPP stack on Ubuntu 15.04, and its previous versions such as 14.04, 13.10 etc.

Install XAMPP Stack On Ubuntu

Download the latest version from the official download page. As of writing this article, the latest version was 5.6.8.

After downloading the XAMPP package, make it executable as shown below.

sudo chmod +x xampp-linux-x64-5.6.8-0-installer.run

Now, install XAMPP stack as shown below.

sudo ./xampp-linux-x64-5.6.8-0-installer.run

You’ll be asked to answer a couple questions. Here. I will go with defaults.

Press Y to accept the defaults.

----------------------------------------------------------------------------
Welcome to the XAMPP Setup Wizard.

----------------------------------------------------------------------------
Select the components you want to install; clear the components you do not want 
to install. Click Next when you are ready to continue.

XAMPP Core Files : Y (Cannot be edited)

XAMPP Developer Files [Y/n] :y

Is the selection above correct? [Y/n]: y

----------------------------------------------------------------------------
Installation Directory

XAMPP will be installed to /opt/lampp
Press [Enter] to continue:

----------------------------------------------------------------------------
Setup is now ready to begin installing XAMPP on your computer.

Do you want to continue? [Y/n]: y

----------------------------------------------------------------------------
Please wait while Setup installs XAMPP on your computer.

 Installing
 0% ______________ 50% ______________ 100%
 #########################################

----------------------------------------------------------------------------
Setup has finished installing XAMPP on your computer.

Starting/Stopping XAMPP Server

XAMPP will be installed in /opt/lampp directory. After installing XAMPP, you can start it using the following command.

sudo /opt/lampp/lampp start

Sample output:

Starting XAMPP for Linux 5.6.8-0...
XAMPP: Starting Apache...already running.
XAMPP: Starting MySQL...ok.
XAMPP: Starting ProFTPD...ok.

Like wise, you can stop the service using command:

sudo /opt/lampp/lampp stop

Sample output:

Stopping XAMPP for Linux 5.6.8-0...
XAMPP: Stopping Apache...ok.
XAMPP: Stopping MySQL...ok.
XAMPP: Stopping ProFTPD...ok.

Test XAMPP

To check if everything is OK, open up your web browser, and navigate to http://ip-address/xampp.

You may get the following error. This is because, the XAMPP test page will not be accessible from the remote clients using IP address.

Access forbidden! - Mozilla Firefox_001

To resolve this error, edit file /opt/lampp/etc/extra/httpd-xampp.conf,

sudo nano /opt/lampp/etc/extra/httpd-xampp.conf

Find the following line:

[...]
Require local
[...]

And, comment it out:

[...]
#Require local
[...]

For more details, refer the XAMPP forum.

Restart XAMPP service.

sudo /opt/lampp/lampp restart

Refresh the XAMPP test page. Now, you’ll be able to access the XAMPP test page.

Select the language. In my case, I selected English.

XAMPP - Mozilla Firefox_002

This is how my XAMPP welcome page looked.

XAMPP for Linux 5.6.8-0 - Mozilla Firefox_003

Access phpMyAdmin

phpMyAdmin is a graphical management tool for MySQL. Using this tool, you can create/delete/modify mysql databases graphically via a web browser.

To access phpMyAdmin, click on the “phpMyAdmin” link on the left pane of the XAMPP welcome page.

Selection_005

This is how my phpMyAdmin dashboard looks.

192.168.1.100 - localhost | phpMyAdmin 4.4.3 - Mozilla Firefox_004

Likewise, you can view the phpinfo() page. The phpinfo() will also be accessed from the left pane of the XAMPP welcome page.

phpinfo() - Mozilla Firefox_006

Viewing Statistics of the XAMPP server

XAMPP comes with pre-installed webalizer application, which is a fast, free web server log file analysis program. It displays the web server usage reports in HTML format with a web browser. 

To access webalizer, click on the “webalizer” link on the left pane of the XAMPP welcome page.

XAMPP for Linux 5.6.8-0 - Mozilla Firefox_007

Security Issues of XAMPP

XAMPP is not meant for production use, it’s only for development purpose. Don’t attempt to use XAMPP in production environments.

The way XAMPP is configured is to be open as possible to allow the developers anything they want. For development environments this is great but in a production environment, it could be fatal.

Here a list of missing security in XAMPP:

  • The MySQL administrator (root) has no password.
  • The MySQL daemon is accessible via network.
  • ProFTPD uses the password “lampp” for user “daemon”.
  • PhpMyAdmin is accessible via network.
  • Examples are accessible via network.

To fix the above security holes, enter the following command:

sudo /opt/lampp/lampp security

You’ll be asked a couple of questions to secure the XAMPP installation. Answer the questions accordingly.

XAMPP:  Quick security check...
XAMPP:  Your XAMPP pages are NOT secured by a password. 
XAMPP: Do you want to set a password? [yes] 
XAMPP: Password: 
XAMPP: Password (again): 
XAMPP:  Password protection active. Please use 'xampp' as user name!
XAMPP:  MySQL is accessable via network. 
XAMPP: Normaly that's not recommended. Do you want me to turn it off? [yes] 
XAMPP:  Turned off.
XAMPP: Stopping MySQL...ok.
XAMPP: Starting MySQL...ok.
XAMPP:  The MySQL/phpMyAdmin user pma has no password set!!! 
XAMPP: Do you want to set a password? [yes] 
XAMPP: Password: 
XAMPP: Password (again): 
XAMPP:  Setting new MySQL pma password.
XAMPP:  Setting phpMyAdmin's pma password to the new one.
XAMPP:  MySQL has no root passwort set!!! 
XAMPP: Do you want to set a password? [yes] 
XAMPP:  Write the password somewhere down to make sure you won't forget it!!! 
XAMPP: Password: 
XAMPP: Password (again): 
XAMPP:  Setting new MySQL root password.
XAMPP:  Change phpMyAdmin's authentication method.
XAMPP:  The FTP password for user 'daemon' is still set to 'xampp'. 
XAMPP: Do you want to change the password? [yes] 
XAMPP: Password: 
XAMPP: Password (again): 
XAMPP: Reload ProFTPD...ok.
XAMPP:  Done.

That’s it. Now your XAMPP server is secured.

Cheers!

Reference Links:

---------------------------------------------------------------------
How To Install XAMPP Stack On Ubuntu 15.04

Ubuntu 15.04 Vivid Vervet Review

$
0
0


By the time we had a chance to review Ubuntu 15.04, the final release date had passed and it had already shipped. But it’s important to point out that our final review is based on a Beta release. However, the tasks that we threw at the latest iteration of Ubuntu, were easily completed without any major issues.

The boot process of Ubuntu 15.04 was great. Even when running the operating system in Live mode, it is so responsive that you could be forgiven for thinking that it was physically installed on real metal. Read below, for a bit more of an in-depth glance at what we think of Ubuntu 15.04.

Desktop

Ubuntu 15.04 desktop

We tested 15.04 with the XFCE desktop environment. It’s clean, simple and responsive on even slower older system specifications. Unless you really love or have a specific requirement for the Unity desktop, stick with something more traditional such as XFCE and you can’t go wrong.

On a daily basis, we have become accustomed to the use of Linux Mint here in the office. Nautilus file manager that is included in Ubuntu feels somewhat limited in comparison to Caja file manager. Still, it does the basic roles of graphical file management just fine. However, the absence of the BACK arrow button still makes no logical sense to us.

We did perform some testing using the Ubuntu native Unity desktop environment. It still feels too bloated. In fact, we feel it gets worse with each release. It’s not that its response times are slow or laggy in any way. It simply feels very cluttered with lots of unnecessary bits and bobs that offer nothing but another obstacle for the user to maneuver the mouse cursor around. We stand by our recommendation of using something much more traditional.

We also had some issues with Global Menus in Unity. They did not function properly when moving windows using the mouse and title-bar grab. We point out this is not a fault as such but rather a design flaw with Global Menus. This can be seen as another reason to look past Unity unless you really feel comfortable with its ways of performing daily desktop tasks.

Software

Ubuntu 15.04 software

There is one specific feature with Ubuntu 15.04 that we would like to point out as very strange. So strange, it concerns us a little as to where developers are heading with it in future versions of Ubuntu.

What are we ranting about, you might ask? Default Web Browser. We have no idea what the exact name of this web browser, so we will refer to it as just the Ubuntu Web Browser.

If web browsers had hearts, this piece of code would certainly be heartless. There is no menu(s) or options or anything, actually. If there is, we couldn’t find them. We were able to open a website, new tab and access web history. Feature-wise, this web browser remains almost featureless. Digging a little deeper into the workings of the browser, we discovered that when you access a website, it seeks to access a mobile version of the website as preference. This backs our theory that it is indeed a web browser designed specifically for
mobile use.

To top off the misery in the case of the heartless web browser, we were unable to highlight anything. Not a single string of text was able to be highlighted or selected in any way. Finally, the text rendering from the browser’s engine, whatever that engine may be, is terrible. Text is blurry and unreadable in any sense.

Initially, our thoughts were it is a web browser intended for use with touch screens and/or mobile devices. If this is the case, then it gives an indication of where Ubuntu Developers are taking Ubuntu. Possibly an all-in-one desktop/office/mobile operating system. Much like Microsoft has and still is trying to do with its Windows operating system. We like some things that Microsoft has done with Windows and what we have seen with Windows 10. But it’s safe to declare its attempt to turn Windows into a one size fits all operating system, a overall failure. If Ubuntu Developers are heading this way with their own operating system, then we wish them all the best in their attempts because those before them have failed to date. Watch this space in future versions of Ubuntu.

Looking at Ubuntu 15.04 from a general software perspective; there is no GIMP package, still. We really do hope this package is reinstated to a default installation of Ubuntu sometime in the future, as its absence is still somewhat difficult to understand why it was ever removed in the first place and never replaced with any other package which comes close to the power of GIMP. Yes, this is still a sore spot with us here in the office
and the testing Labs.

Speaking of sore spots, there is another package installed which we detected through the Unity Application Launcher which bothers us, as we have no idea what it is and what it is meant to do, as we couldn’t get it to do anything. The package is listed in Unity Application Launcher as Fcitx and is accompanied by another package listed as Fcitx Configuration. Digging deeper in a terminal, the package seemed to be fcitx-qimpanel-configtool. Regardless of how we attempted to launch the package, nothing happens. Again, we have no idea what this package is or is supposed to do, but if it is simply a background package or some kind of configuration package, it really should be hidden in the Unity Application Launcher.

Ubuntu BBC

Although we have big complaints about the default Ubuntu web browser, thankfully we still have Firefox at our fingertips. The Firefox version in the Beta build of Ubuntu 15.04 we tested, was Firefox 26.0.1. We accept this has since been updated as there have been several version updates to Firefox since our build was shipped to us.

To round the software selection off, LibreOffice version is 4.4.1.2. Unity 7.3.1 desktop is the default desktop environment shipped with Ubuntu 15.04 vanilla package.

Hardware Detection

We tested the operating system on a fairly decent system running a quad-core Intel CPU, 6GB RAM and a SSD hard drive. This was accompanied by a high-end AMD graphics adapter.

Ubuntu 15.04 had absolutely no issue(s) detecting our dual-display setup. Both displays registered and Ubuntu utilized the maximum resolution possible for both displays. Although, it is a little strange that Unity decides to place its sidebar on both displays. We are unsure whether this is normal behavior or something more sinister occurring. We sense the former.

Regardless of what display behavior Ubuntu considers normal, display and graphics performance across the two displays was fantastic, using our high-end AMD graphics adapter.

Linux Kernel

The Beta version that we received in the Labs for testing, was running the Linux kernel 3.19. At the time of publishing, Linux kernel 4.0 is available. It came simply too late to get pushed into Ubuntu 15.04 by the Developers. But that’s ok as there really is nothing missing from the 3.19 that makes any performance difference. Despite one being easily fooled by the higher version number of Linux 4.0.

Conclusion

Despite our complaints of certain aspects of Ubuntu 15.04, it is a very good release. Probably the fastest, most stable version of Ubuntu to be dropped into our Labs. We have no issue with recommending the upgrade.

Ubuntu has come a long way and one of its greatest assets is having so many official variants readily available. So there is absolute guarantee you will find the right version to suit your desktop environment preferences and requirements.

If you have not yet installed Ubuntu 15.04, please proceed to do so as you are missing out on one heck of a great Linux operating system.

Refer this link to install Ubuntu 15.04 Desktop and Server. If you already have Ubuntu 14.xx version on your system, and want to upgrade it to Ubuntu 15.04, then refer the following link.

Well, I have installed Ubuntu 15.04, what now?

Here is the list of 15 important things to do after installing Ubuntu 15.04.

About the Author:

Chris Jones is the Editor-in-Chief, Secretary and Director of Global Operations of Freedom Publishers Union. He is the former Chief Editor of Unixmen.com and Unixmen Australia. Prior to this role, he run the now defunct technology news website, TheMuldyZone.net.

Mail: editor@freedompublishersunion.com

---------------------------------------------------------------------
Ubuntu 15.04 Vivid Vervet Review

How To Install LEMP Stack On Ubuntu 15.04

$
0
0


LEMP is a combination of the operating system and open-source software stack. The acronym LEMP came from the first letters of Linux, Nginx(engine-x) HTTP Server, MySQL/MariaDB database, and PHP/Perl/Python.

In this tutorial, let us see how to install lemp stack on Ubuntu 15.04, and its previous versions such as Ubuntu 14.10, 14.04, 13.10 etc..

Install LEMP Stack On Ubuntu

1. Install Nginx

Nginx (pronounced as engine-x) is a free, open-source, high-performance HTTP server and reverse proxy, as well as an IMAP/POP3 proxy server written by Igor Sysoev.

To install Nginx enter the following command in your terminal:

Note: If another web server like apache2 was installed in your system, remove it first to avoid conflicts. To uninstall apache, run the following commands:

sudo service apache2 stop
sudo apt-get remove --purge apache2 apache2-utils apache2.2-bin apache2-common -y
sudo apt-get autoremove -y
sudo apt-get autoclean -y

Find the apache2 configuration directories and files using command:

whereis apache2

Then, permanently delete them with command:

sudo rm -Rf /etc/apache2 /usr/lib/apache2 /usr/include/apache2

Now, install nginx using command:

sudo apt-get install nginx

Start Nginx service using the following command.

On Ubuntu 15.04:

sudo systemctl start nginx

On Ubuntu 14.10 and previous versions:

sudo service nginx start

To check whether nginx service is started, run:

sudo systemctl status nginx

Or

sudo service nginx status

Sample output:

● nginx.service - A high performance web server and a reverse proxy server
   Loaded: loaded (/lib/systemd/system/nginx.service; enabled; vendor preset: enabled)
   Active: active (running) since Fri 2015-05-01 16:18:40 IST; 45s ago
 Main PID: 1510 (nginx)
   CGroup: /system.slice/nginx.service
           ├─1510 nginx: master process /usr/sbin/nginx -g daemon on; master_...
           ├─1511 nginx: worker process
           ├─1512 nginx: worker process
           ├─1513 nginx: worker process
           └─1514 nginx: worker process

May 01 16:18:39 server systemd[1]: Starting A high performance web server a.....
May 01 16:18:40 server systemd[1]: Failed to read PID from file /run/nginx....nt
May 01 16:18:40 server systemd[1]: Started A high performance web server an...r.
May 01 16:19:17 server systemd[1]: Started A high performance web server an...r.
Hint: Some lines were ellipsized, use -l to show in full.

2. Test nginx

Open up your web browser and navigate to http://ip-address/ or http://localhost/. You will see a screen something like below.

Welcome to nginx on Ubuntu! - Mozilla Firefox_001

3. Configure Nginx

Open the file /etc/nginx/nginx.conf in any editor:

sudo nano /etc/nginx/nginx.conf

Set the worker_processes (i.e No. of CPU’s in your system). To see the no. of CPU’s, use the command “lscpu”. In my case it’s “1″. So I set this as ’1′.

worker_processes 1;

Restart Nginx service:

sudo systemctl restart nginx

Or

sudo service nginx restart

The default vhost(server block) is defined in the /etc/nginx/sites-available/default file.

Open the file /etc/nginx/sites-available/default in any editor.

sudo nano /etc/nginx/sites-available/default

Under the Server section, set the server FQDN or IP address as shown below. Make sure you’ve added a index.php line.

[...]
server {
      listen 80 default_server;
      listen [::]:80 default_server ipv6only=on;
      root /usr/share/nginx/html;
      index index.php index.html index.htm;
      # Make site accessible from http://localhost/
      server_name server.unixmen.local;
[...]

Here,

  • listen 80; –> listen for ipv4
  • listen [::]:80 default_server ipv6only=on; –> listen for ipv6
  • root /usr/share/nginx/html; –> document root directory.
  • server_name server.unixmen.local; –> Server FQDN.

Now, scroll down further and find the section #location ~ \.php$. Uncomment and modify the following lines as shown below.

 location ~ \.php$ {
         try_files $uri =404;   ---------> Add this line
         fastcgi_split_path_info ^(.+\.php)(/.+)$;
         #       # NOTE: You should have "cgi.fix_pathinfo = 0;" in php.ini
         #
         #       # With php5-cgi alone:
         #       fastcgi_pass 127.0.0.1:9000;
         #       # With php5-fpm:
         fastcgi_pass unix:/var/run/php5-fpm.sock;
         fastcgi_index index.php;
         include fastcgi.conf;
    }

Here, I added an extra line ‘try_files $uri =404;’ to prevent zero day exploits.

Save and exit the file.

4. Test nginx configuration

Test the nginx configuration for any syntax errors using command:

sudo nginx -t

Sample output:

nginx: the configuration file /etc/nginx/nginx.conf syntax is ok
nginx: configuration file /etc/nginx/nginx.conf test is successful

Restart nginx service.

sudo systemctl restart nginx

Or

sudo service nginx restart

5. Install MySQL

MySQL is a relational database management system (RDBMS) that runs as a server providing multi-user access to a number of databases, though SQLite probably has more total embedded deployments

sudo apt-get install mysql-server mysql-client

During installation, you’ll be asked to setup the MySQL “root” user password. Enter the password and click Ok.

sk@server: ~_001

Re-enter the password.

sk@server: ~_002

MySQL is installed now.

You can verify the MySQL server status using command:

On Ubuntu 15.04:

sudo systemctl status mysql

On Ubuntu 14.10 and previous versions:

sudo service mysql status

Sample output:

● mysql.service - MySQL Community Server
   Loaded: loaded (/lib/systemd/system/mysql.service; enabled; vendor preset: enabled)
   Active: active (running) since Fri 2015-05-01 16:34:32 IST; 11s ago
 Main PID: 3235 (mysqld_safe)
   CGroup: /system.slice/mysql.service
           ├─3235 /bin/sh /usr/bin/mysqld_safe
           └─3582 /usr/sbin/mysqld --basedir=/usr --datadir=/var/lib/mysql --...

May 01 16:34:31 server systemd[1]: Starting MySQL Community Server...
May 01 16:34:31 server mysqld_safe[3235]: 150501 16:34:31 mysqld_safe Can't ....
May 01 16:34:31 server mysqld_safe[3235]: 150501 16:34:31 mysqld_safe Loggin....
May 01 16:34:32 server mysqld_safe[3235]: 150501 16:34:31 mysqld_safe Starti...l
May 01 16:34:32 server systemd[1]: Started MySQL Community Server.
Hint: Some lines were ellipsized, use -l to show in full.

6. Install MariaDB

In case you want to use MariaDB instead of MySQL community edition, follow the steps given below.

MariaDB is a drop in replacement for MySQL. It is a robust, scalable and reliable SQL server that comes rich set of enhancements.

First you have to remove existing MySQL packages if any. To completely uninstall MySQL along with its configuration files, enter the following commands one by one:

sudo systemctl stop mysql
sudo apt-get remove --purge mysql-server mysql-client mysql-common -y
sudo apt-get autoremove -y
sudo apt-get autoclean -y
sudo rm -rf /var/lib/mysql/
sudo rm -rf /etc/mysql/

After removing MySQL, run the following command to install MariaDB.

sudo apt-get install mariadb-server

Alternatively, you can install it using MariaDB repository if you want to try most recent version of MariaDB. Run the following commands to add PPA. As of writing this, MariaDB PPA is not yet updated to Ubuntu 15.04. However, we can use the repository of Ubuntu 14.10 instead.

sudo apt-get install software-properties-common
sudo apt-key adv --recv-keys --keyserver hkp://keyserver.ubuntu.com:80 0xcbcb082a1bb943db
sudo add-apt-repository 'deb http://ftp.kaist.ac.kr/mariadb/repo/10.0/ubuntu utopic main'

Update the software sources list and install MariaDB using following commands:

sudo apt-get update
sudo apt-get install mariadb-server

During installation you will be asked to set mysql ‘root’ user password. Enter the password twice, and complete the installation.

Note: In Ubuntu 15.04, MariaDB won’t ask you to set root user password during installation.

Also, you can’t set password using command:

mysql_secure_installation

It will throw the following error.

ERROR 1698 (28000): Access denied for user 'root'@'localhost'

To fix this error, log in to mysql prompt without password as root user:

sudo mysql -u root

Then, run the following commands one by one in the mysql prompt:

use mysql;
update user set plugin='' where User='root';
flush privileges;
\q

That’s it. Now, set database administrative “root” user password using command. Press Enter and go with the default settings.

mysql_secure_installation

Sample output:

NOTE: RUNNING ALL PARTS OF THIS SCRIPT IS RECOMMENDED FOR ALL MariaDB
      SERVERS IN PRODUCTION USE!  PLEASE READ EACH STEP CAREFULLY!

In order to log into MariaDB to secure it, we'll need the current
password for the root user.  If you've just installed MariaDB, and
you haven't set the root password yet, the password will be blank,
so you should just press enter here.

Enter current password for root (enter for none): 
OK, successfully used password, moving on...

Setting the root password ensures that nobody can log into the MariaDB
root user without the proper authorisation.

Set root password? [Y/n] y
New password: 
Re-enter new password: 
Password updated successfully!
Reloading privilege tables..
 ... Success!

By default, a MariaDB installation has an anonymous user, allowing anyone
to log into MariaDB without having to have a user account created for
them.  This is intended only for testing, and to make the installation
go a bit smoother.  You should remove them before moving into a
production environment.

Remove anonymous users? [Y/n] 
 ... Success!

Normally, root should only be allowed to connect from 'localhost'.  This
ensures that someone cannot guess at the root password from the network.

Disallow root login remotely? [Y/n] 
 ... Success!

By default, MariaDB comes with a database named 'test' that anyone can
access.  This is also intended only for testing, and should be removed
before moving into a production environment.

Remove test database and access to it? [Y/n] 
 - Dropping test database...
ERROR 1008 (HY000) at line 1: Can't drop database 'test'; database doesn't exist
 ... Failed!  Not critical, keep moving...
 - Removing privileges on test database...
 ... Success!

Reloading the privilege tables will ensure that all changes made so far
will take effect immediately.

Reload privilege tables now? [Y/n] 
 ... Success!

Cleaning up...

All done!  If you've completed all of the above steps, your MariaDB
installation should now be secure.

Thanks for using MariaDB!

Check if mariadb is running or not, using the following command:

sudo service mysql status

Sample output:

● mysql.service - LSB: Start and stop the mysql database server daemon
   Loaded: loaded (/etc/init.d/mysql)
   Active: active (running) since Wed 2015-04-29 13:57:57 IST; 15min ago
     Docs: man:systemd-sysv-generator(8)
   CGroup: /system.slice/mysql.service
           ├─2527 /bin/bash /usr/bin/mysqld_safe
           ├─2528 logger -p daemon.err -t /etc/init.d/mysql -i
           └─2684 /usr/sbin/mysqld --basedir=/usr --datadir=/var/lib/mysql --...

Apr 29 13:57:58 server /etc/mysql/debian-start[2735]: mysql.servers          ...
Apr 29 13:57:58 server /etc/mysql/debian-start[2735]: mysql.table_stats      ...
Apr 29 13:57:58 server /etc/mysql/debian-start[2735]: mysql.tables_priv      ...
Apr 29 13:57:58 server /etc/mysql/debian-start[2735]: mysql.time_zone        ...
Apr 29 13:57:58 server /etc/mysql/debian-start[2735]: mysql.time_zone_leap_se...
Apr 29 13:57:58 server /etc/mysql/debian-start[2735]: mysql.time_zone_name   ...
Apr 29 13:57:58 server /etc/mysql/debian-start[2735]: mysql.time_zone_transit...
Apr 29 13:57:58 server /etc/mysql/debian-start[2735]: mysql.user             ...
Apr 29 13:57:58 server /etc/mysql/debian-start[2790]: Triggering myisam-recov...
Hint: Some lines were ellipsized, use -l to show in full.

7. Install PHP

PHP (recursive acronym for PHP: Hypertext Preprocessor) is a widely used open-source general purpose scripting language that is especially suited for web development and can be embedded into HTML.

Install PHP with following command:

sudo apt-get install php5 php5-fpm php5-mysql

8. Configure PHP

Open php.ini file in any editor:

sudo nano /etc/php5/fpm/php.ini

Find the line ‘cgi.fix_pathinfo=1′, uncomment it and change the value 1 to 0.

cgi.fix_pathinfo=0

Now restart php-fpm service.

sudo systemctl restart php5-fpm

Or

sudo service php5-fpm restart

To check whether php5-fpm is running or not using command:

sudo systemctl status php5-fpm

Or

sudo service php5-fpm status

Sample output:

● php5-fpm.service - The PHP FastCGI Process Manager
   Loaded: loaded (/lib/systemd/system/php5-fpm.service; enabled; vendor preset: enabled)
   Active: active (running) since Fri 2015-05-01 16:39:59 IST; 4s ago
  Process: 9023 ExecStartPre=/usr/lib/php5/php5-fpm-checkconf (code=exited, status=0/SUCCESS)
 Main PID: 9028 (php5-fpm)
   Status: "Ready to handle connections"
   CGroup: /system.slice/php5-fpm.service
           ├─9028 php-fpm: master process (/etc/php5/fpm/php-fpm.conf)
           ├─9031 php-fpm: pool www
           └─9032 php-fpm: pool www

May 01 16:39:59 server systemd[1]: Stopping The PHP FastCGI Process Manager...
May 01 16:39:59 server systemd[1]: Starting The PHP FastCGI Process Manager...
May 01 16:39:59 server systemd[1]: Started The PHP FastCGI Process Manager.

9. Test PHP

Create a sample “testphp.php” file in nginx document root folder.

sudo nano /usr/share/nginx/html/testphp.php

Add the following lines in it.

<?php
 phpinfo();
?>

Save and exit the file.

Navigate to  http://server-ip-address/testphp.php. It will display all the details about php such as version, build date and commands etc.

phpinfo() - Mozilla Firefox_002

PHP-FPM listens on the socket /var/run/php5-fpm.sock by default. If you want to make PHP-FPM use a TCP connection, open the file /etc/php5/fpm/pool.d/www.conf,

sudo nano /etc/php5/fpm/pool.d/www.conf

Find the line listen = /var/run/php5-fpm.sock,

listen = /var/run/php5-fpm.sock

and modify it to listen = 127.0.0.1:9000.

listen = 127.0.0.1:9000

Save and exit the file. Restart php5-fpm service.

sudo systemctl restart php5-fpm

Or

sudo service php5-fpm restart

Now open the nginx configuration file:

sudo nano /etc/nginx/sites-available/default

Find the line fastcgi_pass unix:/var/run/php5-fpm.sock; and change it to fastcgi_pass 127.0.0.1:9000; as shown below.

location ~ \.php$ {
        try_files $uri =404;
        fastcgi_split_path_info ^(.+\.php)(/.+)$;fastcgi_pass 127.0.0.1:9000;
        #       # NOTE: You should have "cgi.fix_pathinfo = 0;" in php.ini
        #
        #       # With php5-cgi alone:
        fastcgi_pass 127.0.0.1:9000;
        #       # With php5-fpm:
        #        fastcgi_pass unix:/var/run/php5-fpm.sock;
        fastcgi_index index.php;
        include fastcgi.conf;
   }

Save and exit the file. Finally restart nginx service.

sudo systemctl restart nginx

Or

sudo service nginx restart

10. Manage MySQL Databases Using phpMyAdmin (Optional)

phpMyAdmin is a free open-source web interface tool used to manage your MySQL databases.

It is available in the Official Debian repositories. So install it with command:

sudo apt-get install phpmyadmin

Select the web server that should be automatically configured to run phpMyAdmin.

By default, nginx will not be displayed here. So, select apache or lighttpd, and we will configure phpmyadmin to work with nginx webserver later.

sk@server: ~_007

Select Yes to configure database for phpmyadmin with dbconfig-common.

sk@server: ~_008

Enter password of the database’s administrative user.

sk@server: ~_009

Enter MySQL application password phpmyadmin.

sk@server: ~_010

Re-enter the password.

sk@server: ~_011

The phpMyAdmin installation has been completed.

Create a symbolic link between phpMyAdmin and the website root directory. Here our website root document directory is /usr/share/nginx/html/.

sudo ln -s /usr/share/phpmyadmin/ /usr/share/nginx/html

Restart nginx server.

sudo systemctl restart nginx

Or

sudo service nginx restart

11. Access phpMyAdmin Web Console

Now you can access the phpmyadmin console by navigating to http://server-ip-address/phpmyadmin/ from your browser.

Enter your MySQL username and password which you have given in previous steps. In my case its “root” and “ubuntu”.

phpMyAdmin - Mozilla Firefox_003

You will be redirected to PhpMyAdmin main web interface. This is how my phpMyAdmin dashboard looks.

192.168.1.100 - localhost | phpMyAdmin 4.2.12deb2 - Mozilla Firefox_004

Now you can manage your MySQL databases from phpMyAdmin web interface.

That’s it. Your LEMP server is ready to use.

Cheers!

---------------------------------------------------------------------
How To Install LEMP Stack On Ubuntu 15.04

Chromixium – An Ubuntu Based Google’s Chrome OS Clone

$
0
0


Chrome OS+Ubuntu = Chromixium

Today, We have come up with an interesting news for both Ubuntu and Chrome OS users. Meet Chromixium – the new modern desktop operating system based on Ubuntu that has the functionality, look and feel of Google’s “Chrome OS”. Chromixium has brought the elegant simplicity of Chromebook and flexibility and stability of Ubuntu together. Chromixium puts the web front and center of the user experience. Web and Chrome apps work straight out of the browser to connect you to all your personal, work and education networks. Sign into Chromium to sync all your apps and bookmarks. When you are offline or when you need more power, you can install any number of applications for work or play, including LibreOffice, Skype, Steam and a whole lot more. Security updates are installed seamlessly and effortlessly in the background and will be supplied until 2019. You can install Chromixium in place of any existing operating system, or alongside Windows or Linux.

chromixium

Chromixium is based on a custom 32 bit Ubuntu 14.04 LTS and it supports wide range of laptops, desktops, network, video and sound cards. At present, there is no 64bit version available, however we can install and use Chromixium on both 32 and 64bit systems. Chromixium is very new to the Linux distro world, and the final stable Chromixium 1.0 version has just arrived few days ago.

Features

The current version includes the following specifications:

  • LTS (Long Term Support) Linux Kernel 3.13 ;
  • Chromium Web Browser ;
  • Pepperflash Plugin ;
  • Openbox window manager ;
  • Compton desktop compositor ;
  • Plank dock ;
  • LXPanel ;
  • Nautilus (Files) ;
  • GTK+3 applications.

Hardware Requirements

Chromixium is very light weight distro similar to Lubuntu.

The minimum hardware requirements are:

  • 1GHZ Processor, Intel/AMD (dual core preferred) ;
  • 512MB RAM (1GB preferred) ;
  • 4GB hard disk space (8GB prefered) ;
  • 1GB USB device or DVD-R/RW ;
  • Video graphics capable of 800×600 resolution (1024×600 or better preferred) ;
  • Wired (ethernet) or wireless (WiFi) Internet access ;
  • A computer that is capable of booting from a DVD or USB ;
  • Intel hardware is generally better supported ‘out-of-the-box’ on Linux-based operating systems.

Why Chromixium?

The answer is very simple. We can have both Chrome OS and Ubuntu’s experience together.

As you may know, Chromebooks are the easy to use, cheap laptop PC’s specially designed for the Web. They are running with Chrome OS, a customized Linux distribution. Chromebooks are one of the fastest growing segment of PC sales since 2013.

Chrome OS comes pre-installed with Chromebooks, and you can’t download or buy Chrome OS to use it on other devices. This is why Chromixium has born. The Chromixium desktop is built on top of the Ubuntu and imitates the look, functionality, and feel of the Chrome OS. Unlike Chrome OS, Chromixium will run on any computer. So anybody can turn an ordinary desktop in to Chromebook in a couple of minutes using Chromixium.

Since, it is based on Ubuntu, you can also install all conventional applications from Ubuntu or third party repositories, and also other web apps from chrome store. Additionally, you can even run Windows related applications using Wine in Chromixium.

Install Chromixium

Download the latest stable version from here. Chromixium is available as installable live ISO. You can create either a bootable DVD or USB drive.

Start the live session.

Chromixium 1.0 [Running] - Oracle VM VirtualBox_001

The live user account is “user” with the password “user”. This account has sudo privileges and is needed to launch the installer.

Chromixium 1.0 [Running] - Oracle VM VirtualBox_002

I am quite surprised while playing in live session. Chromixium is really fast. And, the desktop is clean, minimal, elegant, and exactly looks like Chrome OS.

Chromixium 1.0 [Running] - Oracle VM VirtualBox_003

Click on the installer icon on the dock (green-arrows) or right-click on the desktop and go to Applications–>System–>Chromixium Installer.

Chromixium 1.0 [Running] - Oracle VM VirtualBox_007

Enter the password “user” and the installer will open.

Accept the License agreement.

Chromixium 1.0 [Running] - Oracle VM VirtualBox_001

Next, you’ll be asked to select the list of available partitioning method. Here, I will go with Automatic partition method.

Chromixium 1.0 [Running] - Oracle VM VirtualBox_002

Click Forward.

Chromixium 1.0 [Running] - Oracle VM VirtualBox_003

Make sure your hard drive doesn’t has any important files. And click Yes to continue.

Chromixium 1.0 [Running] - Oracle VM VirtualBox_004

Click Forward.

Chromixium 1.0 [Running] - Oracle VM VirtualBox_005

Enter the new user details.

Chromixium 1.0 [Running] - Oracle VM VirtualBox_006

Choose the last partition with ext4 an ext4 installation.

Click in the Mount Point box and select “/” from the drop-down list.

Then, Click on the green arrow to save the partition settings. If the partition is not empty then tick the Format box.

Finally click Next to continue the installation.

Chromixium 1.0 [Running] - Oracle VM VirtualBox_007

Finally, click Start to install the live system.

Chromixium 1.0 [Running] - Oracle VM VirtualBox_008

This will take few minutes. Make sure you have connected to the internet.

Chromixium 1.0 [Running] - Oracle VM VirtualBox_009

Installation is completed. Click Ok to continue.

Chromixium 1.0 [Running] - Oracle VM VirtualBox_010

Next, the installer will ask you to set the Timezone. Click Yes to change the Timezone, or else click No to keep the defaults.

Chromixium 1.0 [Running] - Oracle VM VirtualBox_011

Select the Geographical area, for example Asia in my case.

Chromixium 1.0 [Running] - Oracle VM VirtualBox_012

Select the correct Timezone (Kolkata in my case).

Chromixium 1.0 [Running] - Oracle VM VirtualBox_013

Next we have to configure keymap. I go with default kepmap settings which is US, so selected Don’t touch keymap option. If you want to configure different keymap, ‘select Keymap from full list’ option and choose the required keymap.

Select Keyboard model.

Chromixium 1.0 [Running] - Oracle VM VirtualBox_016

Select ‘Country of Origin for the keyboard’ option.

Chromixium 1.0 [Running] - Oracle VM VirtualBox_018

Select Keyboard layout.

Chromixium 1.0 [Running] - Oracle VM VirtualBox_019

Click Forward.

Chromixium 1.0 [Running] - Oracle VM VirtualBox_020

If you want to install additional language packs, select them from the list. Here, I want to install Indian language pack.

Chromixium 1.0 [Running] - Oracle VM VirtualBox_021

Finally, remove the installation medium, and click Reboot.

Chromixium 1.0 [Running] - Oracle VM VirtualBox_022

unknown_023

Now, log in with your new user.

Chromixium 1.0 [Running] - Oracle VM VirtualBox_024

Here is the Chromixium’s default desktop.

desktop 1_001

Post Installation

First, update your system.

Open Terminal, and run the following command:

(To open Terminal, right click anywhere on the Desktop and go to Applications -> Accessories -> Terminal).

sudo apt-get update && sudo apt-get upgrade

Then, sign into your Google account to keep your bookmarks, extensions, chrome applications synced across devices, such as Android mobiles, tablets, Linux, Windows, and Mac computers.

To log in to Google account, click on the Chromium browser icon in the Plank Dock.

Then, click on the ‘Customize and Control’ icon(the 3 bars icon near Bookmarks button) on the top right corner of Chromium browser.

Click on the ‘Sign in to Chromium’.

Menu_007

Enter your Gmail user name and password.

Chromium - Chromium_008

Now, the bookmarks will appear in the browser and chrome apps will appear in the launcher.

Chromixium First look

As I said before, Chromixium is an elegant, light weight, and fast operating system. It quite resembles the Chrome OS in look, functionality and feel.

To access the list of available applications, just right click on the Desktop. There you go. The applications are grouped and arranged in different categories, such as Settings, Accessories, Graphics, Internet, Multimedia, System. Each category has plenty of basic applications.

Chromixium 1.0 [Running] - Oracle VM VirtualBox_004

Also, the Chromixium has a plank dock in the bottom that contains the shortcuts to launch various applications like Chromixium App launcher, Chromium web browser, Gmail, Youtube, Google Drive, File manager etc.

From the Chromixium App launcher, you can access various Google cloud applications, such as Google Docs, Chrome web store etc. If you want to install a web app, just enter the name in search box.

Chromixium 1.0 [Running] - Oracle VM VirtualBox_005

If you want to install a web app, for example Telegram, just enter the app name in the Chromixium App launcher’s search box and select Add to Chromium.

Unnamed Window_003

The Chrome web store will automatically open. Just click the ‘Add to Chrome’ button to install the web app.

Selection_004

After installing the new web app(Ex.Telegram), start using it from Chromixium App Launcher.

To install normal Ubuntu conventional applications, open Terminal, and run:

sudo apt-get install <package-name>

If you are dual booting along side Windows or other OS, you will probably find that Chromium has over written their bootloaders. So, you may not see the list of boot choices from the Boot menu.

To fix this issue, run:

sudo update-grub2

That’s it. Next you reboot, you should now see the list of installed operating system’s entries will be found in the boot menu.

Chromixium Control Panel

The Chromixium Control Panel is the place where we’re doing all kind of administration tasks, customization, software installation and removal etc.

Chromixium 1.0 [Running] - Oracle VM VirtualBox_006

Another notable feature (an important one) is Systemback. Chromixium comes with Systemback preinstalled. Systemback is an open source, system backup and restore application. Using Systemback, we can easily create backups of system and users configuration files. In case of problems, we can easily restore the previous state of the system. There are extra features like system copying, system installation and Live system creation.

To know more about Systemback, refer the following link.

Conclusion

Chromixium is the quite surprising new comer to the Linux world. It is more attractive, modern and functional operating system with plenty of good features. Chromixium combines the power of the web, with the power of the Ubuntu and GNU/Linux desktop ecosystem. If you want to taste the Chrome OS and Ubuntu experience together, then this is going to be a best choice. Give it a try, you won’t be disappointed.

Cheers!

Source and reference: Chromixium website

---------------------------------------------------------------------
Chromixium – An Ubuntu Based Google’s Chrome OS Clone

How To Check The Progress Of Your Commands With The ‘cv’ Utility

$
0
0


As a Linux user you deal with many different commands during the work on a system such as copying file with the cp command, extracting .tar archives with the tar utility, moving files with the mv command and even convert and converting and copying files with the dd utility. The progress of a command is very important to you as you need to get your job done and also want to know how the utility is performing when using it.

Is my movie copied from Downloads to Desktop? Yes we know that the cp command can be used to copy a file, but this command does not show a progress bar for the user to know how the process of copying the file is going.

A very nice and easy solution to implement is the cv tool which is known as the Coreutils Viewer. It is very fast as it is coded in the C programming language. According to the official documentation on github this linux command looks for basic built-in commands currently running on your system such as mv, cp, dd, tar,unzip etc and displays the percentage of copied data.

Even though it is Linux specific a mac port is available.

How to install cv on your Linux system

Installing the cv utility on a Linux system is very easy. The only dependency you have to take care is the library ‘ncurses’ which comes installed by default on many Linux systems.

Ubuntu users can install ncurses using the following command.

sudo apt-get install ncurses-dev

If you use Fedora as your operating system then you will need to run the following command in order  to properly install the library ncurses on your system.

sudo yum install ncurses-devel

CentOS users can install ncurses through yum using the following command.

sudo yum install ncurses-devel

Once you have finished taking care of package dependencies just use the following command to download the source code from github.

wget https://github.com/Xfennec/cv/archive/master.zip

Then use the unzip utility to unzip the file like shown below.

unzip master.zip

Change directory using the cd command.

cd cv-master

Compile and install the cv utility using the two commands shown below.

sudo make
sudo make install

How to use the cv utility

Once the installation of the cv utility is finished you can launch it using the following command.

cv

Running the above command on my system shows the following output.

[ 2796] cat inactive/flushing/streaming/...
[ 2847] cat /home/oltjano/.xsession-errors 100.0% (1.8 MiB / 1.8 MiB)
[ 2848] cat /home/oltjano/.xsession-errors 100.0% (1.8 MiB / 1.8 MiB)

Now let me copy a movie from my MOVIE directory to Desktop and see what happens when running the cv utility.

cp -r "Troy/" /home/oltjano/Desktop

Running the cv command gives me information on the progress of copying.

[ 7545] cp /home/oltjano/Desktop/MOVIES/Troy/Troy.mp4 6.1% (176.7 MiB / 2.8 GiB)
[ 2847] cat /home/oltjano/.xsession-errors 100.0% (1.8 MiB / 1.8 MiB)
[ 2848] cat /home/oltjano/.xsession-errors 100.0% (1.8 MiB / 1.8 MiB)

Running cv again.

[ 7545] cp /home/oltjano/Desktop/MOVIES/Troy/Troy.mp4 17.8% (516.5 MiB / 2.8 GiB)
[ 2847] cat /home/oltjano/.xsession-errors 100.0% (1.8 MiB / 1.8 MiB)
[ 2848] cat /home/oltjano/.xsession-errors 100.0% (1.8 MiB / 1.8 MiB)

As you can see from the above output the cv utility is giving me information on copying process showing me the percentage of the file being copied and also the entire size of the file which is being copied. This is very useful when copying big files: for example when copying a movie and you want to see how much ‘time’ is going to take to get your movie where you want it to be.

There are many useful options you can use while working with the cv Linux utility. One of them is the option -w which gives the user information on the remaining time of an operation: for example this option is very useful when copying large files like we did above with our movie.

Let me run the following command now while copying a movie to my Desktop.

cv -w

The following output is displayed on my console.

[ 2796] cat inactive/flushing/streaming/...
[ 7642] cp /home/oltjano/Desktop/MOVIES/Troy/Troy.mp4 6.7% (195.5 MiB / 2.8 GiB) 1.2 MiB/s eta 0:36:07
[ 2847] cat /home/oltjano/.xsession-errors 100.0% (1.8 MiB / 1.8 MiB) 0/s
[ 2848] cat /home/oltjano/.xsession-errors 100.0% (1.8 MiB / 1.8 MiB) 0/s

Running it again.

[ 2796] cat inactive/flushing/streaming/...
[ 7642] cp /home/oltjano/Desktop/MOVIES/Troy/Troy.mp4 28.8% (835.1 MiB / 2.8 GiB) 14.5 MiB/s eta 0:02:22
[ 2847] cat /home/oltjano/.xsession-errors 100.0% (1.8 MiB / 1.8 MiB) 0/s
[ 2848] cat /home/oltjano/.xsession-errors 100.0% (1.8 MiB / 1.8 MiB) 0/s

Running the cv -w command again on my system tells me there is 31 seconds left for my file to get copied.

[ 2796] cat inactive/flushing/streaming/...
[ 7642] cp /home/oltjano/Desktop/MOVIES/Troy/Troy.mp4 54.2% (1.5 GiB / 2.8 GiB) 42.2 MiB/s eta 0:00:31
[ 2847] cat /home/oltjano/.xsession-errors 100.0% (1.8 MiB / 1.8 MiB) 0/s
[ 2848] cat /home/oltjano/.xsession-errors 100.0% (1.8 MiB / 1.8 MiB) 0/s

In case you want to run quiet without showing any message use the -q option. But if you want to show all warning/error messages use the -d opition.

For example a good usage of of the cv utility would be like shown below.

cv -wd

You can also loop while monitored processes are running by using the -m option like shown in the following example.

cv -m

The following is a screenshot which is taken on my system after running the above command.

If you want to monitor the progress of your core utilities and never stop then run the following command.

cv -M

The equivalent of the above command is shown below.

watch cv

A very useful combination of options that I like is shown below.

cv -wM

When running the above command I get an idea of a real progress bar.

The equivalent of the above combination is the following.

watch cv -w

There are many other different ways in which you can find the cv linux utility very useful while working on the command line. If you want to see how your download is progressing then use the following command.

watch cv -wc firefox

You can also look at your Web server activity by using the following command.

cv -c httpd

Get help

Getting help when learning and using a new utility is very important. To get help while learning how to use the cv uility run the following command.

cv -h

It will display the following output on your console.

 cv - Coreutils Viewer
 ---------------------
 Shows running coreutils basic commands and displays stats.
 Supported commands: cp mv dd tar gzip gunzip cat grep fgrep egrep cut sort xz md5sum sha1sum sha224sum sha256sum sha384sum sha512sum adb
 Usage: cv [-qdwmM] [-W secs] [-c command] [-p pid]
 -q --quiet hides all messages
 -d --debug shows all warning/error messages
 -w --wait estimate I/O throughput and ETA (slower display)
 -W --wait-delay secs wait 'secs' seconds for I/O estimation (implies -w, default=1.0)
 -m --monitor loop while monitored processes are still running
 -M --monitor-continous like monitor but never stop (similar to watch cv)
 -c --command cmd monitor only this command name (ex: firefox)
 -p --pid id monitor only this process ID (ex: `pidof firefox`)
 -v --version show program version and exit
 -h --help display this help and exit

To get more detailed information and examples use the man command like shown below.

man cv

Conclusion

Being a power Linux user takes alot of passion and work on the command line. Basically everything we do happens on the terminal from copying files to unzipping and extracting tar archives. In this detailed tutorial we took a look at the cv utility which can be used as a great tool when we need information on the progress of basic commands running on our system.

I always like to know the percentage of copied data when dealing with large files. And to be honest I deal with big files alot especially when watching movies on my Ubuntu laptop.

To show the percentage of copied data while using cp I just use the cv utility. Easy as that! Why don’t you install this great useful tool on your system and give it a try?

I bet you never regret trying it!

---------------------------------------------------------------------
How To Check The Progress Of Your Commands With The ‘cv’ Utility


How To Install Oracle Express In CentOS

$
0
0


Oracle Database XE is a great starter database for:

  • Developers working on Node.js, Python, PHP, Java, .NET, XML, and Open Source application
  • DBAs who need a free, starter database for training and deployment
  • Independent Software Vendors (ISVs) and hardware vendors who want a starter database to distribute free of charge
  • Educational institutions and students who need a free database for their curriculum

With Oracle Database XE, you can now develop and deploy applications with a powerful, proven, industry-leading infrastructure, and then upgrade when necessary without costly and complex migrations.It can be installed on any size host machine with any number of CPUs (one database per machine).

Oracle Express is available for MS Windows and GNU / Linux in 64-bit RPM package. We will describe below typical installation on a Centos server. The procedure is not complex.

Install Oracle Express

A prerequisite to comply, is to create a swap partition of at least 2x the amount of RAM on the machine.

Oracle Express is downloaded from its official website. Recovering a ZIP file containing the RPM package. Unzip it and install on CentOS package using the following command:

$ yum install unzip bc

Oracle needs the name of the server (hostname) is associated with an IP address. The simple solution is to edit the / etc / hosts of the server and add an entry with the name of the server and its IP address. We are now ready to start the installation. We unzip the archive and install rpm package using the following commands:

$ unzip oracle-xe-11.2.0-1.0.x86_64.rpm
$ rpm -ivh oracle-xe-11.2.0-1.0.x86_64.rpm

When the oracle-XE package is installed, we need to configure the database using the oracle-XE Service:

$ /etc/init.d/oracle-xe configure
Oracle Database 11g Express Edition Configuration
-------------------------------------------------
This will configure on-boot properties of Oracle Database 11g Express
Edition.  The following questions will determine whether the database should
be starting upon system boot, the ports it will use, and the passwords that
will be used for database accounts.  Press <enter> to accept the defaults.
Ctrl-C will abort.

Specify the HTTP port that will be used for Oracle Application Express [8080]:

Specify a port that will be used for the database listener [1521]:

Specify a password to be used for database accounts.  Note that the same
password will be used for SYS and SYSTEM.  Oracle recommends the use of
different passwords for each database account.  This can be done after
initial configuration:
Confirm the password:

Do you want Oracle Database 11g Express Edition to be started on boot (y/n) [y]:y

Starting Oracle Net Listener...Done
Configuring database...Done
Starting Oracle Database 11g Express Edition instance...Done
Installation completed successfully.</enter>

By leaving the defaults, you confirm the HTTP port, the port of Listener, you choose a password for SYS and SYSTEM accounts and confirm the starting base to boot the server.

At this stage, the base is started and available locally. The CentOS firewall is installed by default so you have to add rules to open remote access or more brutally disable the firewall with the command:

$ lokkit --disabled

Local access by SQLPlus requires changing the environment of Shell. We can avoid doing so at each stroke by adding the following to the end of the / etc / profile:

export ORACLE_SID=XE
export ORACLE_BASE=/u01/app/oracle
export ORACLE_HOME=$ORACLE_BASE/product/11.2.0/xe
export ORACLE_TERM=xterm
export NLS_LANG=FRENCH_FRANCE.utf8
export TNS_ADMIN=$ORACLE_HOME/network/admin
export ORA_NLS33=$ORACLE_HOME/ocommon/nls/admin/data
export LD_LIBRARY_PATH=$ORACLE_HOME/lib
export PATH=$ORACLE_HOME/bin:$PATH

Finally, you can create a normal user that will be used in our development since SQLPlus:

SQL> connect
SQL> create user joelafrite idenfied by <password-for-joe>;
SQL> grant CREATE SESSION, ALTER SESSION, CREATE DATABASE LINK, -
   CREATE MATERIALIZED VIEW, CREATE PROCEDURE, CREATE PUBLIC SYNONYM, -
   CREATE ROLE, CREATE SEQUENCE, CREATE SYNONYM, CREATE TABLE, -
   CREATE TRIGGER, CREATE TYPE, CREATE VIEW, UNLIMITED TABLESPACE -
   to joelafrite;

Unless you have a license for Oracle HTTP Server (OHS), your options are the embedded PLSQL Gateway (EPG) or Apex Listener.

The Application Express that is installed with Oracle 11g XE is configured using the EPG. While the EPG is simpler than Apex Listener, it can be painfully slow as of Apex 3.2. And Apex Listener, which is quite fast, adds an extra layer of complexity. So you will need to install an application server to run Apex Listener.

We have to run Apex Listener on both Tomcat (unsupported) as well as Oracle GlassFish 3.x (supported) and was not impressed with either.

---------------------------------------------------------------------
How To Install Oracle Express In CentOS

Installation Of FreeRADIUS On CentOS And Ubuntu

$
0
0


FreeRADIUS is a modular, high performance free RADIUS suite developed and distributed under the GNU General Public License on its second version. It is a free and open source tool. The FreeRADIUS Suite includes a RADIUS server, a BSD-licensed RADIUS client library, a PAM library, an Apache module, and numerous additional RADIUS related utilities and development libraries

In this article we will show you how you can install and setup the FreeReadius tool in a centOS and Ubuntu systems.

Features of FreeRadius

FreeRADIUS is the most popular open source RADIUS server and the most widely deployed RADIUS server in the world. It supports all common authentication protocols, and the server comes with a PHP-based web user administration tool called dialupadmin.

Modules included with the server core support LDAP, MySQL, PostgreSQL, Oracle, and many other databases. It supports all popular EAP authentication types, including PEAP and EAP-TTLS.

FreeRADIUS is also the only open source RADIUS server to support virtual servers. The use of virtual servers means that complex implementations are simplified and ongoing support and maintenance costs for network administrators are greatly reduced.

Installation of FreeRadius

For the installation we will not use the same command with centOS and Ubuntu. So with CentOS 5 we use the following command:

yum install freeradius2 freeradius2-mysql freeradius2-utils mysql-server –y

with centOS 6 we use the following command:

yum install freeradius freeradius-mysql freeradius-utils mysql-server -y

While with Ubuntu we use the following command:

apt-get install freeradius freeradius-mysql freeradius-utils mysql-server

then we will setup the MySQL by using the following commands:

For CentOS:
service mysqld start
For Ubuntu:
service mysql start

And to set a new password and the security settings we will use the following commands:

/usr/bin/mysql_secure_installation

Generally, the common issues are from the cPanel servers, so it is important to check the knowledge base to fix the problems coming from cPanel servers. And to create the Radius database we will use the following command:

mysql

Or

mysql -uroot -p

Later you will be asked to give your MySQL root password, so enter your password and now use the following command to create the database:

CREATE DATABASE radius;
GRANT ALL PRIVILEGES ON radius.* TO radius@localhost IDENTIFIED BY "radpass";
flush privileges;

Now after making the installation, we will import the tables for radius using the following command:

mysql> use radius;
For CentOS:
SOURCE /etc/raddb/sql/mysql/schema.sql
For Ubuntu :
SOURCE /etc/freeradius/sql/mysql/schema.sql

And don’t forget to exit using the following command:

exit

Now open up using the following commands:

For CentOS:
 /etc/raddb/sql.conf
 For Ubuntu:
 /etc/freeradius/sql.conf

You have to enter your mysql database details already created, you find in following command an example:

# Connection info:
       server = "localhost"
       #port = 3306 login = "radius"
       password = "mypassword"

       # Database table configuration for everything except Oracle
       radius_db = "radius"

Then you have to check that in /etc/raddb/radiusd.conf directory the following line is uncommented:

$INCLUDE sql.conf

Then edit the /etc/raddb/sites-available/default and uncomment the line containing ‘sql’ in theauthorize{} section and ‘sql’ in the accounting {} section, also uncomment ‘sql’ under session{}.

Also, edit the /etc/raddb/sites-available/inner-tunnel and uncomment the line containing ‘sql’ under “authorize {}” and under session {}

Open the file /etc/raddb/clients.conf enter your secret fo example:

Change:

secret = testing123

To something like this that will be more secure:

secret = anismolkkijbsn123365

Now we will restart Radius and check if it is working:

For CentOS:
service radiusd restart
service radiusd stop
For Ubuntu:
service freeradius restart 
service freeradius stop

And to add clients (External VPN Servers) you have to use the following command:

For CentOS:
 /etc/raddb/clients.conf
For  Ubuntu:
 /etc/freeradius/clients.conf

under the following command:

# coa_server = coa
}

Add the following line:

  client VPN_SERVER_IP { 
              secret          = YOUR SECRET 
              shortname       = yourVPN 
       nastype        = other
   }

To give access to authenticate for external servers on your FreeRADIUS, you have to do a redondant task to make this. So you have to add a client or change a value in the config files. You will do as fellow:

For CentOS:
service radiusd restart
For Ubuntu:
service freeradius restart

Then add a test user to the radius database, so you have to login to your mysql radius database using the following command:

mysql -uroot –pyourrootpass

Later switch to the radius database using the following command:

use radius;

Then:

mysql> INSERT INTO `radcheck` (`id`, `username`, `attribute`, `op`, `value`) VALUE

So test the test user with radtest as fellow:

radtest test test 127.0.0.1 0 mysecret

You will be convinced that you installation is working well if you see something like: “rad_recv: Access-Accept”

And if you have any problems with FreeRADIUS you can run FreeRADIUS in debug mode to fix any issues, you have just to do as fellow:

For CentOS:
service radiusd stop
radiusd –x
For Ubuntu:
service freeradius stop
freeradius –x

Every thing is fine now we will open the file /etc/raddb/sql.conf on CentOS and /etc/freeradius/sql.conf on Ubuntu and uncomment the following line:

#readclients = yes

To

readclients = yes

Conclusion:

Your FreeRadius now is ready for being used. This tool is widely used for Enterprise Wi-Fi and IEEE 802.1X network security, particularly in the academic community, including eduroam.

---------------------------------------------------------------------
Installation Of FreeRADIUS On CentOS And Ubuntu

How To Manage Multiple SSH Sessions Using Cluster SSH And PAC Manager

$
0
0


About SSH

We, all, know what is SSH, right? SSH, stands for Secure Shell (sometimes known as Secure Socket Shell), is a Cryptographic Protocol that can be used to access remote server and VPS from your local systems. We don’t have to be near to the physical machine to perform commands in the remote system’s Terminal. As it name says, SSH is completely secure and It encrypts all traffic between remote and local systems. SSH is actually a suite of three utilities namely slogin, ssh, and scp. These three utilities are the secure replacement of the earlier UNIX utilities namely rlogin, rsh, and rcp. SSH will help you to get the virtual Terminal environment of the remote systems.

Manage Multiple SSH Sessions

In this tutorial, we will see how to manage multiple ssh sessions. Sometimes, you may want to access multiple user’s Terminal of a remote system at the same time, or you may want to access multiple remote system’s Terminal using SSH. How can you do that? No worries.

There are few tools comes in handy for this purpose. In this tutorial, we are going to discuss about the following tools.

  1. Cluster SSH ;
  2. PAC Manager.

Prerequisites

Install openSSH on your Remote systems

Make sure you have installed openssh software on your remote systems.

To install openSSH on DEB based systems, run:

sudo apt-get install openssh-server

On RPM based systems, run:

yum install openssh-server

Start sshd service and make it to start automatically on every reboot.

On RHEL 6.x based systems:

service sshd start
chkconfig sshd on

On RHEL 7 systems:

systemctl start sshd
systemctl enable sshd

1. Cluster SSH

Cluster SSH, also known as cssh, is a Cluster administration tool via SSH. It is used to control number of xterm windows via a single graphical console window to allow commands to be interactively run on multiple servers over an SSH connection. If you’re are a Linux administrator managing hundreds of machines, you may have chances to enter same command on many servers. To do that, you have to login to each server and should enter the command on each server. It is such a time consuming process. Using ClusterSSH, the commands typed in the administration console window will replicate to all servers. In simple words it is an excellent tool for making the same change on multiple servers at the same time.

Install Cluster SSH on your Local system

On Ubuntu/Debian:

sudo apt-get install clusterssh

On RHEL/CentOS 6.x:

cssh is not available in official repositories. So add EPEL repository and then install clusterssh.

To add EPEL repository, enter the following command:

yum install epel-release

Now install ClusterSSH:

yum install clusterssh -y

Add Hosts

Here I am going to manage two remote servers, one is Ubuntu 15.04 server and the other is CentOS 6.6 server from my Lubuntu 14.04 desktop. IP Address address of both servers are 192.168.1.100 and 192.168.1.101 respectively.

Launch Cssh console either from Unity or Dash. The default interface of Cssh will look like below.

CSSH [0]_001

Let us now add the remote hosts. To do that, go to Hosts -> Add Host(s) or Cluster(s) from the main menu. Enter the IP address of the remote host.

Add Host(s) or Cluster(s)_003

Type Yes and press Enter to add the remote hosts ssh keys to your local system.

CSSH: 192.168.1.100_004

Finally, enter the password.

CSSH: 192.168.1.100_005

That’s it. We have successfully connected to the Ubuntu 14.04 system (192.168.1.100).

CSSH: 192.168.1.100_006

Similarly, add as many as remote hosts you want.

Here is my another remote host running with CentOS 6.5 (192.168.1.101).

CSSH: 192.168.1.101_007

But, wait? We’re supposed to manage multiple SSH sessions at once, right? Yes. Now let us create cluster which contains more than one system.

Add Cluster(s)

Create a Cluster SSH config file and define the clusters.

Here, I am going to use my cluster name as testcluster.

First create a cluster config file as shown below:

sudo nano /etc/clusters

Add the following contents:

clusters = testcluster
testcluster = 192.168.1.100 192.168.1.101

Save and exit the file.

As I mentioned above, testcluster is my cluster name. 192.168.1.100 is my Ubuntu 14.04 server’s IP address and 192.168.1.101 is my CentOS 6 server’s IP address. Alternatively, You can use hostnames instead of IP address.

Open up your terminal and run the following command.

cssh -l sk testcluster

Here sk is the user name of my Ubuntu and centos remote server.

Note: You must allow the port 22 through Firewall/Router to access the servers from any remote machines.

The terminal windows of all servers will automatically open. Refer the following screenshot.

desktop 2_001

Enter the password on both server’s SSH sessions. Now you will see that two servers are logged-in.

desktop 2_002

Also, you can launch each systems SSH sessions using hostname or IP address instead of cluster name as shown below:

cssh -l sk 192.168.1.100 192.168.1.101

Usage

The small window called CSSH(2) is the administration console window of ClusterSSH. The commands typed in the administration console will reflect on both servers.

CSSH [2]_003

For example, let us type hostname in the CSSH’s console and see what happens.

desktop 2_004

As you see in the above screenshot, the command hostname is performed automatically on both servers at the same time and displays the result.

A word of caution: Beware while using CSSH cluster. If you type any wrong commands or inappropriate commands in CSSH admin console, it will perform on all servers simultaneously and will lead you into trouble. Double check the commands before hit enter. Enjoy!

2. PAC Manager

PAC, Perl Auto Connector, is a Perl/GTK replacement for SecureCRT/PuTTY etc.,(Linux SSH/Telnet). It provides a GUI to configure connections, users, passwords, EXPECT regular expressions, macros etc. This is free software, licensed under GNU’s GLPv3 version.

Features

  • Unique Linux application to implement SecureCRT’s functionality ;
  • Remote and local macros ;
  • Remotely send commands with EXPECT regexp ;
  • Cluster connections!! Connections on same cluster share keystrokes ;
  • Scripting support ;
  • Serial/tty connection via cu/tip/remote-tty connections ;
  • Pre/post connections local executions ;
  • TABS OR WINDOWS for connections ;
  • Proxy support ;
  • KeePass integration ;
  • Wake On LAN capabilities ;
  • Possibility to split terminals in the same TAB ;
  • Quick access to configured connections via tray menu icon ;
  • Best Linux GUI for SSH, Telnet, SFTP, rdesktop, VNC, cu, remote-tty, FTP, etc. ;
  • DEB, RPM & .TAR.GZ packages available ;
  • FREE (GNU GPLv3).

Install PAC Manager On Ubuntu/Debian

Download the latest version from www.sourceforge.net:

wget http://sourceforge.net/projects/pacmanager/files/pac-4.0/pac-4.5.5-all.deb

Install it using command:

sudo apt-get install gdebi
sudo gdebi pac-4.5.5-all.deb

Install PAC Manager On RHEL/CentOS

On 32bit systems:

wget http://sourceforge.net/projects/pacmanager/files/pac-4.0/pac-4.5.5-2.i386.rpm

On 64bit systems:

wget http://sourceforge.net/projects/pacmanager/files/pac-4.0/pac-4.5.5-2.x86_64.rpm

Then, install PAC manager using command:

rpm -ivh pac-4.5.5-2*.rpm

PAC manager has been installed now. Next, let us see how to see how it works.

Launch PAC

Open up PAC from your Dash or Menu. The main window of PAC manager will look like below.

PAC (v4.5.5)_006

Add Remote Hosts

First, let us see how to access a single remote host.

Click on the New Connection icon in the top left of PAC main window.

PAC (v4.5.5)_006

Enter the Name and Title for the new connection.

PAC (v4.5.5) : Enter data_007

In the next window, select the connection method from the Method drop down box. There are many connection methods available such as FTP, SFTP, SSH, RDP, RDESKTOP and VNC etc. The default method is SSH. Then enter the ip address, user name and password of the remote host. Finally, click on Save and Close button.

Editing 'Ubuntu 15.04 Server' : PAC (v4.5.5)_008

If you want to run the remote user with sudo permission, check the ‘sudo’ box under the connection method drop down box.

Now the remote node will be added under Connections tab in the PAC main window.

Connect to Remote Host

Select the remote node that you want to access and click Connect.

PAC (v4.5.5)_009

Voila! Now, you will able to connect to your remote host.

PAC (v4.5.5)_010

As you see in the above screenshot, I can able to access my Ubuntu 15.04 server from PAC Manager. Similarly, you can add and access as many remote hosts you want. All remote hosts will be listed under ‘Connections’ section in the left side of the PAC main window.

The below screenshots shows my remote Ubuntu and CentOS server’s SSH sessions.

PAC (v4.5.5)_012

Create Cluster(s)

Using Cluster, We can combine two or more systems, and perform same command on multiple SSH sessions at the same time.

First, connect to remote systems that you want to add to the Cluster.

Let us create a new Cluster. To create a Cluster, click on the Clusters button in the lower left corner of PAC window.

Selection_013

The following window will appear. Click Add button.

Cluster Administration : PAC (v4.5.5)_016

Enter Cluster name.

PAC (v4.5.5) : Enter data_015

Select the remote hosts and click Add to Cluster button.

Cluster Administration : PAC (v4.5.5)_017

Now, our remote hosts are joined to the Cluster. Click Ok to save.

Cluster Administration : PAC (v4.5.5)_018

Now, enter any command in any remote host’s SSH session. The same command will be replicated to all systems in the Cluster. For example, I type ‘ifconfig’ command in the Ubuntu’s Terminal, and the same command is performed automatically in the CentOS 6.6 server.

PAC (v4.5.5)_002

Be careful while entering commands in the Cluster. In case, you enter a wrong command every systems will affect in the Cluster.

Create Groups

Click on the New Group icon in the top left corner.

Selection_003

Enter Group name.

PAC (v4.5.5) : Enter data_004

The newly created Group will be listed under Connections section. Right click on the group and select ‘Add Connection’.

Menu_005

Enter Name for the new node.

PAC (v4.5.5) : Enter data_007

Enter the node IP address, user name and password. Finally, click Save and Close button.

Editing 'Ubuntu 15.04' : PAC (v4.5.5)_008

Similarly, you can add as many as nodes you want into the group.

Selection_009

Now, select a node in the group and click Connect button to start the new SSH session. Also, you can right click on the Group name and select ‘Execute in New Cluster’ option to start all nodes SSH sessions at once.

Menu_010

Enter the Cluster name and click OK.

PAC (v4.5.5) : Enter data_011

Now, the SSH sessions of all nodes in the group will automatically open.

PAC (v4.5.5)_012

As you may already know, if you enter a command in any SSH sessions, the command will execute on all nodes in the Cluster. So beware!

Start Multiple SSH instances

Another cool feature is we can open multiple SSH instances(up to 9) of our remote hosts.

To start the multiple instances, right click on the remote node and select ‘Start’. From the sub menu of ‘Start’ item, choose the number of instances you want to open.

Menu_013

As you see in the below screenshot, I am running three SSH sessions of CentOS server.

PAC (v4.5.5)_014

Multi-protocol support

PAC Manager is not just to access remote server’s Terminal. It has some more advanced features.

It supports multi-protocols such as FTP, SFTP, redesktop, MOSH, VNC, WEBDAV, and many. For example, to access your remote server using FTP protocol do the following.

First make sure you have installed FTP server in your remote system. Refer the following link to install FTP server in RPM based systems.

Then, right click on your Remote node under the Connections section and select ‘Edit Connection’.

The following window will appear. From the ‘Method’ drop down box, select the FTP protocol. Then, click Save and Close button.

Editing 'CentOS 6.6 server' : PAC (v4.5.5)_017

Now, click the Connect button. That’s it. We have successfully connected to the remote node using FTP.

PAC (v4.5.5)_018

We can prevent from accidental changes such as edit, change Rename or delete remote hosts.

To do that, right click on the remote node and select ‘Protect’ option.

Menu_019

Conclusion

These tools are ideal for one who manage large number of remote systems. Among these two tools, PAC Manager has lot of features than Cluster SSH. PAC manager has multi-protocol, proxy support, KeepassX, auto save sessions support and many. These tools are highly recommended and useful for day to day activities to a System Administrator.

Cheers!

---------------------------------------------------------------------
How To Manage Multiple SSH Sessions Using Cluster SSH And PAC Manager

Camicri Cube Server: An Offline And Portable Package Manager For Debian, Ubuntu, And Linux Mint

$
0
0


About Camicri Cube Server

As we all know, we must have an Internet connection in our Linux system for downloading and installing applications, right? Yes of course! But wait, what are you going to do if you don’t have an Internet connection, or the Internet connection is dead slow? This will be definitely a headache while downloading and installing packages in your Linux desktop using slow Internet connection.

Of course, you can manually download the applications from other Internet enabled system, transfer the downloaded applications to a CD or removable devices, and install them in your Offline system (The System with no or slow Internet connection). But, the problem is many Linux users do not exactly know what are the required dependencies for the applications that they wanted to install. What could you do if you have such situation? Leave all the worries now. Today, we introduce an offline package manager called Camicri Cube Server.

Using Camicri Cube Server, we can download any packages along with all required dependencies from an Internet connected system (Windows or Linux), and we can install the downloaded packages in the offline computer. Sounds good? Yes, It is! Cube Server is a package manager just like Synaptic and Ubuntu Software Center, but it is portable package manager.

Camicri Cube Server (2015) is the successor of Camicri Cube 1.0 (2013). Compared to Cube 1.0, which is written in C# programming language, Cube Server is written in Vala, an open source programming language by GNOME community. It doesn’t use any GUI toolkits ( GTK or QT ). Cube Server uses HTML, CSS and Javascript, to be loaded by a web browser, as a front end UI. It will run on both Windows and Linux platforms (Cross platform). The main goal of this project is to enable the offline Linux users to download and install Linux applications easily.

How It works?

Cube Server will collect the complete details of your offline computer, such as OS details, installed applications and more. Then, we will copy the cube application using any USB thumb drive, and use it on the other Internet connected system, and download the list of applications you want to install. After downloading all required packages, head back to your offline computer and start installing the downloaded packages. Cube Server is developed and maintained by Jake R. Capangpangan, a Computer Science graduate, and currently working as Software Design Engineer in Philippines.

Installation

For the purpose of this tutorial, we will be using two Linux systems.

  • Online System (Internet connected) – Lubuntu 14.04 LTS Desktop
  • Offline System (No Internet) – Ubuntu 15.04 Desktop

Usage

1. Download And Install Cube Server package In Online System (Ubuntu 14.04)

Download Cube Server latest version from the official Launchpad Page. Make sure you have downloaded the correct version depending upon your offline computer architecture. As I use 64 bit system, I downloaded the 64bit version.

wget https://launchpad.net/cube-server/trunk/0.1/+download/cube-server-installer-0.1.91_Linux64bit.zip

Extract the cube-server zip file.

unzip cube-server-installer-0.1.91_Linux64bit.zip

Now, install it using command:

sudo ./cube-server-installer install

Sample output:

Camicri Cube Server Installer ( cube-server 0.91 )
Created by Jake R. Capangpangan <camicrisystems@gmail.com>

This will install cube-server. Press enter key to proceed...
Installing cube system...
gtk-update-icon-cache: Cache file created successfully.
Installation finished.

To remove cube-server, run:

sudo ./cube-server-installer remove

Now, Copy the ‘cube-server-installer.zip’ file to any USB drives and go to your Offline system. Because, we don’t have Internet connection to download and install cube-server in our offline machine.

Note:

It is also available now to download via apt-get by entering the following commands to the terminal.

sudo add-apt-repository ppa:camicrisystems/daily
sudo apt-get update 
sudo apt-get install cube-server

2. Steps needs to be done In Offline system(Ubuntu 15.04)

Plug your USB drive and copy the cube-server-installer zip file to any location of your choice.

Extract the cube-server zip file.

unzip cube-server-installer-0.1.91_Linux64bit.zip

Now, install it using command:

sudo ./cube-server-installer install

Sample output:

Camicri Cube Server Installer ( cube-server 0.91 )
Created by Jake R. Capangpangan <camicrisystems@gmail.com>

This will install cube-server. Press enter key to proceed...
Installing cube system...
gtk-update-icon-cache: Cache file created successfully.
Installation finished.

To remove cube-server, run:

sudo ./cube-server-installer remove

Now, Launch Cube Server either from Unity or Menu.

Menu_002

Cube Server will open in a new browser window.

Enter the Project name (Ex.sk) and click Create. As I mentioned above, this will create a new project with complete details of your system such as OS details, list of installed applications, list of repositories etc.

Camicri Cube Server (0.1.91) - Mozilla Firefox_004

After a few seconds, you will see a new message that says: ‘Project sk is created’. Now, click the Open button.

Selection_005

Cube Server will scan all your system’s repositories and list of the available packages.

Camicri Cube Server (0.1.91) - Mozilla Firefox_008

Since, we don’t have Internet connection, we can’t install any applications at present. So, click on the Quit button on the top right corner.

That’s it. Now the new project has been created. The new project will be saved in cube-system folder in your home directory.

Go to your cube-system/projects directory and copy the newly created project (In my case it’s sk) to your flash drive.

Selection_009

Now, go back again to the online system (Lubuntu 14.04).

3. Steps needs to be done in Online system (Lubuntu 14.04 LTS)

The following steps needs to be done on the Internet connected system. In our case, It’s Lubuntu 14.04.

Plug in the flash drive and copy the project(Ex. sk folder in the flash drive) to the projects directory in the cube-system directory.

Selection_003

As you see, I copied the ‘sk’ folder to the cube-system/projectss in my online system.

Now, Launch Cube Server either from Unity Dash or Menu or Terminal.

Select your project and click the Open button.

Camicri Cube Server (0.1.91) - Mozilla Firefox_004

The following window will open.

Camicri Cube Server (0.1.91) - Mozilla Firefox_005

Now, it is time to download new repositories, upgrade outdated installed applications and download new applications. First, let us download Repositories.

To do that, go to Download -> Download Repositories from the Main menu.

Click ‘Okay, do it’ button to continue.

Selection_006

The repositories will be downloaded now.

Selection_007

A ‘Update System’ notice will appear. You must do this when you go back to your original computer, so that your computer will know the latest list also. Finally, click ‘Okay’ to close this dialogue box.

Selection_008

After downloading repositories, we need to download applications with available updates. Check the ‘Main List’ to find the list of available applications with updates. Click the ‘Upgradable Package’ under the Main List to show all applications that needs to be upgraded.

As you see below, we have 32 outdated packages that needs to be updated.

Camicri Cube Server (0.1.91) - Mozilla Firefox_009

To download applications, click ‘Mark -> Mark All Upgradable Package’ from the Navigation bar.

Selection_010

In the navigation bar, click ‘Download -> Download All Marked’ to download all marked applications.

Selection_011

Finally, click ‘Okay’ to download all application updates.

Selection_012

Cube Server will start to download all updates.

Selection_013

We downloaded all updates now.

What we have done so far is we just download the updates for the existing installed applications. Now, let us see how to download a new application, so that we can install it in our offline system later.

Downloading New Applications

For example, here I am going to download the apache2 Package.

To do that click on the Available Packages under the Main List. Enter the name of the package in the search box, and hit Search button.

Camicri Cube Server (0.1.91) - Mozilla Firefox_016

The Cube Server will fetch the details of the application that you are looking for. Hit the “Download” button.

Selection_017

Cube will start to download the apache2 package with all its dependencies. If you want to search and download more packages, click Mark -> Mark All Downloaded Packages from the navigation bar. Then, search the required packages. You can mark as many as packages you want to install on your original computer. Once you marked all packages, click Download All marked button from the Navigation bar.

After updating repositories, outdated packages, and downloading new applications, close the Cube Server application. Then, copy the latest Projects folder from the cube-system directory to any flash drive or external hdd, and go back to your Offline system.

Selection_018

4. Steps needs to be done In Offline computer (Ubuntu 15.04)

Copy the latest ‘sk’ folder from your removable storage device (Flash drive) to the projects folder (Replacing the old
one).

Launch Cube Server either from Unity or Menu. Select your project and click Open.

Selection_010

Now, let us update our system. To do that, click System -> Update System from the Navigation bar.

Selection_011Click ‘Okay do it’ to continue.

Selection_012

After updating your system, it is time to install your downloaded packages.

You can do it in four different ways:

1. You can Install all downloaded packages:

To do that, Click Mark -> Mark All Downloaded Packages.

Selection_013

Then, click Install -> All Marked Packages.

Selection_014

2. Install only upgraded packages:

Click Mark -> Mark All Upgradable Packages.

Selection_015

Then, click Install -> All Marked Packages.

Selection_014

3. Install Only Satisfied Downloaded packages:

This will install only downloaded applications with complete package dependencies downloaded also.

Selection_016

4. Install Specific packages:

In this method, we install only a specific application. Go to Downloaded Packages under the Main List and select the application you want to install.

Camicri Cube Server (0.1.91) - Mozilla Firefox_017

I want to install all downloaded packages with updates, so I go with the first method. Click Okay to install all downloaded packages.

Selection_018

Enter the Authentication password to continue. The update process will take a while depending upon the total number of applications.

Terminal_019

That’s it.

Conclusion

Using Cube Server, you can download the required packages from any Internet connected system, and then you can install them in your offline computer without Internet connection. This is one of the best and useful tool ever I have used. Give it a try you won’t be disappointed.

In case, you have any questions or encountered a problem, contact the developer at camicrisystems@gmail.com.

Cheers!

---------------------------------------------------------------------
Camicri Cube Server: An Offline And Portable Package Manager For Debian, Ubuntu, And Linux Mint

Install And Configure OpenLDAP In Ubuntu 15.04 And Debian 8

$
0
0


About OpenLDAP

OpenLDAP is a free open source Light Weight Directory Access protocol developed by the OpenLDAP project. It is a platform independent protocol, so that it runs on all Linux/Unix like systems, Windows, AIX, Solaris and Android.

OpenLDAP includes:

  • slapd – stand-alone LDAP daemon (server)
  • libraries implementing the LDAP protocol, and
  • utilities, tools, and sample clients.

In this tutorial, let us see how to install and configure OpenLDAP in Ubuntu / Debian server. Due to lack of resources and time, I tested this how-to only in Ubuntu 15.04. However, the following steps should work on Debian 7/8 and previous versions of Ubuntu, including Ubuntu 14.10/14.04/13.10/13.04/12.10 etc. If you had any issues while installing OpenLDAP in other distros, feel free to let me know, I will check and update this how-to ASAP.

Well, let us begin to setup LDAP server.

Here is my LDAP server’s details:

Operating System : Ubuntu 15.04
Hostname         : server.unixmen.local
IP Address       : 192.168.1.100

Replace the above values with your own.

Install And Configure OpenLDAP

First let us see how to install OpenLDAP in DEB based systems.

1. Install OpenLDAP

Enter the following command in Terminal to install openldap.

Switch to root user:

sudo su

Or

su

Run the following command to install OpenLDAP.

apt-get install slapd ldap-utils

During the installation, you’ll be asked to set password for the LDAP admin account. Enter your admin password here.

root@server: -home-sk_001

Re-enter the password.

root@server: -home-sk_002

OpenLDAP is installed now. Let’s go to the configuration task.

2. Configure OpenLDAP

Edit “/etc/ldap/ldap.conf” file,

vi /etc/ldap/ldap.conf

Find, uncomment and replace ‘BASE’ and ‘ URI’ values with your domain name and IP Address as shown below.

#
# LDAP Defaults
#
# See ldap.conf(5) for details
# This file should be world readable but not world writable.
BASE    dc=unixmen,dc=local
URI     ldap://server.unixmen.local ldap://server.unixmen.local:666
#SIZELIMIT      12
#TIMELIMIT      15
#DEREF          never
# TLS certificates (needed for GnuTLS)
TLS_CACERT      /etc/ssl/certs/ca-certificates.crt

Save and close the file.

Next, we should reconfigure the slapd with the updated values.

dpkg-reconfigure slapd

The following screen should appear. Select “No” and press Enter.

root@server: -home-sk_003

Enter the DNS domain name.

root@server: -home-sk_004

Enter the Organization name (i.e your company name).

root@server: -home-sk_005

Enter the LDAP admin password which you created in the earlier step.

root@server: -home-sk_006

Re-enter the password.

root@server: -home-sk_007

Select the backend database. I go with defaults.

root@server: -home-sk_008

Select whether you want to delete the database automatically or keep it when slapd is removed. Here i want to keep my old database, hence i clicked No.

root@server: -home-sk_009

Select Yes to move old database.

root@server: -home-sk_010

Select No and Press Enter.

root@server: -home-sk_011

That’s it. We have successfully configured OpenLDAP. Let us go ahead and check whether it’s working or not.

Test LDAP Server

Run the following command to test OpenLDAP:

ldapsearch -x

Sample output:

# extended LDIF
#
# LDAPv3
# base <dc=unixmen,dc=local> (default) with scope subtree
# filter: (objectclass=*)
# requesting: ALL
#

# unixmen.local
dn: dc=unixmen,dc=local
objectClass: top
objectClass: dcObject
objectClass: organization
o: unixmen
dc: unixmen

# admin, unixmen.local
dn: cn=admin,dc=unixmen,dc=local
objectClass: simpleSecurityObject
objectClass: organizationalRole
cn: admin
description: LDAP administrator

# search result
search: 2
result: 0 Success

# numResponses: 3
# numEntries: 2

If you see the ‘Success’ message in your output, then Congratulations! LDAP Server is working!!

LDAP Server Administration

Administration of LDAP server in command mode is bit difficult. We can’t remember all LDAP commands. So, we will use an easier GUI administration tool called “phpldapadmin” to manage, configure, and administer LDAP server.

Install phpLDAPadmin

phpLDAPadmin is a web-based LDAP administration tool for managing your LDAP server. Using phpLDAPadmin, you can browse your LDAP tree, view LDAP schema, perform searches, create, delete, copy and edit LDAP entries. You can even copy entries between servers.

Enter the following command to install phpLDAPAdmin:

apt-get install phpldapadmin

Create a symbolic link for phpldapadmin directory.

ln -s /usr/share/phpldapadmin/ /var/www/html/phpldapadmin

On Ubuntu 14.10 and lower versions, run:

ln -s /usr/share/phpldapadmin/ /var/www/phpldapadmin

Edit “/etc/phpldapadmin/config.php” file,

vi /etc/phpldapadmin/config.php

Set the correct timezone. To do that, find and uncomment the following line and set your Timezone.

[...]
$config->custom->appearance['timezone'] = 'Asia/Kolkata';
[....]

Scroll down further and Replace the domain names with your own values.

To do that, Find “Define LDAP Servers” section in the config file and edit the following lines as shown below.

[...]
// Set your LDAP server name //
$servers->setValue('server','name','Unixmen LDAP Server');
[...]
// Set your LDAP server IP address // 
$servers->setValue('server','host','192.168.1.100');
[...]
// Set Server domain name //
$servers->setValue('server','base',array('dc=unixmen,dc=local'));
[...]
// Set Server domain name again//
$servers->setValue('login','bind_id','cn=admin,dc=unixmen,dc=local');
[...]

Restart the apache service.

systemctl restart apache2

On Ubuntu 14.10 and older versions, run:

service apache2 restart

Make sure that you have opened apache server port “80” and LDAP default port “389” in your firewall/router configuration.

ufw allow 80

Sample output:

Rules updated
Rules updated (v6)
ufw allow 389

Sample output:

Rules updated
Rules updated (v6)

The above steps are not necessary for Debian systems.

Test phpLDAPadmin

Open your web browser and navigate to: “http://192.168.1.100/phpldapadmin”.

The following screen should appear.

phpLDAPadmin (1.2.2) - - Mozilla Firefox_012

Click “login” on the left pane. Enter the LDAP admin password that you have created during OpenLDAP installation, and click “Authenticate”.

phpLDAPadmin (1.2.2) - - Mozilla Firefox_014

Now the main console screen of phpldapadmin will open.

You can see the LDAP domain “unixmen.local” and other details on the left.

phpLDAPadmin (1.2.2) - - Mozilla Firefox_015

From here, you can add additional objects, such as Organizational Unit, Users and groups etc.

Creating Objects

1. Create Organizational Unit(OU):

Lets create some sample objects from the phpldapadmin console. First, we will create an OU.

Click on the “+” sign near the line “dc=unixmen” and click “Create new entry here” link.

Selection_016

Scroll down and Select “Generic-Organizational Unit”.

Selection_017

Enter the name of the Organizational unit (Ex.sales) and Click “Create Object”.

Selection_018

Finally, click “Commit”.

Selection_019

You can find the newly created OU in main LDAP section on the left.

Selection_020

2. Create Group:

Click on the sales OU on the left pane and click on “Create a child entry” link.

phpLDAPadmin (1.2.2) - - Mozilla Firefox_021

In the next window, Select “Generic: Posix Group”.

Selection_022

Enter the name of the group and click Create Object button. For example, here i enter the group name as “sales-group”.

Selection_023

Click Commit to save changes.

Selection_024

Now you can see that the newly created group called “sales-group” under the sales OU.

Selection_025

3. Create User:

Now, let us create a new user under sales-group.

Click on the sales-group on the left.

Selection_025

Select Create a child entry link button.

Selection_026

In the next window, Select “Generic: User Account”.

Selection_027

Enter the user details such as common name, GID number, last name, Login shell, user password and user id etc., as shown in the below screen shot and click Create object. For example. here I am going to create a user called “kumar”.

Selection_028

And then Click “Commit” to save the changes.

Selection_029

Now the newly created user “kumar” will be found under “sales-group” object.

Selection_031

Also, you can verify the newly created objects are really existing with command:

ldapsearch -x

Sample output:

# extended LDIF
#
# LDAPv3
# base <dc=unixmen,dc=local> (default) with scope subtree
# filter: (objectclass=*)
# requesting: ALL
#

# unixmen.local
dn: dc=unixmen,dc=local
objectClass: top
objectClass: dcObject
objectClass: organization
o: unixmen
dc: unixmen

# admin, unixmen.local
dn: cn=admin,dc=unixmen,dc=local
objectClass: simpleSecurityObject
objectClass: organizationalRole
cn: admin
description: LDAP administrator

# sales, unixmen.local
dn: ou=sales,dc=unixmen,dc=local
objectClass: organizationalUnit
objectClass: top
ou: sales

# sales-group, sales, unixmen.local
dn: cn=sales-group,ou=sales,dc=unixmen,dc=local
gidNumber: 500
cn: sales-group
objectClass: posixGroup
objectClass: top

# kumar, sales-group, sales, unixmen.local
dn: cn=kumar,cn=sales-group,ou=sales,dc=unixmen,dc=local
cn:: IGt1bWFy
gidNumber: 500
homeDirectory: /home/users/kumar
sn: kumar
loginShell: /bin/sh
objectClass: inetOrgPerson
objectClass: posixAccount
objectClass: top
uidNumber: 1000
uid: kumar

# search result
search: 2
result: 0 Success

# numResponses: 6
# numEntries: 5

As you see in the above output, the new objects, namely ‘sales’, ‘sales-group’, and ‘kumar’ has been successfully created under the main LDAP domain. Similarly, you can create as many as objects you wanted.

Installing and configuring OpenLDAP in Debian and Ubuntu and derivatives is really easy and fun. Even a novice users can easily setup a working LDAP server within an hour.

Now OpenLDAP Server is ready to use.

I have successfully installed and configured LDAP server, what now? Please refer next article How To Configure Linux Clients To Authenticate Using OpenLDAP.

Good luck!

---------------------------------------------------------------------
Install And Configure OpenLDAP In Ubuntu 15.04 And Debian 8

Viewing all 1264 articles
Browse latest View live