Quantcast
Channel: Linux tutorials Archives | Unixmen
Viewing all 1264 articles
Browse latest View live

Picty: Managing Photos Made Easy

$
0
0

About Picty

Picty is a free, simple, yet powerful photo collection manager that will help you to manage your photos. It is designed around managing metadata and a lossless approach to image handling. Picty currently supports both online(web-based) and offline(local) collections. In local collections, the images will be stored in a local folder and it’s sub-folders. A database will be maintained to speed up the image queries in the user’s home folder. In online(web-based) collections, you can upload and share images through a web browser. Ant user with proper rights can share photos to any persons, and each user can have multiple collections open at once and collections can be shared by multiple users. There is a simple interface for transferring images between collections using a transfer plugin.

You can download any number of photos from your Camera or any devices. Also, Picty allows you to browse photo collections from your Camera before downloading it. Picty is lightweight application, and has snappy interface. It supports Linux, and Windows platforms.

Features

  • Supports big photo collections (20,000 plus images).
  • Open more than one collection at a time and transfer images between them.
  • Collections are:
    • Folders of images in your local file system.
    • Images on cameras, phones and other media devices.
    • Photo hosting services (Flickr currently supported).
  • picty does not “Import” photos into its own database, it simply provides an interface for accessing them wherever they are. To keep things snappy and to allow you to browse even if you are offline, picty maintains a cache of thumbnails and metadata.
  • Reads and writes metadata in industry standard formats Exif, IPTC and Xmp
  • Lossless approach:
    • picty writes all changes including image edits as metadata. e.g. an image crop is stored as any instruction, the original pixels remain in the file
    • Changes are stored in picty’s collection cache until you save your metadata changes to the images. You can easily revert unsaved changes that you don’t like.
  • Basic image editing:
    • Current support for basic image enhancements such as brightness, contrast, color, cropping, and straightening.
    • Improvements to those tools and other tools coming soon (red eye reduction, levels, curves, noise reduction)
  • Image tagging:
    • Use standard IPTC and Xmp keywords for image tags
    • A tag tree view lets you easily manage your tags and navigate your collection
  • Folder view:
    • Navigate the directory heirarchy of your image collection
  • Multi-monitor support
    • picty can be configured to let you browse your collection on one screen and view full screen images on another.
  • Customizable
    • Create launchers for external tools
    • Supports plugins – many of the current features (tagging and folder views, and all of the image editing tools) are provided by plugins
    • Written in python – batteries included!

Installation

1. Install from PPA

Picty developers has a PPA for Debian based distributions, like Ubuntu, to make the installation much easier.

To install in Ubuntu and derivatives, run:

sudo add-apt-repository ppa:damien-moore/ppa
sudo apt-get update
sudo apt-get install picty

2. Install from Source

Also, you can install it from Source files. First, install the following dependencies.

sudo apt-get install bzr python-pyinotify python-pyexiv2 python-gtk2 python-gnome2 dcraw python-osmgpsmap python-flickrapi

Then, get the latest version using command:

bzr branch lp:picty

To run picty, change to the picty directory, and enter:

cd picty
bin/picty

To update to the latest version, run:

cd picty
bzr pull

Usage

Launch Picty either from Menu or Unity Dash.

picty_001

You can either choose existing collection, device or directory. Let us create a new collection. To do that, create New Collection button. Enter the collection, and browse to the path where you have the images stored. Finally, click Create button.

Create a Collection_001

picty_002

You can modify, rotate, add/remove tags, set descriptive info of each images. To do that, just right click any image and do the actions of your choice.

Visit the following Google group to get more information and support about Picty Photo manager.

Cheers!


Advertise here with BSA

---------------------------------------------------------------------
Picty: Managing Photos Made Easy


How To Install PowerDNS On Ubuntu 14.04

$
0
0

PowerDNS is an open source, high performance, and DNS server. It runs on many GNU/Linux, Unix, and Mac OS X systems. It is written using C++, and released under the GPLv2. It uses popular Databases, such as MySQL, MariaDB, PostgreSQL, and Oracle etc., to read the Zone files and records.

In this tutorial, let us see how to install PowerDNS on Ubuntu 14.04. Also, the same steps will work on Debian and it’s derivatives.

Install PowerDNS On Ubuntu

Scenario:

Operating system: Ubuntu 14.04 LTS server
IP Address: 192.168.1.250/24
Hostname: server.unixmen.local

Update your system:

First of all, update your system:

sudo apt-get update && sudo apt-get upgrade -y

Setup MySQL:

sudo apt-get install mysql-server mysql-client

During installation you’ll be asked to set MySQL root user password. While it’s not mandatory, It is highly recommended.

sk@server: ~_001

Re-enter the password.

sk@server: ~_002

Now, edit /etc/mysql/my.cnf to make MySQL to listen all interfaces.

sudo vi /etc/mysql/my.cnf

Find the following line, and comment it out.

[...]
#bind-address           = 127.0.0.1
[...]

Save and close the file. Restart MySQL service.

sudo service mysql restart

We completed the installation now. Next, we will Install PowerDNS.

Install PowerDNS:

Run the following command to install PowerDNS.

sudo apt-get install pdns-server pdns-backend-mysql

Press ‘Yes’ to configure database for pdns-backend-mysql with dbconfig-common.

sk@server: ~_003

Provide MySQL root user password:

sk@server: ~_004

Then, provide a password for pdns-backend-mysql to register with the database serve.

sk@server: ~_005

Re-enter password:

sk@server: ~_006

PowerDNS has been installed now.

Create PowerDNS Database and User in MySQL

The next step is we should now create the necessary database, user account, tables, and records etc., for the PowerDNS.

Enter to MySQL prompt using command:

sudo mysql -u root -p

Create database, namely ‘powerdns’. You can define your own.

CREATE DATABASE powerdns;

Create database user, namely ‘poweruser’.

GRANT ALL ON powerdns.* TO 'poweruser '@'localhost' IDENTIFIED BY 'ubuntu';

Here,

powerdns – is the database;

poweruser – is the database user,

ubuntu – is the password for the ‘poweruser’ user.

I recommend you to use any strong password to tighten the security.

Enter the following command to update the user settings.

FLUSH PRIVILEGES;

Now, use the powerdns database with command:

USE powerdns;

Create the necessary tables and records.

First, let us create domains table:

CREATE TABLE domains (
id INT auto_increment,
name VARCHAR(255) NOT NULL,
master VARCHAR(128) DEFAULT NULL,
last_check INT DEFAULT NULL,
type VARCHAR(6) NOT NULL,
notified_serial INT DEFAULT NULL,
account VARCHAR(40) DEFAULT NULL,
primary key (id)
);

Create Unique Index for domains table:

CREATE UNIQUE INDEX name_index ON domains(name);

Create records table:

CREATE TABLE records (
id INT auto_increment,
domain_id INT DEFAULT NULL,
name VARCHAR(255) DEFAULT NULL,
type VARCHAR(6) DEFAULT NULL,
content VARCHAR(255) DEFAULT NULL,
ttl INT DEFAULT NULL,
prio INT DEFAULT NULL,
change_date INT DEFAULT NULL,
primary key(id)
);

Create the following indexes for records table:

CREATE INDEX rec_name_index ON records(name);
CREATE INDEX nametype_index ON records(name,type);
CREATE INDEX domain_id ON records(domain_id);

Create the supermasters table:

CREATE TABLE supermasters (
ip VARCHAR(25) NOT NULL,
nameserver VARCHAR(255) NOT NULL,
account VARCHAR(40) DEFAULT NULL
);

Finally, exit from MySQL prompt using command:

quit;

Configure PowerDNS

Now, we should configure PowerDNS to use MySQL as backend to store Zone files and records.

Remove the existing PowerDNS configuration files.

sudo rm /etc/powerdns/pdns.d/*.*

Then, create file /etc/powerdns/pdns.d/pdns.local.gmysql.conf file;

sudo vi /etc/powerdns/pdns.d/pdns.local.gmysql.conf

Add the following lines. Set the correct database name and database user which we created earlier.

# MySQL Configuration
#
# Launch gmysql backend
launch=gmysql

# gmysql parameters
gmysql-host=localhost
gmysql-dbname=powerdns
gmysql-user=poweruser
gmysql-password=ubuntu

Finally restart powerdns service.

sudo service pdns restart

Test PowerDNS

First, edit /ect/resolv.conf file,

sudo vi /etc/resolv.conf

Set the name server IP address:

auto lo
iface lo inet loopback

# The primary network interface
auto eth0
iface eth0 inet static
address 192.168.1.250
netmask 255.255.255.0
network 192.168.1.0
broadcast 192.168.1.255
gateway 192.168.1.1
dns-nameservers 192.168.1.250
dns-search home

We completed all installation and configuration parts. Now, we will check whether PowerDNS is really working or not.

First check if PowerDNS is listening:

sudo netstat -tap | grep pdns

Sample output:

tcp        0      0 *:domain                *:*                     LISTEN      1549/pdns_server-in

Now, enter the following command to check PowerDNS is working:

sudo dig @127.0.0.1

Or,

sudo dig @localhost

Sample output:

; <<>> DiG 9.9.5-3-Ubuntu <<>> @127.0.0.1
; (1 server found)
;; global options: +cmd
;; Got answer:
;; ->>HEADER<<- opcode: QUERY, status: NOERROR, id: 65075
;; flags: qr rd; QUERY: 1, ANSWER: 0, AUTHORITY: 0, ADDITIONAL: 1
;; WARNING: recursion requested but not available

;; OPT PSEUDOSECTION:
; EDNS: version: 0, flags:; udp: 2800
;; QUESTION SECTION:
;.                IN    NS

;; Query time: 4 msec
;; SERVER: 127.0.0.1#53(127.0.0.1)
;; WHEN: Mon Mar 30 14:38:58 IST 2015
;; MSG SIZE  rcvd: 29

Or,

sudo dig @192.168.1.250

Where, 192.168.1.250 is my PowerDNS server’s IP address.

Sample output:

; <<>> DiG 9.9.5-3-Ubuntu <<>> @192.168.1.250
; (1 server found)
;; global options: +cmd
;; Got answer:
;; ->>HEADER<<- opcode: QUERY, status: NOERROR, id: 39576
;; flags: qr rd; QUERY: 1, ANSWER: 0, AUTHORITY: 0, ADDITIONAL: 1
;; WARNING: recursion requested but not available

;; OPT PSEUDOSECTION:
; EDNS: version: 0, flags:; udp: 2800
;; QUESTION SECTION:
;.                IN    NS

;; Query time: 0 msec
;; SERVER: 192.168.1.250#53(192.168.1.250)
;; WHEN: Mon Mar 30 14:39:49 IST 2015
;; MSG SIZE  rcvd: 29

That’s it. PowerDNS is ready to use.

I have successfully installed and configured PowerDNS, now what? It is time to manage PowerDNS using Poweradmin administration tool.

Want to setup PowerDNS on RHEL based systems like CentOS, Scientific Linux? Well, refer the following link.

Cheers!!


Advertise here with BSA

---------------------------------------------------------------------
How To Install PowerDNS On Ubuntu 14.04

How To Install PowerDNS On CentOS

$
0
0

In our previous article, We saw how to install PowerDNS on Ubuntu 14.04. In this tutorial, let us see how to install PowerDNS on CentOS 6.5.

Install PowerDNS On CentOS

Scenario:

Operating system: CentOS 6.5 minimal server
IP Address: 192.168.1.150/24
Hostname: server.unixmen.local

Update your system:

First of all, update your system:

Note: The commands in this article is being performed by Root user.

yum update

Setup MySQL:

Install MySQL using command:

yum install mysql-server mysql -y

Start MySQL service and let it to start automatically on every reboot:

service mysqld start
chkconfig mysqld on

Check if MySQL is listening:

netstat -tap | grep mysql

Sample output:

tcp        0      0 *:mysql                     *:*                         LISTEN      1425/mysqld

Set Database Root user password:

By default, Database root password is empty. So, to prevent unauthorized access to your database server, let us set root user password. Enter the following command to setup mysql root user password:

mysql_secure_installation
NOTE: RUNNING ALL PARTS OF THIS SCRIPT IS RECOMMENDED FOR ALL MySQL
      SERVERS IN PRODUCTION USE!  PLEASE READ EACH STEP CAREFULLY!
In order to log into MySQL to secure it, we'll need the current
password for the root user.  If you've just installed MySQL, and
you haven't set the root password yet, the password will be blank,
so you should just press enter here.

Enter current password for root (enter for none):     ## Press Enter ## 
OK, successfully used password, moving on...
Setting the root password ensures that nobody can log into the MySQL
root user without the proper authorisation.

Set root password? [Y/n]     ## Press Enter ##
New password:                ## Enter new password ##
Re-enter new password:       ## Re-enter new password ##
Password updated successfully!
Reloading privilege tables..
 ... Success!

By default, a MySQL installation has an anonymous user, allowing anyone
to log into MySQL without having to have a user account created for
them.  This is intended only for testing, and to make the installation
go a bit smoother.  You should remove them before moving into a
production environment.

Remove anonymous users? [Y/n]     ## Press Enter ##
 ... Success!

Normally, root should only be allowed to connect from 'localhost'.  This
ensures that someone cannot guess at the root password from the network.

Disallow root login remotely? [Y/n]     ## Press Enter ## 
... Success!
By default, MySQL comes with a database named 'test' that anyone can
access.  This is also intended only for testing, and should be removed
before moving into a production environment.

Remove test database and access to it? [Y/n]     ## Press Enter ##
 - Dropping test database...
 ... Success!
 - Removing privileges on test database...
 ... Success!
Reloading the privilege tables will ensure that all changes made so far
will take effect immediately.

Reload privilege tables now? [Y/n]     ## Press Enter ##
 ... Success!

Cleaning up...

All done!  If you've completed all of the above steps, your MySQL
installation should now be secure.

Thanks for using MySQL!

We completed the installation now. Next, we will Install PowerDNS.

Install PowerDNS:

First, install and enable EPEL repository.

rpm -Uvh http://epel.mirror.net.in/epel/6/i386/epel-release-6-8.noarch.rpm

After installing EPEL repository, run the following command to install PowerDNS.

yum install pdns pdns-backend-mysql bind-utils

After installing PowerDNS, run the following commands to start and enable PowerDNS service to start automatically on every reboot.

service pdns start
chkconfig pdns on

PowerDNS has been installed now.

Create PowerDNS Database and User in MySQL

The next step is we should now create the necessary database, user account, tables, and records etc., for the PowerDNS.

Enter to MySQL prompt using command:

mysql -u root -p

Create database, namely ‘powerdns’. You can define your own.

CREATE DATABASE powerdns;

Create database user, namely ‘poweruser’.

GRANT ALL ON powerdns.* TO 'poweruser '@'localhost' IDENTIFIED BY 'centos';

Here,

powerdns – is the database;

poweruser – is the database user,

centos – is the password for the ‘poweruser’ user.

I recommend you to use any strong password to tighten the security.

Enter the following command to update the user settings.

FLUSH PRIVILEGES;

Now, use the powerdns database with command:

USE powerdns;

Create the necessary tables and records.

First, let us create domains table:

CREATE TABLE domains (
id INT auto_increment,
name VARCHAR(255) NOT NULL,
master VARCHAR(128) DEFAULT NULL,
last_check INT DEFAULT NULL,
type VARCHAR(6) NOT NULL,
notified_serial INT DEFAULT NULL,
account VARCHAR(40) DEFAULT NULL,
primary key (id)
);

Create Unique Index for domains table:

CREATE UNIQUE INDEX name_index ON domains(name);

Create records table:

CREATE TABLE records (
id INT auto_increment,
domain_id INT DEFAULT NULL,
name VARCHAR(255) DEFAULT NULL,
type VARCHAR(6) DEFAULT NULL,
content VARCHAR(255) DEFAULT NULL,
ttl INT DEFAULT NULL,
prio INT DEFAULT NULL,
change_date INT DEFAULT NULL,
primary key(id)
);

Create the following indexes for records table:

CREATE INDEX rec_name_index ON records(name);
CREATE INDEX nametype_index ON records(name,type);
CREATE INDEX domain_id ON records(domain_id);

Create the supermasters table:

CREATE TABLE supermasters (
ip VARCHAR(25) NOT NULL,
nameserver VARCHAR(255) NOT NULL,
account VARCHAR(40) DEFAULT NULL
);

Finally, exit from MySQL prompt using command:

quit;

Configure PowerDNS

Now, we should configure PowerDNS to use MySQL as backend to store Zone files and records.

Backup the old configuration file.

mv /etc/pdns/pdns.conf /etc/pdns/pdns.conf.bak

Then, create /etc/pdns/pdns.conf file;

vi /etc/pdns/pdns.conf

Add the following lines at the end. Set the correct database name and database user which we created earlier.

# MySQL Configuration
#
# Launch gmysql backend
launch=gmysql

# gmysql parameters
gmysql-host=localhost
gmysql-dbname=powerdns
gmysql-user=poweruser
gmysql-password=centos

Finally, restart powerdns service.

service pdns restart

Test PowerDNS

First, edit your network interface configuration file /etc/sysconfig/network-scripts/ifcfg-eth0,

vi /etc/sysconfig/network-scripts/ifcfg-etho

Set the name server IP address:

DEVICE=eth0
TYPE=Ethernet
UUID=add4274e-d5be-4834-9142-8a85f4444b00
ONBOOT=yes
NM_CONTROLLED=yes
BOOTPROTO=none
DEFROUTE=yes
IPV4_FAILURE_FATAL=yes
IPV6INIT=no
NAME="System eth0"
HWADDR=08:00:27:DC:33:3F
IPADDR=192.168.1.150
PREFIX=24
GATEWAY=192.168.1.1
DNS1=192.168.1.150

Restart the network service to save the changes.

service network restart

We completed all installation and configuration parts. Now, we will check whether PowerDNS is really working or not.

We must allow the DNS service default port 53 through firewall.

Edit file /etc/sysconfig/iptables,

vi /etc/sysconfig/iptables

Add the following line:

-A INPUT -p tcp -m state --state NEW --dport 53 -j ACCEPT

Save and close the file. Then, restart iptables service.

service iptables restart

Now, enter the following command to check PowerDNS is working:

dig @127.0.0.1

Or,

dig @localhost

Sample output:

; <<>> DiG 9.8.2rc1-RedHat-9.8.2-0.30.rc1.el6_6.2 <<>> @localhost
; (2 servers found)
;; global options: +cmd
;; Got answer:
;; ->>HEADER<<- opcode: QUERY, status: NOERROR, id: 47553
;; flags: qr rd; QUERY: 1, ANSWER: 0, AUTHORITY: 0, ADDITIONAL: 0
;; WARNING: recursion requested but not available

;; QUESTION SECTION:
;.                IN    NS

;; Query time: 0 msec
;; SERVER: 127.0.0.1#53(127.0.0.1)
;; WHEN: Tue Mar 31 16:08:40 2015
;; MSG SIZE  rcvd: 17

Or,

dig @192.168.1.150

Here 192.168.1.150 is my PowerDNS server’s IP address.

Sample output:

; <<>> DiG 9.8.2rc1-RedHat-9.8.2-0.30.rc1.el6_6.2 <<>> @192.168.1.150
; (1 server found)
;; global options: +cmd
;; Got answer:
;; ->>HEADER<<- opcode: QUERY, status: NOERROR, id: 58268
;; flags: qr rd; QUERY: 1, ANSWER: 0, AUTHORITY: 0, ADDITIONAL: 0
;; WARNING: recursion requested but not available

;; QUESTION SECTION:
;.                IN    NS

;; Query time: 0 msec
;; SERVER: 192.168.1.150#53(192.168.1.150)
;; WHEN: Tue Mar 31 16:09:09 2015
;; MSG SIZE  rcvd: 17

That’s it. PowerDNS is ready to use.

I have successfully installed and configured PowerDNS, now what? It is time to manage PowerDNS using Poweradmin administration tool.

Cheers!!


Advertise here with BSA

---------------------------------------------------------------------
How To Install PowerDNS On CentOS

Configure PostgreSQL With Django Application On CentOS 7

$
0
0

Django is a high level and flexible Python web framework. It is a free and open source tool used to store data into a lightweight SQLite database file. In this article, we will explain how you can make the installation and configuration of PostgreSQL in order to be able to use it with Django applications.

In this tutorial, let us see how to Configure PostgreSQL With Django Application On CentOS 7.

Introduction to PostgreSQL

PostgreSQL is an open source object relational database system. It has been released since 15 years, during which it earned a strong reputation for its reliability, data integrity and correctness. PostgreSQL could be used with all existing operating systems, such Linux, UNIX and windows. All the data types are existed with this tool such INTEGER, NUMERIC, BOOLEAN, CHAR, VARCHAR, DATE, and others. This tool also supports storage of binary large objects, including pictures, sounds and videos.

Before starting it is required to have a clean CentOS 7 server instance with a non-root user set up which also must be configured using “sudo” privileges”.

Configure PostgreSQL With Django Application

Install the needed components from repositories:

We will start our tutorial by installing all the needed components from our CentOS and EPEL repository. So we will need the “pip”, python package manager, the database software and the associated libraries to interact with them. As it is mentioned those components will be installed from the CentOS and EPEL repository. So to enable the EPEL repository you have just to use the following command:

sudo yum install epel-release

To install the required components, the following command is used:

sudo yum install python-pip python-devel gcc postgresql-server postgresql-devel postgresql-contrib

Configure the PostgreSQL:

To initialize the PostgreSQL database, the following command is used:

sudo systemctl start postgresql

After the initialization of the PostgreSQL database, now we will make some adjustment of the configuration files. Choose your editor the “sudo” command and type as below:

sudo nano /var/lib/pgsql/data/pg_hba.conf

Using this command you will open the file which is responsible of the authentication methods for the database system. For local maintenance tasks, the type of connection used with it can be accepted but for a Django project isn’t the case since a user configuration is with a password. In order to adjust this we will edit the “host” lines. Just the last column will be replaced by “md5” which will allow the password authentication:

# TYPE  DATABASE        USER            ADDRESS                 METHOD
# "local" is for Unix domain socket connections only
local   all             all                                     peer
# IPv4 local connections:
#host    all             all             127.0.0.1/32            ident
host    all             all             127.0.0.1/32            md5
# IPv6 local connections:
#host    all             all             ::1/128                 ident
host    all             all             ::1/128                 md5

Now we will restart the service using:

sudo systemctl restart postgresql

sudo systemctl enable postgresql

Create database and database user:

There is an operating system named “postgres” was created during the installation of the Postgres to correspond to the postgres PostgreSQL administrative user. So it is required to change to this user to be able to perform administrative tasks using:

sudo su - postgres

To log in the Postgres session use the following command:

psql

Now we will create our database for the Django project. We will name it “projectdata”:

CREATE DATABASE projectdata;

It is important to finish each command at SQL with semicolon. Now we will create a database user which will be used to connect to and interact with the database, you have to enter your password here:

CREATE USER projectdatauser WITH PASSWORD 'password';

We will make some changes for the connection parameters using the following command:

ALTER ROLE projectdatauser SET client_encoding TO 'utf8';
ALTER ROLE projectdatauser SET default_transaction_isolation TO 'read committed';
ALTER ROLE projectdatauser SET timezone TO 'UTC';

Now we will give our database user access rights to the database already created using the following command:

GRANT ALL PRIVILEGES ON DATABASE myproject TO myprojectuser;

Then type the following command to exit the SQL prompt:

\q

And the following command is used to exit the postgres user’s shell session.

exit

Installation of Django:

Now we will start the installation of our Django and all its dependencies within Python virtual environment. To get the virtual environment package use the following command:

sudo pip install virtualenv

Then type the following command to make a directory for holding your Django project:

mkdir ~/projectdata
cd ~/projectdata

And to create your virtual environment type:

virtualenv projectdataenv

Now we will activate the applications that will be installed within the virtual environment using the following command:

source projectdataenv/bin/activate

You will remark that your prompt will be changed showing you that you are now operating with your virtual environment:

(projectdataenv)user@host:~/projectdata$.

Now we will install the Django and the “psycopg2” package using the “pip” command:

pip install django psycopg2

Using the “projectdata” created directory, we can start our Django project using the following command:

django-admin.py startproject projectdata .

Configure Django database settings:

Now we will configure our project in order to use the created database. We will open the main Django project settings file using the following command:

nano ~/projectdata/projectdata/settings.py

At the end of this file there is a “DATABASES” section which is configured to SQLite as a database.

DATABASES = {
   'default': {
       'ENGINE': 'django.db.backends.sqlite3',
       'NAME': os.path.join(BASE_DIR, 'db.sqlite3'),
   }
}

We will change this section that the PostgreSQL database will be used instead of SQLite.

We will do as below:

DATABASES = {   'default': {
       'ENGINE': 'django.db.backends.postgresql_psycopg2',
       'NAME': 'projectdata',
       'USER': 'projectdatauser',
       'PASSWORD': 'password',
       'HOST': 'localhost',
       'PORT': '',
   }
}

Then save and close the file.

Test our project:

Now we will test our Django project starting by the migration of our data structures to our database using the following command:

cd ~/projectdata
python manage.py makemigrations
python manage.py migrate

Then type the following command to create an administrative account while you will be asked to choose a username, an e-mail address and a password:

python manage.py createsuperuser

now we will start our Django project using the following command:

python manage.py runserver 0.0.0.0:8000

In your web browser, visit your server’s domain name or IP address followed by :8000 to reach default Django root page:

http://server_domain_or_IP:8000

Then add the “/admin” to the end of the URL, that you be in front of the login screen. So enter your username and password already created that you will be taken to the admin interface. You can stop the development server using the Ctrl-C on your terminal window.

Now our user account information was stored in our database and it can be appropriately been accessed.

Conclusion

The installation and configuration of the PostgreSQL was described in this article. This tool can be used as the backend database for a Django project.


Advertise here with BSA

---------------------------------------------------------------------
Configure PostgreSQL With Django Application On CentOS 7

Install Poweradmin, A Web-based Control Panel For PowerDNS, In Linux

$
0
0

About Poweradmin

Poweradmin is a free, web-based PowerDNS administration tool. Using this tool, anyone, even a novice user, can easily manage PowerDNS. Poweradmin allows us to easily define Zone files and record types. The current version of Poweradmin is adapted from a very old version of Poweradmin that was originally written by Jorn Ekkelenkamp and Roeland Nieuwenhuis. The current version has extended enhancements, feature and performance improvements.

Poweradmin is released under GPL, and it supports GNU/Linux, Windows, and Mac OS X.

Features

The following are the list notable features of Poweradmin.

  • Full support for all zone types: master, native or slave.
  • Full support for supermasters, for automatic provisioning of slave zones.
  • Full support for A, AAAA, CNAME, HINFO, MX, NS, PTR, SOA, SRV and TXT record types.
  • Multi-language support.
  • Support for larger databases.
  • Support for custom layouts.
  • Enhanced user and permission management setup. It now allows for fine-grained control of the permissions a user has, using “permission templates”, assigned to users.
  • Full support for IPv6.
  • And many.

Install Poweradmin

In this tutorial, let us see how to install Poweradmin in DEB and RPM based systems.

Install Poweradmin On RPM based systems:

First, make sure you have installed PowerDNS on your system.

After installing PowerDNS, install the following prerequisites.

yum install httpd php php-mcrypt php-pdo php-mysql wget

Start httpd service and make it to start automatically on every reboot.

service httpd start
chkconfig httpd on

Next, edit /etc/sysconfig/iptables file,

vi /etc/sysconfig/iptables

Allow the apache web server default port ’80’ through firewall.

[...]
-A INPUT -p tcp -m state --state NEW --dport 80 -j ACCEPT
[...]

Then, restart iptables service.

service iptables restart

If you use DEB based system like Ubuntu, then follow the instructions given below.

Install Poweradmin On DEB based systems:

Check out the following link to install PowerDNS on DEB based systems.

After installing PowerDNS, install the following prerequisites.

sudo apt-get install apache2 gettext libapache2-mod-php5 php5 php5-common php5-curl php5-dev php5-gd php-pear php5-imap php5-ming php5-mysql php5-xmlrpc php5-mhash php5-mcrypt wget

Then, Install PEAR modules using command:

sudo pear install DB
sudo pear install pear/MDB2#mysql

Enable Mcrypt module with command:

sudo php5enmod mcrypt

Finally, start/restart apache service using command:

sudo service apache2 start

Download and Install Poweradmin:

Download the latest version of Poweradmin as shown below.

wget http://sourceforge.net/projects/poweradmin/files/poweradmin-2.1.7.tgz

Extract the downloaded file.

tar xvfz poweradmin-2.1.7.tgz

Move the extracted files to the apache document root as shown below.

mv poweradmin-2.1.7/ /var/www/html/poweradmin

Note: If you use Ubuntu version lower than 14.04 such as Ubuntu 13.10, 13.04, 12.04 etc., then the apache root document folder will be /var/www/.

Set the proper permission and ownership  to /var/www/html/poweradmin directory.

On RPM based systems:

chown -R apache:apache /var/www/html/poweradmin/

On DEB based systems:

sudo chown -R www-data:www-data /var/www/html/poweradmin/

Finally, restart apache service to take effect the changes.

On RPM based systems:

service httpd restart

On DEB based systems:

sudo service apache2 start

Starting Poweradmin Web-based installer:

Once you completed all the above steps, open up your web browser, and type http://ip-address/poweradmin/install/ to start the web-based installation.

On RPM based systems, you might be end up with: “403 forbidden” error.

403 Forbidden - Mozilla Firefox_001

To fix this error, setup the proper SELinux policies using commands:

setsebool -P httpd_enable_homedirs true
chcon -R -t httpd_sys_content_t /var/www/html/poweradmin/

After running the above commands, refresh your web page. You should see the following screen. Select your preferred language and Click Go to step 2 button.

Poweradmin - Mozilla Firefox_002

Now you should get warning message like:

“This installer expects you to have a PowerDNS database accessable from this server. This installer also expects you to have never ran Poweradmin before, or that you want to overwrite the Poweradmin part of the database. If you have had Poweradmin running before, any data in the following tables will be destroyed: perm_items, perm_templ, perm_templ_items, users and zones. This installer will, of course, not touch the data in the PowerDNS tables of the database. However, it is recommended that you create a backup of your database before proceeding.”

That means, if you have any zone files created in your PowerDNS server, plas backup them first.

Click the Go to step 3 button.

Poweradmin - Mozilla Firefox_003

This is the important step. Keep attention. Enter the database username and password to connect to the database. As you may know, we have created the database for PowerDNS with proper permission during PowerDNS installation in our previous articles. Also, select your database type(Ex.MySQL, PostgreSQL etc). Enter the name of the PowerDNS database and the password of the Poweradmin administrator. This administrator has full rights to Poweradmin using the web interface.

Then, click Go to step 4 button.

Poweradmin - Mozilla Firefox_005

Here,

  • powerdns (You can also use ‘root’ in the Username section) – The username to use to connect to the database, make sure the username has sufficient rights to perform administrative task to the PowerDNS database (the installer wants to drop, create and fill tables to the database).
  • MySQL – The type of the PowerDNS database.
  • localhost – The hostname on which the PowerDNS database resides. Frequently, this will be “localhost”.
  • 3306 – The port the database server is listening on.
  • powerdnsThe name of the PowerDNS database.

If you have entered the correct values, you should see the following screen. Otherwise, make sure you have entered the correct database name, user name and password details.

Now, enter the username and password for Poweradmin. This new user will have limited rights only. Click Go to step 5 button to continue.

Poweradmin - Mozilla Firefox_006

Here,

  • poweruser – The username for Poweradmin.
  • centos – The password for this username.
  • hostmaster.unixmen.local – When creating SOA records and no hostmaster is provided, this value here will be used. Should be in the form “hostmaster.example.net”.
  • ns1.unixmen.local – When creating new zones using the template, this value will be used as primary nameserver. Should be like “ns1.example.net”.
  • ns2.unixmen.local – When creating new zones using the template, this value will be used as secondary nameserver. Should be like “ns2.example.net”.

Click Go to step 6 to update records in the PowerDNS database.

Poweradmin - Mozilla Firefox_007

Now, the installer will ask you should now create the file “../inc/config.inc.php” in the Poweradmin root directory yourself. And update the contents of the config.inc.php file with the contents as shown in the below screen.

Poweradmin - Mozilla Firefox_008

To do that, open terminal and create config.inc.php file in the Poweradmin root directory,

vi /var/www/html/poweradmin/inc/config.inc.php

Add the following lines as shown in the above screenshot.

<?php

$db_host		= 'localhost';
$db_user		= 'poweruser';
$db_pass		= 'centos';
$db_name		= 'powerdns';
$db_type		= 'mysql';
$db_layer		= 'PDO';

$session_key		= 'pgSB2Dr(M5_@9LWdRq~tNHQGL%VL#xf+24BO[(y{*XGf89';

$iface_lang		= 'en_EN';

$dns_hostmaster		= 'hostmaster.unixmen.local';
$dns_ns1		= 'ns1.unixmen.local';
$dns_ns2		= 'ns2.unixmen.local';

After creating the config.inc.php file, return back to your installation screen and click Go to step 7 button.

Done! Now we have finished the configuration.

Poweradmin - Mozilla Firefox_010

If you want support for the URLs used by other dynamic DNS providers, run “cp install/htaccess.dist .htaccess” and enable mod_rewrite in Apache.

You must remove the directory “install/” from the Poweradmin root directory. You will not be able to use Poweradmin if it exists.

rm -fr /var/www/html/poweradmin/install/

After you have removed the directory, you can login to Poweradmin web console using URL http://IP-address/poweradmin/index.php with username “admin” and password “centos”(which we created in the previous steps).

Poweradmin - Mozilla Firefox_011

This is how my Poweradmin Dashboard looked after entering into it.

Poweradmin - Mozilla Firefox_012

It is highly recommended to change and set a strong password for Poweradmin user.

To do that, click on the Change password link in the Dashboard.

Poweradmin - Mozilla Firefox_012

Enter the current and new passwords twice.

Poweradmin - Mozilla Firefox_014

Now, our Poweradmin web console has been secured.

In our next tutorial, we will see how to create Zone files using Poweradmin.

That’s it. Cheers!


Advertise here with BSA

---------------------------------------------------------------------
Install Poweradmin, A Web-based Control Panel For PowerDNS, In Linux

How To Create New Zone Files And Record Types In PowerDNS Using Poweradmin

$
0
0

In our previous series of tutorials, we have seen,

  1. How To Install PowerDNS On Ubuntu
  2. How To Install PowerDNS In CentOS
  3. How To Install Poweradmin in Linux

Today, we will discuss about, how to add new zone files and record types in Powerdns using Poweradmin administration tool.

Create New Zone Files And Record Types In PowerDNS

Once you properly have setup PowerDNS and Poweradmin as stated in the above links, open up your Web browser and type “http://IP-address/poweradmin” in the address bar.

Enter the user name and password. In my case, the user name and password is admin/centos.

Poweradmin - Mozilla Firefox_002

Add Zone files:

Here, I will be using domain name as unixmen.local and IP address as 192.168.1.101.

Let us create our first zone file. To do that, click Add master zone link in the Poweradmin dashboard.

Poweradmin - Mozilla Firefox_001

Here, we will name the forward zone as “unixmen.local”. Click Add zone to the new forward zone file.

Poweradmin - Mozilla Firefox_003

Then, create a reverse zone file. To do that, click on the Add master zone link again. Enter the reverse Zone file name. For example: 1.168.192.in-addr.arpa

Poweradmin - Mozilla Firefox_006

You can view the newly created Zone files in the List zones link.

Poweradmin - Mozilla Firefox_004

As you see in the below screenshot, the new zone files are added.

Poweradmin - Mozilla Firefox_007

Done! Next we will create DNS record types.

Add DNS Record types:

To add new Record click on the Edit button of the corresponding zone file.

Poweradmin - Mozilla Firefox_007

Enter name, Type, Content, TTL details. Refer the following screenshot. Then, Click Add record button.

Poweradmin - Mozilla Firefox_008

Likewise, you can create any number of record types.

Poweradmin - Mozilla Firefox_009

Also, you can change the Type of the records. For example, let us create a NS record. Leave name as empty. Check “Add also reverse record” to create a reverse record automatically.

Poweradmin - Mozilla Firefox_010

ns2.unixmen.local record:

Poweradmin - Mozilla Firefox_012

MX record:

Poweradmin - Mozilla Firefox_013

Similarly, create Record types for the Reverse Zone too. Do you remember? We have created PTR records automatically in the previous steps.

Let us create another PTR record. Click on the Edit button on the Reverse zone files.

Poweradmin - Mozilla Firefox_015

That’s it. We have created sample Zone files and Record types.

Now, we will test whether it’s working.

Testing DNS Records

Example 1:

dig ns unixmen.local @localhost

Sample output:

; <<>> DiG 9.8.2rc1-RedHat-9.8.2-0.30.rc1.el6_6.2 <<>> ns unixmen.local @localhost
;; global options: +cmd
;; Got answer:
;; ->>HEADER<<- opcode: QUERY, status: NOERROR, id: 45575
;; flags: qr aa rd; QUERY: 1, ANSWER: 1, AUTHORITY: 0, ADDITIONAL: 0
;; WARNING: recursion requested but not available

;; QUESTION SECTION:
;unixmen.local.            IN    NS

;; ANSWER SECTION:
unixmen.local.        86400    IN    NS    ns1.unixmen.local.

;; Query time: 28 msec
;; SERVER: 127.0.0.1#53(127.0.0.1)
;; WHEN: Thu Apr  2 17:23:56 2015
;; MSG SIZE  rcvd: 49

Example 2:

dig A unixmen.local @localhost

Sample output:

; <<>> DiG 9.8.2rc1-RedHat-9.8.2-0.30.rc1.el6_6.2 <<>> A unixmen.local @localhost
;; global options: +cmd
;; Got answer:
;; ->>HEADER<<- opcode: QUERY, status: NOERROR, id: 26512
;; flags: qr aa rd; QUERY: 1, ANSWER: 0, AUTHORITY: 1, ADDITIONAL: 0
;; WARNING: recursion requested but not available

;; QUESTION SECTION:
;unixmen.local.            IN    A

;; AUTHORITY SECTION:
unixmen.local.        86400    IN    SOA    ns1.unixmen.local. hostmaster.unixmen.local. 2015040204 28800 7200 604800 86400

;; Query time: 16 msec
;; SERVER: 127.0.0.1#53(127.0.0.1)
;; WHEN: Thu Apr  2 17:25:29 2015
;; MSG SIZE  rcvd: 82

Example 3:

dig MX unixmen.local @localhost

Sample output:

; <<>> DiG 9.8.2rc1-RedHat-9.8.2-0.30.rc1.el6_6.2 <<>> MX unixmen.local @localhost
;; global options: +cmd
;; Got answer:
;; ->>HEADER<<- opcode: QUERY, status: NOERROR, id: 56456
;; flags: qr aa rd; QUERY: 1, ANSWER: 1, AUTHORITY: 0, ADDITIONAL: 1
;; WARNING: recursion requested but not available

;; QUESTION SECTION:
;unixmen.local.            IN    MX

;; ANSWER SECTION:
unixmen.local.        86400    IN    MX    10 mail.unixmen.local.

;; ADDITIONAL SECTION:
mail.unixmen.local.    86400    IN    A    192.168.1.101

;; Query time: 4 msec
;; SERVER: 127.0.0.1#53(127.0.0.1)
;; WHEN: Thu Apr  2 17:26:05 2015
;; MSG SIZE  rcvd: 68

Example 5:

dig MX unixmen.local @192.168.1.150

Sample output:

; <<>> DiG 9.8.2rc1-RedHat-9.8.2-0.30.rc1.el6_6.2 <<>> MX unixmen.local @192.168.1.150
;; global options: +cmd
;; Got answer:
;; ->>HEADER<<- opcode: QUERY, status: NOERROR, id: 12673
;; flags: qr aa rd; QUERY: 1, ANSWER: 1, AUTHORITY: 0, ADDITIONAL: 1
;; WARNING: recursion requested but not available

;; QUESTION SECTION:
;unixmen.local.            IN    MX

;; ANSWER SECTION:
unixmen.local.        86400    IN    MX    10 mail.unixmen.local.

;; ADDITIONAL SECTION:
mail.unixmen.local.    86400    IN    A    192.168.1.101

;; Query time: 1 msec
;; SERVER: 192.168.1.150#53(192.168.1.150)
;; WHEN: Thu Apr  2 17:26:36 2015
;; MSG SIZE  rcvd: 68

Conclusion

That’s it. What we have seen so far is PowerDNS installation and configuration on RPM and DEB based systems, Installation and configuration of PowerDNS’s web-based administration tool “Poweradmin, and how to create Zone files and Record types using Poweradmin. But, the fact is we just have covered the basic part. There are plenty of things yet to be learned. I recommend you to read PowerDNS official comprehensive guide to know more about PowerDNS.

Cheers!


Advertise here with BSA

---------------------------------------------------------------------
How To Create New Zone Files And Record Types In PowerDNS Using Poweradmin

VPSSIM: A Script To Deploy LEMP Stack Automatically In CentOS

$
0
0

About VPSSIM

VPSSIM, an acronym of VPS is SIMple, is an auto-installer script for LEMP stack setup. Using this script, anyone, even the novice users, can easily deploy LEMP stack, i.e Nginx, MariaDB, and PHP in minutes. VPSSIM will currently work on both CentOS 6 and CentOS 7.

Features

  • Works both on 32 and 64bit systems;
  • Latest and stable Nginx;
  • NginX running PHP via FastCGI is faster and consumes much less RAM memory than Apache + mod_php;
  • PHP-FPM with FastCGI;
  • You can setup different versions of PHP. You can choose PHP 5.4, 5.5 or 5.6 when setup and change PHP version anytime;
  • MariaDB for better performance;
  • Supports SSL;
  • Includes PhpMyAdmin for managing databases;
  • Includes CSF firewall;
  • We can either enable or disable PhpMyAdmin;
  • Optional Zend opcache/Memcached/Google Pagespeed;
  • And many.

Try VPSSIM Demo

Before setup VPSSIM in your server, you can try VPSSIM VPS DEMO and see what it does, and how it works.

Here, We will see how to access and test VPSSIM demo.

  • VPSSIM demo IP address: 168.235.69.220
  • User name: vpssim
  • Password: vpssim

Open your Terminal, an type:

ssh vpssim@168.235.69.220

Type ‘Yes’ to add the host (168.235.69.220) to known list.

The authenticity of host '168.235.69.220 (168.235.69.220)' can't be established.
RSA key fingerprint is 99:6d:40:bc:65:34:c9:e7:75:87:ea:be:39:9b:37:96.
Are you sure you want to continue connecting (yes/no)? yes
Warning: Permanently added '168.235.69.220' (RSA) to the list of known hosts.
vpssim@168.235.69.220's password:  ##password is vpssim

After you login to VPS, SSH auto redirect to VPSSIM demo

sk@sk: ~_013

Okay, I am happy with VPSSIM, now I want to install it on my production server. How do I do it? Well, follow the procedures given below.

VPSSIM Installation

As we mentioned before, VPSSIM will work both on CentOS 6 and CentOS 7. Do not install it in a existing systems that has Nginx, Php, or MariaDB already installed. It may conflict with the existing installations. Use it only on a fresh and minimal servers.

Before setup VPSSIM, you need a VPS at minimum 512 MB RAM with centos 6 or 7. We will install and test VPSSIM in CentOS 6.5 minimal server.

Log in to your server with root privileges, and update your system.

yum update

Then, Enter the following command to start the installation.

yum -y install wget && wget https://vpssim.com/install && chmod +x install && ./install

The above command will start to pull and install all required packages. It will take a while depending upon your Internet connection speed.

After a few moments, you’ll be asked to choose which PHP version you want to install. Here, I go the latest version. So, I entered the choice 1.

root@server1:~_002

Now, the installer will check for the system specifications. Then, It will ask you to enter the domain name, PHP port etc.

root@server1:~_004

Now, it will ask you to confirm the details you have given. Just enter Y and hit Enter key.

root@server1:~_005

Note down or take screenshot of the following URLs that needed after installation completed.

Finally press Enter.

root@server:~_004

This will take some time. The installer will start to download and install all required packages for LEMP stack. Be patient and grab a cup of Coffee!

root@server:~_005

After a few minutes, you’ll be asked to enter the MySQL root user password. Enter the password twice.

root@server1_012

After the installation is over, your server will be automatically reboot in few seconds.

sk@sk: ~_007

Congratulations!! VPSSIM has been successfully installed. Now, you can login to the server as usual.

CentOS 6.5 Minimal (VPSSIM) [Running] - Oracle VM VirtualBox_008

Now, type “vpssim” in the Terminal to see list of menus available.

vpssim

Sample output:

=========================================================================
               VPSSIM - Manage VPS/Server by VPSSIM.COM                
=========================================================================
                             VPSSIM Menu                                
=========================================================================
 1) Add Website & Code          11) Cronjob Manage
 2) Remove website          12) CSF Firewall Manage
 3) Backup code & Config      13) IPtables Firewall Manage
 4) Check & Block IP DOS      14) Setup SSL (https)
 5) Database Manage          15) Download Log file
 6) PhpMyadmin Manage          16) Tools - Addons
 7) Zend OPcache Manage          17) Upgrade / Downgrade PHP
 8) Google pagespeed Manage   18) Server Status
 9) Memcached Manage          19) Update VPSSIM
10) Swap Manage              20) Exit
Type in your choice:

From the menu, you can type any numbers to start installing the corresponding service. For example, I am going to update VPSSIM, so I entered the number “19”.

root@server1:~_015

To view the server status, enter number: 18.

Sample output:

root@server:~_009

Press Enter to return back to VPSSIM menu.

To exit from the VPSSIM menu, type number: 20

Testing Nginx:

To test whether Nginx is properly working, open up the web browser and type: http://IP-address or http://domain-name.

You should see the following nginx test page.

Test Page for the Nginx HTTP Server - Mozilla Firefox_010

Access PhpMyAdmin Console:

Type http://IP-addres:2015 or http://domain-name:2015/ in the address bar of your Browser.

Enter the mysql root user name and it’s password which we created during installation. in my case my database root username/password is root/centos.

phpMyAdmin - Mozilla Firefox_011

PhpMyAdmin Dashboard:

192.168.1.150:2015 - localhost | phpMyAdmin 4.3.12 - Mozilla Firefox_012

From PhpMyAdmin dashboard you can create/delete/edit any number of databases in few Mouse clicks.

That’s it. Your LEMP server is ready to use. Start building your websites.

But, I want to setup LEMP server step by step myself? How do I do it? Well, follow the below links to setup LEMP server step by step manually.

Cheers!


Advertise here with BSA

---------------------------------------------------------------------
VPSSIM: A Script To Deploy LEMP Stack Automatically In CentOS

How To Install CentOS Web Panel In CentOS

$
0
0

About CentOS Web Panel

There are so many free and paid Control panels available nowadays. We will, today, discuss about CentOS Web panel(CMP), specially designed for RPM based distributions like CentOS, RHEL, Scientific Linux etc. CWP is a free, Open Source control panel that can be widely used for deploying a Web hosting environment easily. Unlike other Control panels, CWP is automatically deploy the LAMP stack with Varnish Cache server.

Features

CWP comes with lot of features and free services. As I mentioned before, CWP automatically installs full LAMP stack (apache, php, phpmyadmin, webmail, mailserver etc.) on your server.

Here is the complete list of features and software that will be automatically installed and configured during CWP installation.

List of softwares to be installed and configured during CWP installation:

  • Apache Web Server
  • PHP 5.4
  • MySQL + phpMyAdmin
  • Postfix + Dovecot + roundcube webmail
  • CSF Firewall
  • File System Lock (no more website hacking, all your files are locked from changes)
  • Backups; AutoFixer for server configuration

3rd Party Applications:

  • CloudLinux + CageFS + PHP Selector
  • Softaculous – Script Installer (Free and Premium)

Web Server:

  • Varnish Cache server
  • Compiles Apache from source
  • Apache reCompiler + Additional modules
  • Apache server status, configuration
  • Edit apache vhosts, vhosts templates, include configuration
  • Rebuild all apache Virtual hosts
  • suPHP & suExec
  • Mod Security + OWASP rules
  • Tomcat 8 server management
  • DoS protection
  • Perl cgi script support

PHP:

  • Compiles PHP from source
  • PHP Switcher (switch between PHP versions like: 5.2, 5.3, 5.4, 5.5)
  • PHP Selector select PHP version per user or per folder (PHP 4.4, 5.2, 5.3, 5.4, 5.5, 5.6)
  • Simple php editor
  • Simple php.ini generator in the users panel
  • PHP addons
  • PHP.ini editor & PHP info & List modules
  • php.ini per user account
  • FFMPEG, For Video streaming websites
  • CloudLinux + PHP Selector

User Management

  • Add, List, Edit adn Remove Users
  • User Monitoring
  • Shell access management
  • User Limit Managment
  • Limit Processes
  • Limit Open Files
  • User FTP & File Manager
  • CloudLinux + CageFS
  • Dedicated IP per account

DNS:

  • FreeDNS
  • Add, Edit, List and Remove DNS zones
  • Edit nameserver IPs
  • DNS zone template editor
  • New Easy DNS Zone Manager (with ajax)
  • New DNS Zone list with Additional resolving information using google (also checking rDNS, nameservers….)

Email:

  • Postfix & dovecot
  • MailBoxes, Alias
  • Roundcube webmail
  • Postfix Mail queue
  • rDNS Checker Module
  • AntiSPAM
  • SPF & DKIM Integration
  • Re-Build Postfix/Dovecot Mail server with AntiVirus, AntiSpam Protection
  • Email Auto Responder

System:

  • CPU core and clock info
  • Memory usage info
  • Detailed Disk status
  • Software Info like kernel version, uptime etc.
  • Services Status
  • ChkConfig Manager
  • Network port usage
  • Network configuration
  • SSHD configuration
  • Auto-Fixer (checks important configuration and tries to auto-fix issues)

Monitoring:

  • Monitor services eg. top, apache stats, mysql etc.
  • Use Java SSH Terminal/Console within panel
  • Services Configuration (eg. Apache, PHP, MySQL etc)
  • Run shell commands in screen/background

Security:

  • CSF Firewall
  • SSL generator
  • SSL Certificate Manager
  • CloudLinux + CageFS

SQL:

  • MySQL Database Management
  • Add local or remote access user
  • Live Monitor MySQL process list
  • Create, Remove database
  • Add additional users per database
  • MySQL server configuration
  • PhpMyAdmin
  • PostgreSQL, phpPgAdmin Support

Additional options:

  • TeamSpeak 3 Manager
  • Shoutcast Manager
  • Auto-update
  • Backup manager
  • File Manager
  • Virtual FTP users per domain
  • cPanel Account Migration (restores files, databases and database users)
  • And many more.

Install CentOS Web Panel In CentOS 6

At the time writing this tutorial, CWP only supports upto CentOS 6.x versions. It doesn’t work on CentOS 7 and later versions.

Prerequisites:

Before installing CWP, you must know the following information:

  • CWP only supports static IP addresses. It does not support dynamic, sticky, or internal IP addresses.
  • CWP doesn’t has an uninstaller. After you install CWP, you must reinstall the server to remove it.
  • Only install CWP on a freshly installed operating system without any configuration changes.
  • Need atleast 512MB RAM for 32 bit systems.
  • 1024MB for 64 bit systems.
  • Need 4GB RAM or more to deploy all modules.
  • At least 20GB or hard disk space is required.

For testing purpose in VirtualBox, 640MB RAM and 10GB hdd space is enough.

Update server:

Install wget package first. This is needed to download CWP.

yum install wget -y

Update your server using command:

yum update -y

Reboot once to take effect the changes.

Install CWP:

Change to /usr/local/src/ directory:

cd /usr/local/src

Download latest CWP version with command:

wget http://centos-webpanel.com/cwp-latest

If the above URL doesn’t work, use the following link instead.

wget http://dl1.centos-webpanel.com/files/cwp-latest

Then, start CWP installer using command:

sh cwp-latest

Sample output:

root@server:-usr-local-src_001

root@server:-usr-local-src_002

The installation will take upto 30 minutes or more depending upon your Internet speed.

Finally, you’ll see the installation completed message like below. Note down the details such as mysql root user password and login URLs of CWP. You”ll need them later. Then Press Enter key to reboot your system.

root@server:-usr-local-src_004

After booting into the system, you will see the CWP welcome login message.

CentOS 6.5 Minimal [Running] - Oracle VM VirtualBox_006

Adjust Firewall/Router:

The CWP default web console ports are 2030(http) and 2031(https). You should allow the both ports through firewall/Router in order to access the CWP web console from a remote system.

To do that, edit:

vi /etc/sysconfig/iptables

Add the following lines:

[...]
-A INPUT -p tcp -m state --state NEW -m tcp --dport 2030 -j ACCEPT
-A INPUT -p tcp -m state --state NEW -m tcp --dport 2031 -j ACCEPT
[...]

Save and close the file. Restart iptables service to take effect the changes.

service iptables restart

Accessing CWP Web Console

Open up your browser and type:

http://IP-Address:2030/

Or

https://IP-Address:2031/

You will see the following like screen.

The login credentials are:

  • Username: root
  • Password: your root password

Login | CentOS WebPanel - Mozilla Firefox_007

This is how CWP dashboard will look:

CWP.admin - Mozilla Firefox_008

Congratulations! CWP has been successfully has been installed.

CWP Basic Configuration

Next, we have to do couple of things such as:

  1. Setup nameservers
  2. Setup shared ip (must be your public IP address)
  3. Setup at least one hosting package (or edit default package)
  4. Setup root email, etc.

Setup nameservers:

To setup nameservers, go to DNS Functions -> Edit nameservers IPs.

CWP.admin - Mozilla Firefox_009

Set your nameservers and click Save changes button.

CWP.admin - Mozilla Firefox_010

Setup Shared IP And Root mail ID:

This is important step to host websites on your host. To setup shared IP, go to CWP Settings -> Edit settings.

CWP.admin - Mozilla Firefox_011

Enter your Static IP and Email ID, and Click Save settings button.

CWP.admin - Mozilla Firefox_012

Now, CWP is ready to host websites.

Setup hosting package:

A hosting package is nothing but a Web hosting plan that consists of allowed diskspace, bandwidth, no of FTP accounts, no of email ids, and no of databases etc. You can setup any number of web hosting plans as your wish.

To add a package, go to Packages – Add a Package from the CWP console.

CWP.admin - Mozilla Firefox_013

Enter the name of the package, amount of Diskquota/RAM allowed, FTP/Email accounts, Databases, and subdomains etc. Click Save settings button to create the web hosting plan.

CWP.admin - Mozilla Firefox_014

Now, CWP is ready to host your domains.

Adding Domains:

To create a new Domain, you to have at least one user account.

To add a user, go to User Accounts -> New Account.

Enter the domain(ex.unixmen.com), username, password and Email id etc. Finally, click Create.

CWP.admin - Mozilla Firefox_016

Now, let us add a new domain.

To add a domain, go to Domains -> Add Domain.

Enter the Domain and assign the domain the users of your choice.

CWP.admin - Mozilla Firefox_017

Conclusion

In this tutorial, we have seen how to install and configure CentOS Web Panel to create a simple web hosting environment. CWP is very simple to install and use. Even a novice user can create a basic web hosting server in a couple of hours. Also, CWP is completely free to use and open source. Give it a try! You won’t be disappointed.

You can find the more details about CWP in the CentOS Web Panel Wiki page.

Cheers!


Advertise here with BSA

---------------------------------------------------------------------
How To Install CentOS Web Panel In CentOS


NethServer: A CentOS Based All-in-one Server Distribution

$
0
0

About NethServer

NethServer

NethServer is a free, Open Source, CentOS based all-in-one Linux server distribution, specially designed for small offices and medium-size enterprises. NethServer offers number of built-in modules that can be used to turn any systems into a mail, Web, Proxy, DNS, FTP, Cloud, IDS, Samba, or VPN servers instantly within few minutes. Just forget the step by step and comprehensive installation steps, because we can install the modules of our choice with a ‘single click’. It comes with a built-in powerful and modern web interface that simplifies the common administrative tasks. Since it is based on popular CentOS distribution, NethServer is very powerful, solid, secured distribution. We can regularly get security fixes, updates from the official CentOS repositories as well.

Features

NethServer has number of features, including:

  • Web-filter – Filters both HTTP and HTTPS traffic with Squid with or without authentication. Also, It comes ClamAV antivirus.
  • Mail server – Postfix+Dovecot+Roundcube with Antivirus support
  • File server – SAMBA server, Primary Domain controller.
  • Web server – Multi-domain support with ready made LAMP stack
  • Firewall – Built-in Shorewall
  • VPN – Host2Net and Net2Net VPNs based on OpenVPN and L2TP. Compatible with Linux, Windows, Android and iOS.
  • Groupware – Based on SOGo
  • Private Cloud – OwnCloud
  • Web-based console for administering NethServer
  • And many

NethServer Editions

NethServer comes in two flavours as stated below.

  1. Community Edition – free for personal use
  2. Enterprise Edition – Paid version

You can find the features comparison of both editions in the following link.

Install NethServer

Minimum hardware requirements are:

  • 64 bit CPU
  • 1 GB RAM
  • 8 GB disk space
  • Fast Internet connection
  • CD/DVD or Usb drive

We can install NethServer in two methods:

  1. Using NethServer ISO.
  2. Using NethServer YUM repository.

1. Installing from ISO:

This method is easy for new users. All you need is to download the NethServer from the following link, burn it to CD/DVD or USB drive and install it as the way you install CentOS.

As of writing this tutorial, the latest version was NethServer 6.6.

2. Installing from YUM

The second method is best option for those who already have servers/VPSs that pre-installed with CentOS distribution.

First, update your system:

yum update -y

Add NethServer repositories using command:

yum localinstall http://mirror.nethserver.org/nethserver/nethserver-release-6.6.rpm -y

Then, install NethServer base system using command:

nethserver-install

Sample output:

root@server:~_001

The above command will desperately download and install all packages in your server. It will take a while depending upon your Internet connection speed. Just be patient and have a cup of Coffee.

Alternatively, to install base system and additional modules at once, include the name of the module along with NethServer installation script as show below.

nethserver-install nethserver-mail nethserver-nut

After installation completed, you will see the following message.

root@server:~_002

Note down the URLs to access the NethServer Web UI later.

Access NethServer Web UI

NethServer can be configured using the Server Manager web interface. Open up web browser and type: https:IP-Address:980 in your browser’s address bar.

If the web server module is installed, you can also access the web interface using URL: https://server_name/server-manager.

Accept the Untrusted connection.

Untrusted Connection - Mozilla Firefox_004

Enter the user name and password.

  • Username: root
  • Password: <your_root_password>

Example Org - Login - Mozilla Firefox_005

Note: if you install NethServer using ISO, the default user name and password might be:

  • Default user name: root
  • Default password: Nethesis,1234

We’re not finished yet. Click Next to continue.

Example Org - FirstConfigWiz_Title - Mozilla Firefox_006

Enter Hostname and Domain name. Click Next.

Example Org - FirstConfigWiz_Title - Mozilla Firefox_007

Select Timezone and click Next.

Example Org - FirstConfigWiz_Title - Mozilla Firefox_008

Change default SSH port and click Next. I go with the defaults.

Example Org - FirstConfigWiz_Title - Mozilla Firefox_009

Click Next.

Example Org - FirstConfigWiz_Title - Mozilla Firefox_010

Click Apply to save and proceed to next step.

Example Org - FirstConfigWiz_Title - Mozilla Firefox_011

Here is the important part. The Network page configures how the server is connected to the local network (LAN) or other ones (i.e. Internet). If the server has firewall and gateway functionality, it will handle extra networks with special function like DMZ and guests network. NethServer supports an unlimited number of network interfaces.

You can assign network interface cards to a particular zones. Here is the list of supported zones by NethServer.

  • green: local network. Hosts on this network can access any other configured network
  • blue: guests network. Hosts on this network can access orange and red network, but can’t access to green zone
  • orange: DMZ network. Hosts on this network can access red networks, but can’t access to blue, orange and green zones
  • red: public network. Hosts on this network can access only the server itself

As I have only one NIC in my server, I left this part as default.

Click NEW INTERFACE button to create logical interfaces.

The list of available logical interfaces are:

  • alias: associate more than one IP address to an existing network interface. The alias has the same role of its associated physical interface
  • bond: arrange two or more network interfaces, provides load balancing and fault tolerance
  • bridge: connect two different networks, it’s often used for bridged VPN and virtual machine
  • VLAN (Virtual Local Area Network): create two or more physically separated networks using a single interface

Example Org - Network - Mozilla Firefox_013

As I have only one NIC, I will assign my NIC to bridge mode.

Example Org - Network - Mozilla Firefox_014

Enter IP address, Subnet, and Gateway etc. Click Next to proceed.

Example Org - Network - Mozilla Firefox_015

That’s it. We have created logical interface.

Example Org - Network - Mozilla Firefox_016

If you want to create another one, click on the ‘NEW INTERFACE’ button and follow the onscreen instructions.

This is how my NethServer’s dashboard looked:

Example Org - Dashboard - Mozilla Firefox_017

From now on, you can install any modules ( FTP, Mail, or Web Server etc.) directly from the Web UI.

NethServer Software center

We have installed NethServer’s base system. Now, we will install the modules.

NethServer’s Software center allows us to install and remove modules. it shows the all available and installed (checked) modules. The view can be filtered by category.

Example Org - Software center - Mozilla Firefox_018

Here is the list of available modules.

NethServer Modules:

  • Backup
  • Users and groups
  • Email
  • Webmail
  • POP3 connector
  • POP3 proxy
  • Shared folders
  • Windows network
  • Chat
  • UPS
  • Fax Server
  • IAX Modem
  • Web proxy
  • Web content filter
  • Firewall and gateway
  • IPS (Snort)
  • Bandwidth monitor (ntopng)
  • Statistics (collectd)
  • DNS
  • DHCP and PXE server
  • VPN
  • FTP
  • ownCloud
  • Phone Home
  • WebVirtMgr

Like I said before, we can install any module with a ‘single click’. If you want to install a module, just check the corresponding box and click Add button.

Installing ownCloud Module:

For example, here I will show you how to install ownCloud module.

Scroll down and find the ownCloud module. Check the ownCloud checkbox and click Add button at the end.

Example Org - Software center - Mozilla Firefox_019

Then. click APPLY CHANGES button.

Example Org - Software center - Mozilla Firefox_020

Once you clicked the APPLY CHANGES button, NethServer will automatically download, install and configure ownCloud along with all it’s dependencies.

Selection_021

Once the installation completed, open a new tab and enter the URL: https://IP-Address/owncloud in your web browser to access your ownCloud dashboard.


  • use admin/Nethesis,1234 as default credentials

ownCloud - Mozilla Firefox_022

Voila! We have installed ownCloud in our server. How easy, isn’t it?

This is how ownCloud dashboard looked at first log in.

Files - ownCloud - Mozilla Firefox_023

Change the ownCloud Admin user password to something stronger. To do that, Click on the admin user on the top right corner.

Then, select Personal.

Selection_025

Enter your current and new password. Finally, click on Change password button.

ownCloud - Mozilla Firefox_026

That’s it. Log out and log in back to your ownCloud’s dashboard using the new password.

Similarly, you can install any modules of your choice.

Removing modules:

Go to the section called “Installed” in the software center and click the Remove button to uninstall any modules.

Example Org - Software center - Mozilla Firefox_028

Conclusion

In this tutorial, we have seen how to install and configure NethServer, and how to install a module from the software center. I must say that the NethServer is definitely a worth distribution to deploy in your organization. Though, the Community edition has some limited features, It is capable of installing all major components such as FTP, Mail, Squid proxy, Or Web server. If you want to add specific modules which are not available in the Community edition, you can purchase and try them from the Enterprise edition. Whether you want to deploy a mail server or VPN server or anything, you can just install them in a couple of mouse clicks easily using the NethServer’s software center.

To know more about NethServer, I suggest you to have a look at the NethServer’s official documentation page.

Cheers!

Source and Reference:


Advertise here with BSA

---------------------------------------------------------------------
NethServer: A CentOS Based All-in-one Server Distribution

How To Setup DNS Server In Ubuntu

$
0
0

About DNS

DNS, stands for Domain Name System, translates hostnames or URLs into IP addresses. For example, if we type www.unixmen.com in browser, the DNS server translates the domain name into its associated ip address. Since the IP addresses are hard to remember all time, DNS servers are used to translate the hostnames like www.unixmen.com to 173.xxx.xx.xxx. So it makes easy to remember the domain names instead of its IP address.

In this tutorial, we will see how to setup and configure DNS server on Ubuntu 14.04 LTS. Also, the same method will work on Debian and its derivatives.

Setup DNS Server In Ubuntu 14.04

Scenario

For the purpose of this tutorial, I will be using three nodes. One will be acting as Master DNS server, the second system will be acting as Secondary DNS, and the third will be our DNS client. Here are my three systems details.

Primary (Master) DNS Server Details:

Operating System     : Ubuntu 14.04 64bit minimal server
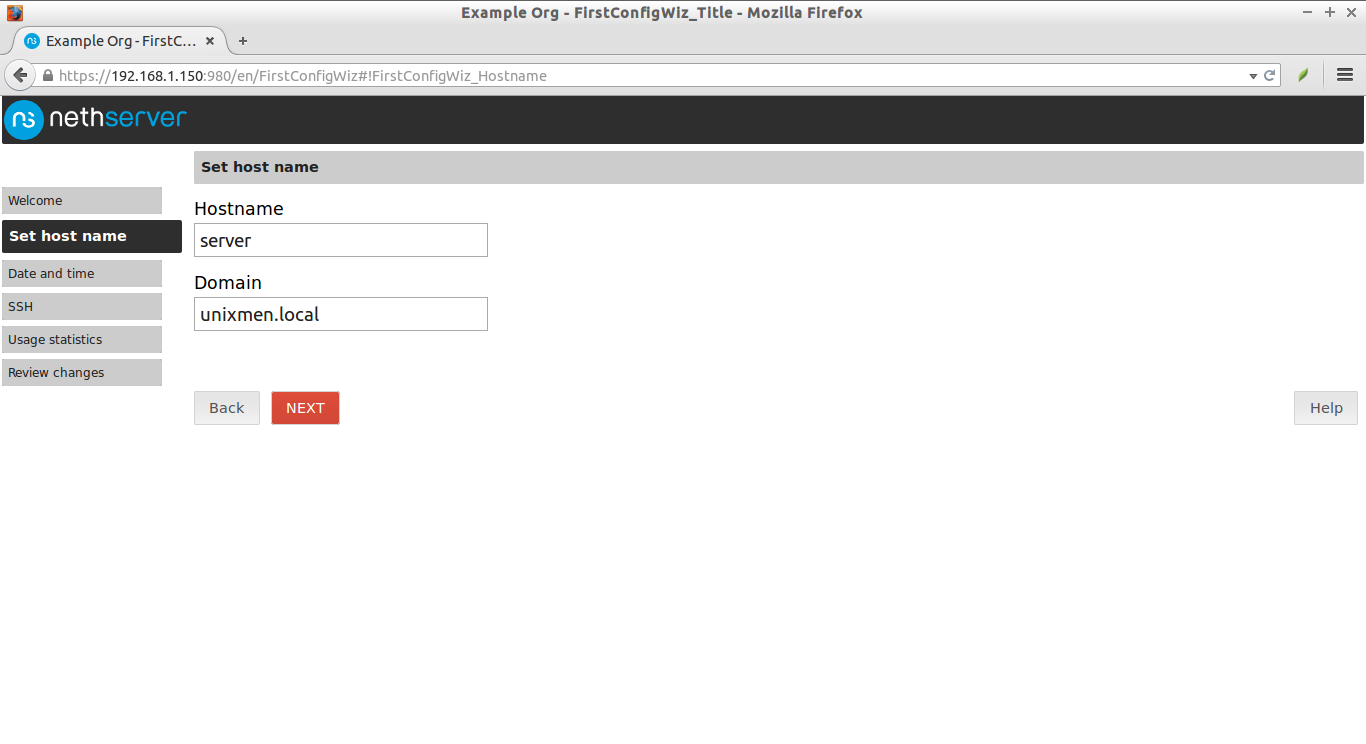
Hostname             : masterdns.unixmen.local
IP Address           : 192.168.1.101/24

Secondary (Slave) DNS Server Details:

Operating System     : Ubuntu 14.04 32bit minimal server
Hostname             : secondarydns.unixmen.local
IP Address           : 192.168.1.102/24

Client Details:

Operating System     : Ubuntu 14.04 desktop
Hostname             : client.unixmen.local
IP Address           : 192.168.1.103/24

Setup Caching Server

In this configuration BIND9 will find the answer to name queries and remember the answer for the next query. This can be useful for a slow internet connection. By caching DNS queries, you will reduce bandwidth and (more importantly) latency.

The default configuration is setup to act as a caching server. All that is required is simply adding the IP Addresses of your ISP’s DNS servers. Caching server is opt for low Internet connection.

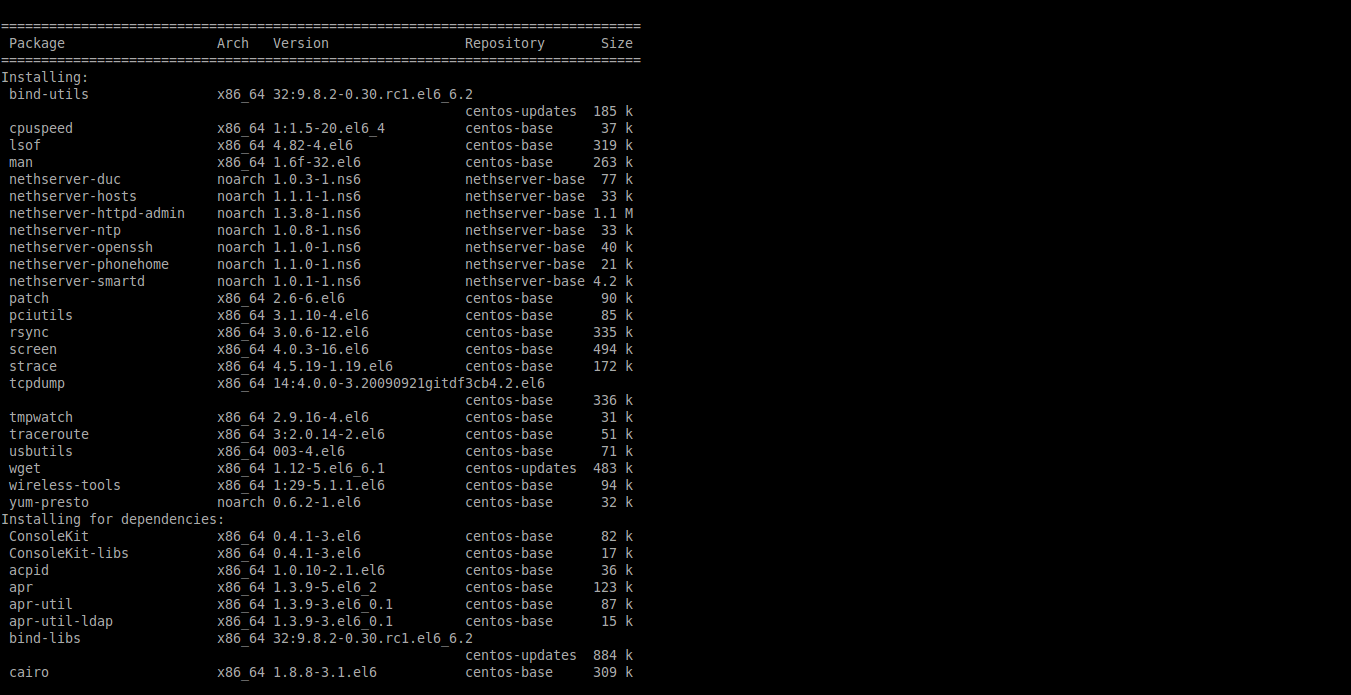
Install bind9 packages using command:

sudo apt-get install bind9 bind9utils bind9-doc

Then edit /etc/bind/named.conf.options file,

sudo vi /etc/bind/named.conf.options

Simply uncomment and edit the following in /etc/bind/named.conf.options:

forwarders {
 8.8.8.8;
};

Restart bind9 service.

sudo service bind9 restart

Test Caching Server

Run the following command to test it.

dig -x 127.0.0.1

Sample output:

;; global options: +cmd
;; Got answer:
;; ->>HEADER<<- opcode: QUERY, status: NOERROR, id: 60612
;; flags: qr aa rd ra; QUERY: 1, ANSWER: 1, AUTHORITY: 1, ADDITIONAL: 3

;; OPT PSEUDOSECTION:
; EDNS: version: 0, flags:; udp: 4096
;; QUESTION SECTION:
;1.0.0.127.in-addr.arpa.        IN    PTR

;; ANSWER SECTION:
1.0.0.127.in-addr.arpa.    604800    IN    PTR    localhost.

;; AUTHORITY SECTION:
127.in-addr.arpa.    604800    IN    NS    localhost.

;; ADDITIONAL SECTION:
localhost.        604800    IN    A    127.0.0.1
localhost.        604800    IN    AAAA    ::1

;; Query time: 4 msec
;; SERVER: 192.168.1.101#53(192.168.1.101)
;; WHEN: Thu Apr 09 14:51:36 IST 2015
;; MSG SIZE  rcvd: 132

Setup Primary (Master) DNS Server

You can use the same server for both Primary and Caching server.

Install bind9 packages on your server if not installed.

sudo apt-get install bind9 bind9utils bind9-doc

1. Configure Master DNS Server

DNS configuration files are stored in /etc/bind directory. Primary configuration file is /etc/bind/namd.conf.

Edit ‘/etc/bind/named.conf’ file.

sudo vi /etc/bind/named.conf

Make sure it contains the following lines. If not, add them.

include "/etc/bind/named.conf.options";
include "/etc/bind/named.conf.local";
include "/etc/bind/named.conf.default-zones";

Save and close the file.

Then, edit named.conf.local,

sudo vi /etc/bind/named.conf.local

Add the lines as shown in bold:

zone "unixmen.local" {
        type master;
        file "/etc/bind/forward.unixmen";
        allow-transfer { 192.168.1.102; };
        also-notify { 192.168.1.102; };
 };

zone "1.168.192.in-addr.arpa" {
        type master;
        file "/etc/bind/reverse.unixmen";
        allow-transfer { 192.168.1.102; };
        also-notify { 192.168.1.102; };
 };

Here,

  • forward.unixmen – Forward zone file
  • reverse.unixmen – Reverse zone file
  • 192.168.1.102 – Slave DNS server

2. Create Zone files

Create forward and reverse zone files which we defiend in the ‘/etc/bind/named.conf.local’ file.

2.1 Create Forward Zone

Create Forward Zone file name forward.unixmen in /etc/bind/zones,

sudo vi /etc/bind/forward.unixmen

Add the following lines:

$TTL 86400
@   IN  SOA     masterdns.unixmen.local. root.unixmen.local. (
        2011071001  ;Serial
        3600        ;Refresh
        1800        ;Retry
        604800      ;Expire
        86400       ;Minimum TTL
)
@       IN  NS          masterdns.unixmen.local.
@       IN  NS          secondarydns.unixmen.local.
@       IN  A           192.168.1.101
@       IN  A           192.168.1.102
@       IN  A           192.168.1.103
masterdns       IN  A   192.168.1.101
secondarydns    IN  A   192.168.1.102
client          IN  A   192.168.1.103

2.2 Create Reverse Zone

Create Forward Zone file name reverse.unixmen in /etc/bind/zones,

sudo vi /etc/bind/reverse.unixmen

Add the following lines:

$TTL 86400
@   IN  SOA     masterdns.unixmen.local. root.unixmen.local. (
        2011071002  ;Serial
        3600        ;Refresh
        1800        ;Retry
        604800      ;Expire
        86400       ;Minimum TTL
)
@       IN  NS          masterdns.unixmen.local.
@       IN  NS          secondarydns.unixmen.local.
@       IN  PTR         unixmen.local.
masterdns       IN  A   192.168.1.101
secondarydns    IN  A   192.168.1.102
client          IN  A   192.168.1.103
101     IN  PTR         masterdns.unixmen.local.
102     IN  PTR         secondarydns.unixmen.local.
103     IN  PTR         client.unixmen.local.

3. Configuring Permissions, Ownership for Bind

Run the following commands one by one:

sudo chmod -R 755 /etc/bind
sudo chown -R bind:bind /etc/bind

4. Test DNS configuration and zone files for any syntax errors

Check DNS default configuration file:

sudo named-checkconf /etc/bind/named.conf
sudo named-checkconf /etc/bind/named.conf.local

If it returns nothing, your configuration is valid.

Check Forward zone:

sudo named-checkzone unixmen.local /etc/bind/forward.unixmen

Sample output:

zone unixmen.local/IN: loaded serial 2011071001
OK

Check reverse zone:

sudo named-checkzone unixmen.local /etc/bind/reverse.unixmen 

Sample Output:

zone unixmen.local/IN: loaded serial 2011071002
OK

Restart bind9 service.

sudo service bind9 restart

Add the DNS Server details in your network interface config file.

sudo vi /etc/network/interfaces

Add the nameserver IP address:

auto eth0
iface eth0 inet static
        address 192.168.1.101
        netmask 255.255.255.0
        network 192.168.1.0
        broadcast 192.168.1.255
        gateway 192.168.1.1
        dns-nameservers 192.168.1.101
        dns-search unixmen.local

Reboot your system.

5. Test DNS Server

Method 1:

dig masterdns.unixmen.local

Sample Output:

; <<>> DiG 9.9.5-3ubuntu0.2-Ubuntu <<>> masterdns.unixmen.local
;; global options: +cmd
;; Got answer:
;; ->>HEADER<<- opcode: QUERY, status: NOERROR, id: 27712
;; flags: qr aa rd ra; QUERY: 1, ANSWER: 1, AUTHORITY: 2, ADDITIONAL: 2

;; OPT PSEUDOSECTION:
; EDNS: version: 0, flags:; udp: 4096
;; QUESTION SECTION:
;masterdns.unixmen.local.    IN    A

;; ANSWER SECTION:
masterdns.unixmen.local. 86400    IN    A    192.168.1.101

;; AUTHORITY SECTION:
unixmen.local.        86400    IN    NS    masterdns.unixmen.local.
unixmen.local.        86400    IN    NS    secondarydns.unixmen.local.

;; ADDITIONAL SECTION:
secondarydns.unixmen.local. 86400 IN    A    192.168.1.102

;; Query time: 4 msec
;; SERVER: 192.168.1.101#53(192.168.1.101)
;; WHEN: Thu Apr 09 14:20:00 IST 2015
;; MSG SIZE  rcvd: 125

Method 2:

nslookup unixmen.local

Sample Output:

Server:        192.168.1.101
Address:    192.168.1.101#53

Name:    unixmen.local
Address: 192.168.1.101
Name:    unixmen.local
Address: 192.168.1.102
Name:    unixmen.local
Address: 192.168.1.103

Now the Primary DNS server is ready to use.

It is time to configure our Secondary DNS server.

Setup Secondary(Slave) DNS Server

Secondary DNS server is optional, but recommended. If the master DNS server goes down, the Secondary DNS server will take charge and answer the queries. You need an additional server to setup Slave DNS server.

Install bind9 packages using the following command:

sudo apt-get install bind9 bind9utils bind9-doc

1. Configure Slave DNS Server

Edit ‘/etc/bind/named.conf’ file.

sudo vi /etc/bind/named.conf

Make sure it contains the following lines. If not, add them.

include "/etc/bind/named.conf.options";
include "/etc/bind/named.conf.local";
include "/etc/bind/named.conf.default-zones";

Save and close the file.

Then, edit named.conf.local,

sudo vi /etc/bind/named.conf.local

Add the lines as shown in bold:

zone "unixmen.local" {
        type slave;
        file "/var/cache/bind/forward.unixmen";
        masters { 192.168.5.101; };
 };

zone "1.168.192.in-addr.arpa" {
        type slave;
        file "/var/cache/bind/reverse.unixmen";
        masters { 192.168.5.101; };
 };

Here,

  • forward.unixmen – Forward zone file
  • reverse.unixmen – Reverse zone file
  • 192.168.1.101 – Master DNS server

The zone file must be in /var/cache/bind/ because, by default, AppArmor only allows write access inside it.

3. Configuring Permissions, Ownership for Bind

Run the following commands one by one:

sudo chmod -R 755 /etc/bind
sudo chown -R bind:bind /etc/bind

Restart bind9 service.

sudo service bind9 restart

4. Add the DNS Server details

Add the DNS Server details in your network interface config file.

sudo vi /etc/network/interfaces
# This file describes the network interfaces available on your system
# and how to activate them. For more information, see interfaces(5).

# The loopback network interface
auto lo
iface lo inet loopback

# The primary network interface
auto eth0
iface eth0 inet static
address 192.168.1.102
netmask 255.255.255.0
network 192.168.1.0
broadcast 192.168.1.255
gateway 192.168.1.1
dns-nameservers 192.168.1.101
dns-nameservers 192.168.1.102
dns-search home

Save and close the file.

Reboot your system.

5. Test DNS Server

After logging in to your server, run the following commands to check if DNS server is really working or not.

Method 1:

dig masterdns.unixmen.local

Sample Output:

; <<>> DiG 9.9.5-3-Ubuntu <<>> masterdns.unixmen.local
;; global options: +cmd
;; Got answer:
;; ->>HEADER<<- opcode: QUERY, status: NOERROR, id: 20290
;; flags: qr aa rd ra; QUERY: 1, ANSWER: 1, AUTHORITY: 2, ADDITIONAL: 2

;; OPT PSEUDOSECTION:
; EDNS: version: 0, flags:; udp: 4096
;; QUESTION SECTION:
;masterdns.unixmen.local.    IN    A

;; ANSWER SECTION:
masterdns.unixmen.local. 86400    IN    A    192.168.1.101

;; AUTHORITY SECTION:
unixmen.local.        86400    IN    NS    masterdns.unixmen.local.
unixmen.local.        86400    IN    NS    secondarydns.unixmen.local.

;; ADDITIONAL SECTION:
secondarydns.unixmen.local. 86400 IN    A    192.168.1.102

;; Query time: 5 msec
;; SERVER: 192.168.1.101#53(192.168.1.101)
;; WHEN: Thu Apr 09 14:32:38 IST 2015
;; MSG SIZE  rcvd: 125

Method 2:

dig secondarydns.unixmen.local

Sample Output:

; <<>> DiG 9.9.5-3-Ubuntu <<>> secondarydns.unixmen.local
;; global options: +cmd
;; Got answer:
;; ->>HEADER<<- opcode: QUERY, status: NOERROR, id: 53461
;; flags: qr aa rd ra; QUERY: 1, ANSWER: 1, AUTHORITY: 2, ADDITIONAL: 2

;; OPT PSEUDOSECTION:
; EDNS: version: 0, flags:; udp: 4096
;; QUESTION SECTION:
;secondarydns.unixmen.local. IN A

;; ANSWER SECTION:
secondarydns.unixmen.local. 86400 IN A 192.168.1.102

;; AUTHORITY SECTION:
unixmen.local. 86400 IN NS masterdns.unixmen.local.
unixmen.local. 86400 IN NS secondarydns.unixmen.local.

;; ADDITIONAL SECTION:
masterdns.unixmen.local. 86400 IN A 192.168.1.101

;; Query time: 5 msec
;; SERVER: 192.168.1.101#53(192.168.1.101)
;; WHEN: Thu Apr 09 14:33:02 IST 2015
;; MSG SIZE rcvd: 125

Method 3:

nslookup unixmen.local

Sample Output:

Server:        192.168.1.101
Address:    192.168.1.101#53

Name:    unixmen.local
Address: 192.168.1.101
Name:    unixmen.local
Address: 192.168.1.103
Name:    unixmen.local
Address: 192.168.1.102

Note: A zone is only transferred if the Serial Number on the Primary DNS server is larger than the one on the Secondary DNS server.

Client Side Configuration

Add the DNS server details in ‘/etc/resolv.conf’ file in all client systems

vi /etc/resolv.conf
# Generated by NetworkManager
search unixmen.local
nameserver 192.168.1.101
nameserver 192.168.1.102

Restart network service or reboot the system.

Test DNS Server

Now, you can test the DNS server using any one of the following commands:

dig masterdns.unixmen.local
dig secondarydns.unixmen.local
dig client.unixmen.local
nslookup unixmen.local

That’s all about now. The primary and secondary DNS servers are ready to use.

If you want to setup DNS server on RHEL based systems, check the following links.

Cheers!


Advertise here with BSA

---------------------------------------------------------------------
How To Setup DNS Server In Ubuntu

Dooble: A Web Browser, Specially Designed For Security And Privacy

$
0
0

Security and privacy are the two biggest concerns in Web, right? Indeed. In this highly sophisticated technological world, security and privacy are just dreams. No one is 100% secure ever in online. But the good news is some tech enthusiasts and companies are desperately trying to develop number of software that will help us to stay safe and secure in online. And, we should appreciate them for their consistent work to keep us safe(atleast a little bit) in online. Today, we will discuss about a Web browser called “Dooble” that can be used mainly for security and privacy.

About Dooble Web Browser

Dooble is yet another web browser among the popular web browsers, such as Firefox, Google Chrome, and Opera etc. But Dooble is slightly different from the other browsers. Yes, it’s main goal is to provide the web experience in a safe way. Unfortunately, Dooble isn’t really opt for everyday usage right now. You can use it whenever you want security and privacy in Web. It is a nice and user friendly browser, comes with many potential features, including a download manager, a file manager, a FTP Browser, authenticated encryption, Content blocking, and Private browsing etc. It supports Linux, Mac OS X, BSD, and Windows operating systems.

Features

Dooble comes with the following features by default.

  • Advertisements blocking.
  • Always HTTPS.
  • Colorful and unique desktop.
  • Complex configuration options.
  • Configurable exceptions.
  • Cookies manager.
  • Downloads manager.
  • Encrypted bookmarks, browsing history, cookies, disk caches, etc.
  • History browser, including side panel.
  • Integrated file manager and FTP browser.
  • Per-tab JavaScript, Per-tab Web plugins, and Per-tab private cookies.
  • Plugins support.
  • Session restoration.
  • Print-in-PDF support
  • And many

Install Dooble in Ubuntu and derivatives

Add the following PPA:

sudo add-apt-repository ppa:richard-sellam/ppa

Update the software sources:

sudo apt-get update

Then, install Dooble using command:

sudo apt-get install dooble

Dooble is Simple and Light weight

Dooble is light-weight than modern web browsers. When I launch it first, It displayed a warning message that says:

A passphrase has not been prepared. Please visit the Safe panel in the Settings window and choose a passphrase. Once a passphrase is selected, bookmarks, cookies, and all other essential information will be available in future sessions. You may disable this reminder via the Safe panel.

Dooble Web Browser: Reminder_001

You’ll be warned to set the passphrase first. It’s because, you will need a passphrase to view the bookmarks, cookies, and all other important information in future. If you don’t set the passphrase, cookies, bookmarks, and history are no longer available. Each user’s profile will be encrypted including the guest profiles.

Click Ok to close the warning message. We will setup passphrase later.

This is how Dooble looks.

Dooble Web Browser - Dooble Web Browser_002

The look and interface of Dooble is very simple. No glitches, no fancy windows, it’s just simple. Dooble has a Menu bar that having ten menu items, an address bar, and a History sidebar by default. You can select any search engines of your choice from the History sidebar.

Tooltip_005

Setting Dooble passphrase

As I mentioned before, Dooble requires a passphrase to remember your history. Once you close the browser, everything will be wiped out from the Dooble’s memory. Temporary sessions will not be remembered until you setup passpharase.

To setup a passphrase, go to Windows -> Settings -> Safe.

Enter the passphrase. Passphrase should be 16 characters long.

Dooble Web Browser: Settings_001

Restart Dooble browser to take effect the changes.

Dooble will ask you to enter the passphrase every time when you open the browser.

Dooble Web Browser_003

Now, you will notice that the Dooble is remembering the previous opened websites.

Dooble is Clean

When I open a browse a website using Dooble, It opens thems a little bit faster than other browsers. Because, it simply bans all ads, flash contents, and JavaScript by default.

Linux Howtos & Tutorials | Unixmen - Dooble Web Browser_003

Linux Howtos & Tutorials | Unixmen - Dooble Web Browser_004

You can’t find any annoying ads or flash contents while browsing. This feature helps the users for fine and faster browsing.

If you to run flash and JavaScript, go to Windows -> Settings -> Security and select the JavaScript checkbox.

Dooble Web Browser: Settings_005

Now, you can play Flash videos as usual.

▶ What If Batman Was From Chennai? | Put Chutney - YouTube - Dooble Web Browser_006

Dooble Desktop

Dooble web browser comes with built-in file manager. We can, directly, browse the contents of our local filesystem with in the browser itself.

To open the Dooble desktop, go to Locations -> My Retrieved files from the menu bar or simply press the key combination CTRL+M.

file:---home-sk-Entertainment - Dooble Web Browser_007

You can create, delete, or rename the folders within this file manager. It will list the folder contents by name, size, type, modified date, accessed date, owner, group. and permissions etc.

Sadly, the file manager is limited for some operations. For example, if you open a media file, it doesn’t automatically play using any Media player. Instead, it will ask you to select an application manually to play it. We can select default applications only for few file types from the Dooble Settings window.

Dooble’s IRC Channel

Dooble’s IRC Channel is another notable feature. We can use Dooble as a IRC client as well. To open the Dooble’s IRC channel, go to Locations -> IRC Channel.

Connection details - freenode Web IRC - Dooble Web Browser_008

Dooble’s IRC Channel is powered by qwebirc, which is a fast, easy to use, free and open source IRC client designed by and originally just for the QuakeNet IRC network

Also, Dooble allows you to add a Webchat option to your site. To add webchat option to your site, click on the Connection details on the top left side of the Dooble’s IRC Channel page.

Connection details - freenode Web IRC - Dooble Web Browser_009

You’ll see the following window. This wizard will help you create an embedded client by asking you questions then giving you the code to add to your website.

Click Next to continue.

Add webchat to your site - freenode Web IRC - Dooble Web Browser_010

Choose a nick name mode.

Add webchat to your site - freenode Web IRC - Dooble Web Browser_012

Note: It is recommended that you only use a preset nickname if the client is for your own personal use.

Now, set the channels, for example #unixmen. To add multiple channels at once, use comma(,) separator.

Add webchat to your site - freenode Web IRC - Dooble Web Browser_013

Click Next.

Add webchat to your site - freenode Web IRC - Dooble Web Browser_014

That’s it. IRC client button is created. Copy the code in the following screen and ask your webmaster to add this code to your website.

Add webchat to your site - freenode Web IRC - Dooble Web Browser_015

Dooble FTP browser

The another interesting feature is we can use Dooble as our FTP client. You don’t need a separate FTP client to access your FTP servers. Dooble will simply replace the FTP client software.

Here, we will access the FreeBSD public FTP site.

Enter the following URL: ftp://ftp.freebsd.org/pub/FreeBSD in the address bar to access FreeBSD public FTP site.

ftp:--ftp.freebsd.org-pub-FreeBSD - Dooble Web Browser_016

Similarly, you can access your local or public FTP servers as aforementioned.

Dooble Settings

Dooble includes both advanced and basic settings. It has all the features like other popular browsers such as Firefox, Chrome, Opera etc.

To open Dooble’s Seetings dialog, go to Windows -> Settings from the menu bar.

Dooble Web Browser: Settings_017

In Dooble’s settings window, we can;

  • Set default homepage
  • Setup proxy server IP address if you to connect to Internet
  • Setup default applications for particular filetypes
  • Customize the Dooble’s appearance, font size, font name etc.
  • History settings and disk cache size
  • Master Passphrase
  • Setup HTTPS option as default
  • Setup “Do not track me”, Suppress HTTP redirect, Suppress HTTP referrer” options etc.
  • Enable Flash and JavaScript
  • Adjusting Menu and Side bars
  • Disable Private browsing. It is enabled by default
  • And many.

Conclusion

Dooble provides many of the features that a modern Web browser should. But, I would say, Dooble is not yet ready for daily usage. It still needs good amount of work, additional features, and polish to be good daily usage web browser. Also, It has some buggies. I can’t or find a way to enable more add-ons. Also, there is lack of documentation for Dooble’s usage. Apart from the few issues, Dooble is a worth to try.

If you are mainly concerning about privacy and security, Dooble is the recommended option to give it a try. You won’t be disappointed.

Cheers!

Reference:

---------------------------------------------------------------------
Dooble: A Web Browser, Specially Designed For Security And Privacy

Get Weather Conditions On Linux From Commandline

$
0
0

Working on commandline for about four years now I feel like I want to do everything from there even browsing on the internet. Maybe you never thought to get weather forecasts from Linux commandline, but you never know until you read an article from me. So now open a new terminal emulator on your machine and be ready to try some cool tools that will help to get weather conditions on Linux anytime you need it.

 A nice utility I use to get weather on my machine is the weather which can be installed on Ubuntu using the command shown below.

sudo apt-get install weather-util

 Once the installation of the package weather-util is finished type the following command on your terminal emulator.

weather

An error will be echoed on your console. It will tell you to put an id which is required for giving back the conditions.

weather: error: id required for conditions

 The option -i can be used to specify an id. According to the official documentation about the weather tool you need the METAR station ID of the place you want to receive weather conditions.

The following example is very practical and easy to understand how to make use of the option -i while using the weather utility.

weather -i KRDU

The above command turns the result shown below.

 Current conditions at Raleigh-Durham International Airport, NC (KRDU)
 Last updated Apr 14, 2015 - 01:51 AM EDT / 2015.04.14 0551 UTC
 Temperature: 66.0 F (18.9 C)
 Relative Humidity: 72%
 Wind: from the S (170 degrees) at 3 MPH (3 KT)
 Sky conditions: mostly cloudy
 Precipitation last hour: A trace

You can google for the METAR station id. For example If I want to find the weather conditions of the city I actually live which is Tirana I just use the following command.

weather -i LATI

Then I get the following output.

 Current conditions at Tirana, Albania (LATI) 41-20N 019-47E 90M (LATI)
 Last updated Apr 14, 2015 - 02:20 AM EDT / 2015.04.14 0620 UTC
 Temperature: 55 F (13 C)
 Relative Humidity: 76%
 Wind: from the S (180 degrees) at 5 MPH (4 KT)

A useful website I recommend to find the METAR id for the place you want to gather weather information is this one. Anyway you can just google and the right results will come up.

I am also curious to know weather conditions at Krakow, Poland. I use the following command.

 weather -i EPKK

And get the following output after running the above command.

 Temperature: 41 F (5 C)
 Relative Humidity: 60%
 Wind: from the W (280 degrees) at 14 MPH (12 KT)
 Sky conditions: partly cloudy

As you guys can see from the above examples the weather utility gives us information on the temperature both in Fahrenheit and Celsius, relative humidity, wind and also sky conditions.

This tool is really great as it does its job very fast. What really makes it useful is the detailed and human readable information it provides about weather conditions of a country or a city.

There are many other options available to the weather utility such as -c  or –city=CITY for specifying a city, -z for alert zones,  -m for metric units, -h to show some help message but we are not going to teach them here as it is best for you to try them yourself by experimenting in the commandline.

Another tool I often use when I want to get weather conditions on a city is the weatherman. I can not find it on the default repos of my Ubuntu machine so I decided to teach you how to install this cool tool from source.

Open a new terminal and download the weatherman using the following command.

curl -o weatherman-1.2.2.tar.gz -L https://github.com/subrosa/weatherman/archive/1.2.2.tar.gz

Then check if the download is done and the file is where you placed it.

ls | grep weatherman

The above command should produce the following output.

weatherman-1.2.2.tar.gz

Now use the tar utility to extract the archive like shown below.

tar -zxvf weatherman-1.2.2.tar.gz

Change directory using the cd command.

cd weatherman

 Then copy the weatherman executable binary inside /usr/bin directory like shown below.

sudo cp weatherman /usr/bin

Finaly run the following command.

sudo chmod a+x /usr/bin/weatherman

And now you can use weatherman on your machine. Want to test it? Just run the following command on your console.

weatherman

You will be presented to alot of output. This output contains information on usage of the tool, examples and options that can be used to help you during the weather conditions gathering on. I find it very easy to make use of weatherman. Basically all you need to know in order to get weather conditions on a place while using this tool is just the name of the place.

weatherman "Tirana, Albania"

The above command runs without any errors. It gives me the following information.

 Current Conditions for Tirana, Albania
 Reported by Tirana @ Apr 14, 2015 8:50 AM
 Temp: 14 C
 :
 :
 High: 14 C Wind Speed: NNE 3 Rain: 0.00mm
 Low: 8 C Gust: SSE 8 Rain/Month: 0.00mm
 Feels Like: 14 C Avg Wind: NNE 0 Sunrise:
 Humidity: 67% Pressure: 1024.05mb Sunset:
 Dew Point: 8 C Moonphase: Waning Crescent

 If you would like to use metric units just use the option -m like shown in the following command.

weatherman -m "Tirana, Albania"

In case you want to use English units such as Fahrenheit and inches use the option -e like shown below.

weatherman -e "Tirana, Albania"

The following is the result of the above command. As you guys can see units have changed from the default ones.

 Current Conditions for Tirana, Albania
 Reported by Tirana @ Apr 14, 2015 8:50 AM
 Temp: 57 F
 :
 :
 High: 57 F Wind Speed: NNE 2 Rain: 0.00"
 Low: 46 F Gust: SSE 5 Rain/Month: 0.00"
 Feels Like: 57 F Avg Wind: NNE 0 Sunrise:
 Humidity: 67% Pressure: 30.24" Sunset:
 Dew Point: 46 F Moonphase: Waning Crescent

To get the version of the weatherman utility you are currently using just type the command shown below.

weatherman -v

Mine is version 1.2.2. You can tell it by the output the above command produces.

weatherman 1.2.2

I am very curious to know the weather conditions in Warsaw, Poland so let me perform a last check with the weatherman utility.

weatherman "Warsaw, Poland"

And the following results are displayed on the console.

 Current Conditions for Warsaw, Poland
 Reported by Warsaw (Okecie) @ Apr 14, 2015 9:00 AM
 Temp: 6 C
 :
 :
 High: 6 C Wind Speed: WNW 19 Rain: 0.00mm
 Low: 1 C Gust: WNW 19 Rain/Month: 0.00mm
 Feels Like: 2 C Avg Wind: NNE 0 Sunrise:
 Humidity: 66% Pressure: 1022.02mb Sunset:
 Dew Point: 0 C Moonphase: Waning Crescent

The weatherman utility does not have as many options as weather tool but it definitely does a great job and is easier to use. All you need is the name of the city and boom. It does everything for you. Why complicate life with ids and stuff?

So, if you want something practical, easy to use and ready to go just make use of weatherman. You have everything you need to make a check of basic weather conditions.

On the other hand weather-util has more options but it is a bit hard for a beginner to figure out how it works. But since we are nerds and love experimenting I highly recommend to try it alot.

Conclusion

I am very sure there are many different ways to get weather forecasts on the  Linux command-line. Maybe other tools we don’t know and even shell scripts written in bash scripting by some nerds on their basement. In this article we took a very practical approach and tested two popular tools among Linux users for gathering weather information.

In short words weatherman and weather work great, but if you know another tool or some hack that can be used to get weather information from the Linux console please do not hesitate to share it with us. We will be very happy if you do that!

---------------------------------------------------------------------
Get Weather Conditions On Linux From Commandline

Configure PostgreSQL With Django Application On Ubuntu

$
0
0

Django is a free and open source tool used to store data into a lightweight SQLite database file. It is a high level and flexible Python web framework. In this article, we will explain how you can make the installation and configuration of PostgreSQL in order to be able to use it with Django applications on Ubuntu.

Let’s start by introducing the PostgreSQL. In fact it is an open source object relational database system. It has been released since 15 years, during which it earned a strong reputation due to its reliability, data integrity and correctness. PostgreSQL could be used with all existing operating systems, such Linux, UNIX and windows. All the data types are existed with this tool such INTEGER, NUMERIC, BOOLEAN, CHAR, VARCHAR, DATE, and others. This tool also supports storage of binary large objects, including pictures, sounds and videos.

Before starting it is required to have a clean Ubuntu server instance with a non-root user set up which also must be configured using “sudo” privileges”.

Configure PostgreSQL With Django Application

Installing the needed components from Ubuntu repository:

We will start our tutorial by installing all the needed components from our Ubuntu repository. So we will need the “pip”, python package manager, the database software and the associated libraries to interact with them. We will use the following command to do this:

sudo apt-get update
sudo apt-get install python-pip python-dev libpq-dev postgresql postgresql-contrib

Create Database and Database user:

There is an operating system named “postgres” which was created during the installation of the Postgres to correspond to the postgres PostgreSQL administrative user. So it is required to change into this user to be able to perform administrative tasks using:

sudo su - postgres

The “peer authentification” is used automatically by Postgres with local connections. It means that if the user’s operating system username corresponds to a valid Postgres username, so the connection will be without authentication. Now you can log into the Postgres session by using the following command:

psql

We will start by creating the Database for our project. So will give it the name: ”projectdata” as the given name with the installation of this tool on Centos 07 in our previous article. Of course you can make your own name:

CREATE DATABASE projectdata;

It is important to finish each command at SQL with semicolon. Now we will create a database user which will be used to connect to and interact with the database, so you have to enter your password here:

CREATE USER projectdatauser WITH PASSWORD ‘password’;

We will make some changes for the connection parameters using the following commands:

ALTER ROLE projectdatauser SET client_encoding TO ‘utf8’;
ALTER ROLE projectdatauser SET default_transaction-isolation TO ‘read committed’
ALTER ROLE projectdatauser SET timezone TO ‘UTC’;

Now we will give our database user access rights to the database already created using the following command:

GRANT ALL PRIVILEGES ON DATABASE projectdata TO projectdatauser;

Then typing the following command to exit the SQL prompt:

\q

And the last command in this section is used to exit the postgres user’s shell session.

exit

Installation of Django:

Now we will start the installation of our Django and all its dependencies within Python virtual environment. To get the virtual environment package you have to use the following command:

sudo pip install virtualenv

Then use the following command to have a directory for your Django project:

mkdir ~/projectdata
cd ~/projectdata

And to finish the creation of your virtual environment use the following command:

virtualenv projectdataenv

Using the previous command, you will have a local copy of python and pip into our made directory projectdataenv (you can call it with other name depending on the first name you made).

Now we will activate the virtual environment before starting the installation using the following command:

source projectdataenv/bin/activate

You will remark that you are working now with your virtual environment after using this command. So now we can start the installation of the Django using the pip command. Type the following command to do that:

pip install django psycopg2

The psycopg2 will be also installed since it will enable us to use our configured database.

Using the “projectdata” created directory, we can start our Django project using the following command:

django-admin.py startproject projectdata .

Configuration of Django database settings:

Now we will configure our project in order to use the created database. We will open the main Django project settings file using the following command:

nano ~/projectdata/projectdata/settings.py

At the end of this file there is a “DATABASES” section which is configured to SQLite as a database.

. . .
DATABASES = {
   'default': {
       'ENGINE': 'django.db.backends.sqlite3',
       'NAME': os.path.join(BASE_DIR, 'db.sqlite3'),
   }
}
. . .

We will change this section that the PostgreSQL database will be used instead of SQLite.

We will do as below:

. . .
DATABASES = {
   'default': {
       'ENGINE': 'django.db.backends.postgresql_psycopg2',
      'NAME': 'projectdata',
       'USER': 'projectdatauser',
       'PASSWORD': 'password',
      'HOST': 'localhost',
       'PORT': '',
   }
}
. . .

Then save and close the file.

Test our project:

Now we will test our Django project starting by the migration of our data structures to our database using the following command:

cd ~/projectdata
python manage.py makemigrations
python manage.py migrate

Then type the following command to create an administrative account while you will be asked to choose a username, an e-mail address and a password:

python manage.py createsuperuser

Now we will start our Django project using the following command:

python manage.py runserver 0.0.0.0:8000

Then visit your server’s domain name or IP address followed by :8000 to find default Django root page. (You can do this with any web browser).

http://server_domain_or_IP:8000

Then add the “/admin” to the end of the URL, that you be in front of the login screen. So enter your username and password already created that you will be taken to the admin interface. You can stop the development server using the Ctrl+C on your terminal window.

Conclusion

The installation and configuration of the PostgreSQL in Ubuntu was described in this article and previously the installation of this tool for Centos 07 also was described. So now you can use this tool as the backend database for a Django project with Centos or Ubuntu.

---------------------------------------------------------------------
Configure PostgreSQL With Django Application On Ubuntu

Installation Of Telegram Messenger In Linux

$
0
0

Telegram is a cloud based messaging application characterized by its fast speed and security features. Currently, it is used by a very large user base and it is the preferred one for them since it has a lot of features that make it different from others. It is similar to WhatsApp but instead of caring more about money than user’s privacy like what does WhatsApp. Telegram is a free and open source application while the user’s privacy is one of its priorities. It is used by every mobile platform, including Android, iOS, Windows Phone, Ubuntu Touch. It is also important to know that it can be used on desktops, thanks to third party applications such as Webogram (Chrome extension), Sigram (Linux native client) and others. Recently, the official desktop apps was released for Linux, Windows, and Mac OS X.

In this article, we will list the features of this modern cloud based messaging application that allows you to share pictures, videos and even files. Then, the installation will be outlined.

Features of Telegram

The identification formula with Telegram consists in the mobile number of the user. A SMS will be sent or a call will be made to give the verification code to the possessor of the entered phone number. The phone number for the verification can be changed without losing the old messages. Discussions with groups may be made, send pictures also.

From its different features, we can list the following ones:

  • Its availability for desktop and mobile devices: Android, Iphone/Ipad, Windows phone, Web-Version, PC, Mac and Linux.
  • A heavily encrypted and self-destruct messages are available. The messages access can be from multiple devices and platform.
  • Several security measures to protect it from different hackers.
  • It has a very fast speed of processing and message delivery.
  • It is a very powerful application, no limit to media and chats.
  • It supports desktop notifications, stickers and sending, receiving files of photos and others.
  • After 6 months of inactivity, the concerned user account will be deleted automatically.
  • There are two types of chats, either an ordinary one which uses client server encryption and can be accessed from multiple devices or the secret chats which uses end-to-end encryption and can be accessed just by the two participating devices.

Installing Telegram in Linux

To install Telegram in Linux you have just to download it from the official website. Your operating system will be detected directly and you will see the button which you have to select responding to your needs. Or, you can use the “wget” command to download it directly as you see in the following line:

# wget https://updates.tdektop.com/tlinux/tsetup.0.7.23.tar.xz

After downloading the concerned package, change the directory from the current working one to the extracted directory.

# tar –xf tsetup.0.23.tar.xz
# cd Telegram/

Later you will use the following line to execute the binary file “Telegram”:

# ./Telegram

Firstly click in the “Start messaging” button,

telgram1

Enter your phone number and start the execution.

telgram1

You will receive the code by SMS or by phone call. So enter this verification code, your first and last name too. Then, click in “Signup” button. You have now a Telegram account, so you can start adding your contact by entering their first name, last name and their phone number.

telgram1

You can start chatting using Telegram interface from every device.

Use Telegram for Ubuntu as an application

Now we will give you the instructions to make Telegram available for your user only. We consider that you are using GNOME or UNITY. So we will start by extracting the download archive from the Telegram website, (if you did it previously you don’t need to repeat it now), then open a terminal window and use the following command to create the needed file for your desktop environment:

Nano .local/share/applications/telegram.desktop

This command will enable you to open the “nano” editor where you can create a new file.

You can see in the contents of the opened editor everything you need for this new file: the name, the image, the directory and the type, and the icon.

[Desktop Entry]
Encoding=UTF-8
Name=Telegram
Exec=/home/username/Telegram/Telegram
Icon=/home/username/Telegram/icon.png
Type=Application
Categories=Network;

After getting this image, replace the username with your own username in your desktop; save it using “ctrl+o”, confirm it using “Enter” and exit using “ctrl+x”.

Now you will need a few other commands to start using Telegram: so you will need to add the PPA (Personal Package Archive) using the following command:

sudo add-apt-repository ppa:noobslab/apps

Then update your Ubunto software sources using the following command:

Sudo apt-get update

Now you can install your Telegram application for your desktop using the following command:

Sudo apt-get install telegram-desktop

So you are able to start using Telegram on your Ubuntu system.

Install Telegram in other Linux Distros

The previous command can’t be with every version of Linux, since not all of them can get an installation through personal package archive of an Arch user repository. If those option you don’t have with your system, so you will install Telegram with the standard method as fellow:

So start by downloading the tar archive of Telegram from its official website, then open up a terminal window:

cd ~/downloads

This command will help you to find the downloaded tar archive. Then extract this folder:

tar –xJvf tsetup.0.7.6.tar

Place the extracted folder in your selected directory using the following command:

Sudo mv Telegram /opt/telegram

Then create a link to be able to run Telegram using the following command:

Sudo ln –sf /opt/telegram/Telegram /usr/bin/telegram

Conclusion

Different messaging applications are used in our days, like iMessage, Google Hangouts, Viber, Whatsapp, Facebook Messenger and many others. All of them are great for use but they don’t have a desktop version. With Telegram isn’t the case you can get a great desktop application which can be opened with pc of mobile. Telegram is a messaging app with a focus on speed and security. It’s super-fast, simple, secure and free. It seamlessly syncs across all of your devices and can be used on desktops, tablets and phones alike where you can send an unlimited amount of messages, photos, videos and files of any type (.doc, .zip, .pdf, etc.).

---------------------------------------------------------------------
Installation Of Telegram Messenger In Linux

How To Install Bacula-web On Ubuntu

$
0
0

Bacula is a free and open source application. It supports Linux, UNIX, Windows and Mac OS X backup clients, its back-end is a set of information stored by MySQL, PostgreSQL or SQLite. Moreover, it is designed to automate backup tasks that had often required intervention from a systems administrator or computer operator.

From the other side, Bacula-web is a free web based reporting and monitoring application used to provide information about Bacula infrastructure, to view its summarizes and graphs. It is released under the GPL license.

In this article, we will give you some of the Bacula-web features and the instructions to make the installation of this application on Ubuntu where you have already an installed Bacula server software.

Bacula-web features

Bacula-Web has been firstly created in 2004 by Juan Luis Frances. This tool provides useful information about Bacula backup jobs, pools and volumes. It is a free and open source PHP web application.

From its features, we can list the following ones:

  • It enables users to control all their Bacula directories from a single point. After its installation, you will be able to manage all your Bacula instances.
  • You will have an overall overview of your Bacula jobs, volumes, pools, catalog statistics and others about 24 hours, last week, last month or even since the beginning of installation time due to Bacula-web dashboard.
  • You can use Bacula-web for different languages as your choice. Like French, German, English, Polish, Spanish…(English is used by Default and others are the translated ones)
  • It contains a lot of information in a single page.
  • It is easy to install, the only thing you need is a well working and configured LAMP server and a valid database connection to your Bacula catalog.
  • Bacula-web source code and documentation are both open source and licensed under GPL.

Prerequisites

Before starting the installation, it is required to have a Bacula backup server software installed in your Ubuntu server.

In this tutorial, we consider that you have MySQL with your Bacula setup. And, if you have PostgreSQL, you need just to make the corresponding adjustments.

So let is start our installation of the Bacula-web for an Ubuntu server.

Installation of Bacula-web

We will start the installation by installing the Nginx and PHP which are important. PHP because Bacula-web is a PHP web application and Nginx an example of web server which we need for our installation. So start by typing the following command:

sudo apt-get update

Then, use the following command to install the required packages:

sudo apt-get install nginx php5-fpm php5-mysql php5-gd apache2-utils

Now, we will configure the installed packages (Nginx and PHP) starting by the configuration of PHP by using the following command:

sudo nano /etc/php5/fpm/php.ini

We used the nano editor, but you can use any one you want. Then replace the line “cgi.fix_pathinfo” that you uncomment it previously with “0”:

cgi.fix_pathinfo=0

After that, uncomment the “date.timezone” line and give your time zone. It will look like the following line:

date.timezone =America/New_York

Then save and exit. You can use the following command to restart the PHP-FPM in order to put the changes correctly:

sudo service php5-fpm restart

Now will move to the configuration of the Nginx, we will use also the nano editor this time by typing the following command to open the Nginx default server block configuration file:

sudo nano /etc/nginx/sites-available/default

After opening the file replace its content by the following:

server {   
      listen 80 default_server;   
      listen [::]:80 default_server ipv6only=on;    
     
      root /usr/share/nginx/html;   
      index index.php index.html index.htm;    
     
     server_name your_server_domain_name_or_IP;    

     auth_basic "Restricted Access";   
     auth_basic_user_file /etc/nginx/htpasswd.users;    
    
     location / {       
        try_files $uri $uri/ =404;   
     }   
     error_page 404 /404.html;   
     error_page 500 502 503 504 /50x.html;   
     location = /50x.html {       
           root /usr/share/nginx/html;   
     }    
    
    location ~ \.php$ {       
        try_files $uri =404;      
        fastcgi_split_path_info ^(.+\.php)(/.+)$;        
        fastcgi_pass unix:/var/run/php5-fpm.sock;      
        fastcgi_index index.php;       
        fastcgi_param SCRIPT_FILENAME 
$document_root$fastcgi_script_name;       
        include fastcgi_params;   
    }
}

To restart the Nginx use the following command:

sudo service nginx restart

Note: if you don’t want to give access to unauthorized person that can check your Bacula-web, you have to make an htpassword file before starting the configuration of the Nginx. Use the following command to create an admin user, called by you:

sudo htpasswd -c /etc/nginx/htpasswd.usersyour_name

Enter your password at the prompt which will be later used to access to your Bacula-web. Before restarting the Bacula-web keep in mind your password it will be used there.

After the installation and configuration of PHP and Nginx, now we will start the installation of our Bacula-web. So, move to your home directory, and download the latest version of Bacula-web. You can do as below:

cd ~
wget --content-disposition http://www.bacula-web.org/download.html?file=files
/bacula-web.org/downloads/bacula-web-7.0.3.tgz

Then, create a new directory, called « bacula-web » using the mkdir command and change to it, extract the Bacula-web archive using the tar xvf command :

mkdir bacula-web
cd bacula-web
tar xvf ../bacula-web-*.tgz

Now use the following command to change to the configuration directory:

cd application/config

Then, use the following command:

cp config.php.sample config.php

Start the editing of the configuration file using your selected editor:

nano config.php

after finding the “//MYSQL bacula catalog” line, uncomment the connection details and replace the password value with your Bacula database password. You will do as below:

// MySQL bacula catalog
$config[0]['label'] = 'Backup Server';
$config[0]['host'] = 'localhost';
$config[0]['login'] = 'bacula';
$config[0]['password'] = 'your_bacula_password';
$config[0]['db_name'] = 'bacula';
$config[0]['db_type'] = 'mysql';
$config[0]['db_port'] = '3306';

After saving and exiting, your Bacula-web is properly configured. Now we will use the following commands to delete the default “index.html” and to change to the “/usr/share/nginx/html”:

cd /usr/share/nginx/htmlsudo rm index.html

Now by using the following command we will move the Bacula-web files to the Nginx document root and we will change the ownership of the files to “www-data”:

sudo mv ~/bacula-web/* .sudo chown -R www-data: *

now you have an installed Bacula-web in your server which is accessible on your server’s domain name or public IP address.

If you want to test your application, open the following URL in a web browser:

http://your_prublic_IP/test.php

You will get a table with a green check marker for the used database modules and with red check marker for the database modules that you don’t need.

After checking everything in the table and all are good, you can start using your dashboard by clicking on the top-left “Bacula-web” text, or by visiting your server in a web browser:

http://your_public_IP/

bacula

Conclusion

We gave you in this article the instructions of installing and configuring the Bacula-web application in your Ubuntu server. So you can easily monitor and manage your Bacula software.


---------------------------------------------------------------------
How To Install Bacula-web On Ubuntu


Install Phabricator Software Development Platform In CentOS

$
0
0

About Phabricator

Phabricator is an open source collection of web applications which help software companies build better software. Phabricator is similar to GIT, and SVN. Phabricator was originally developed as an Internal tool at Facebook for building applications. Then, the lead developer of Phabricator, Mr.Evan Priestley, left Facebook to continue Phabricator’s development in a new company called Phacility. On November 24, 2014, Wikimedia starts using Phabricator as its new Collaboration platform.

Phabricator includes applications for:

  • Reviewing and auditing source code;
  • Hosting and browsing repositories;
  • Tracking bugs;
  • Managing projects;
  • Conversing with team members;
  • Assembling a party to venture forth;
  • Writing stuff down and reading it later;
  • Hiding stuff from coworkers;
  • And many.

Install Phabricator On CentOS 6

In this tutorial, we will see how to install and configure Phabricator in CentOS 6.6 64bit edition. The same steps might work on other RPM based distributions.

Download the Phabricator installation script for RPM distros, such as RHEL, CentOS, and Scientific Linux etc.

wget http://www.phabricator.com/rsrc/install/install_rhel-derivs.sh

Set executable permission to the script:

chmod +x install_rhel-derivs.sh

Finally, start the Phabricator installation using command:

./install_rhel-derivs.sh

The installation will start now. Press Enter to continue.

 PHABRICATOR RED HAT DERIVATIVE INSTALLATION SCRIPT
 This script will install Phabricator and all of its core dependencies.
 Run it from the directory you want to install into.

 Phabricator will be installed to: /root.
 Press RETURN to continue, or ^C to cancel.  ## Press Enter

 [...]

 perl                                           x86_64                          4:5.10.1-136.el6_6.1                             updates                           10 M
 perl-DBD-MySQL                                 x86_64                          4.013-3.el6                                      base                             134 k
 perl-DBI                                       x86_64                          1.609-4.el6                                      base                             705 k
 perl-Error                                     noarch                          1:0.17015-4.el6                                  base                              29 k
 perl-Git                                       noarch                          1.7.1-3.el6_4.1                                  base                              28 k
 perl-Module-Pluggable                          x86_64                          1:3.90-136.el6_6.1                               updates                           40 k
 perl-Pod-Escapes                               x86_64                          1:1.04-136.el6_6.1                               updates                           32 k
 perl-Pod-Simple                                x86_64                          1:3.13-136.el6_6.1                               updates                          212 k
 perl-libs                                      x86_64                          4:5.10.1-136.el6_6.1                             updates                          578 k
 perl-version                                   x86_64                          3:0.77-136.el6_6.1                               updates                           51 k
 php-pdo                                        x86_64                          5.3.3-40.el6_6                                   updates                           78 k
 php-pear                                       noarch                          1:1.9.4-4.el6                                    base                             393 k
 rsync                                          x86_64                          3.0.6-12.el6                                 base                             335 k

 Transaction Summary
 ========================================================================================================================================================================
 Install      41 Package(s)
 
 Total download size: 36 M
 Installed size: 114 M
 Is this ok [y/N]: y ## Type 'y' and press Enter

After few minutes, the installation of required prerequisites will be completed. Now, press Enter to download and install Phabricator.

 Complete!
 Please remember to start the httpd with: /etc/init.d/httpd start
 Please remember to start the mysql server: /etc/init.d/mysqld start
 Press RETURN to continue, or ^C to cancel. ## Press Enter

 Cloning into 'libphutil'...
 remote: Counting objects: 11320, done.
 remote: Total 11320 (delta 0), reused 0 (delta 0), pack-reused 11320
 Receiving objects: 100% (11320/11320), 6.41 MiB | 243.00 KiB/s, done.
 Resolving deltas: 100% (6043/6043), done.
 Cloning into 'arcanist'...
 remote: Counting objects: 14314, done.
 remote: Compressing objects: 100% (110/110), done.
 remote: Total 14314 (delta 73), reused 0 (delta 0), pack-reused 14204
 Receiving objects: 100% (14314/14314), 5.79 MiB | 238.00 KiB/s, done.
 Resolving deltas: 100% (8202/8202), done.
 Cloning into 'phabricator'...
 remote: Counting objects: 159477, done.
 remote: Total 159477 (delta 0), reused 0 (delta 0), pack-reused 159477
 Receiving objects: 100% (159477/159477), 66.24 MiB | 235.00 KiB/s, done.
 Resolving deltas: 100% (107467/107467), done.
 
 Install probably worked mostly correctly. Continue with the 'Configuration Guide':

http://www.phabricator.com/docs/phabricator/article/Configuration_Guide.html

The following three directories will be downloaded in the current directory.

ls

Sample output:

anaconda-ks.cfg  arcanist  install.log  install.log.syslog  install_rhel-derivs.sh  libphutil  phabricator

Move the above three directories to the apache root document folder.

cp -fr arcanist/ libphutil/ phabricator/ /var/www/html/
ls /var/www/html/

Sample output:

arcanist  libphutil  phabricator

Start MySQL and Apache services and make them to start automatically on every reboot.

service httpd start
chkconfig httpd on
service mysqld start
chkconfig mysqld on

Setup MySQL root password

By default, mysql root user doesn’t has password. To secure mysql, we have to setup mysql root user password.

Enter the following command to secure MySQL:

mysql_secure_installation
NOTE: RUNNING ALL PARTS OF THIS SCRIPT IS RECOMMENDED FOR ALL MySQL
      SERVERS IN PRODUCTION USE!  PLEASE READ EACH STEP CAREFULLY!
In order to log into MySQL to secure it, we'll need the current
password for the root user.  If you've just installed MySQL, and
you haven't set the root password yet, the password will be blank,
so you should just press enter here.

Enter current password for root (enter for none):     ## Press Enter ## 
OK, successfully used password, moving on...
Setting the root password ensures that nobody can log into the MySQL
root user without the proper authorisation.

Set root password? [Y/n]     ## Press Enter ##
New password:                ## Enter new password ##
Re-enter new password:       ## Re-enter new password ##
Password updated successfully!
Reloading privilege tables..
 ... Success!

By default, a MySQL installation has an anonymous user, allowing anyone
to log into MySQL without having to have a user account created for
them.  This is intended only for testing, and to make the installation
go a bit smoother.  You should remove them before moving into a
production environment.

Remove anonymous users? [Y/n]     ## Press Enter ##
 ... Success!

Normally, root should only be allowed to connect from 'localhost'.  This
ensures that someone cannot guess at the root password from the network.

Disallow root login remotely? [Y/n]     ## Press Enter ## 
... Success!
By default, MySQL comes with a database named 'test' that anyone can
access.  This is also intended only for testing, and should be removed
before moving into a production environment.

Remove test database and access to it? [Y/n]     ## Press Enter ##
 - Dropping test database...
 ... Success!
 - Removing privileges on test database...
 ... Success!
Reloading the privilege tables will ensure that all changes made so far
will take effect immediately.

Reload privilege tables now? [Y/n]     ## Press Enter ##
 ... Success!

Cleaning up...

All done!  If you've completed all of the above steps, your MySQL
installation should now be secure.

Thanks for using MySQL!

Configure Apache Web server For Phabricator

Open the Apache configuration file with your favourite text editor.

vi /etc/httpd/conf/httpd.conf

At the bottom of the file, paste the following:

<VirtualHost *>
  # Change this to the domain which points to your host.
  ServerName phabricator.unixmen.local

  # Change this to the path where you put 'phabricator' when you checked it
  # out from GitHub when following the Installation Guide.
  #
  # Make sure you include "/webroot" at the end!
  DocumentRoot /var/www/html/phabricator/webroot/

  RewriteEngine on
  RewriteRule ^/rsrc/(.*)     -                       [L,QSA]
  RewriteRule ^/favicon.ico   -                       [L,QSA]
  RewriteRule ^(.*)$          /index.php?__path__=$1  [B,L,QSA]

<Directory "/var/www/html/phabricator/webroot/">
  Order allow,deny
  Allow from all
</Directory>
</VirtualHost>

Replace the path of the phabricator directory and hostname with your own.

Restart apache service.

service httpd restart

Configure MySQL For Phabricator

Now, we need to configure MySQL for Phabricator.

Go to the html/phabricator directory,

cd /var/www/html/phabricator/

Run the following commands one by one.

./bin/config set mysql.host localhost
./bin/config set mysql.user root
./bin/config set mysql.pass <mysql-root-password>

Then, run storage upgrade script to load the Phabricator schemata into it. You’ll be asked to press ‘y’ while loading database schema.

To do this, run:

./bin/storage upgrade --user root --password <mysql-root-password>

Sample output:

Before running storage upgrades, you should take down the Phabricator web
interface and stop any running Phabricator daemons (you can disable this
warning with --force).

    Are you ready to continue? [y/N] y ## Type 'Y' and press Enter

Loading quickstart template...
Applying patch 'phabricator:20150312.filechunk.1.sql'...
Applying patch 'phabricator:20150312.filechunk.2.sql'...
Applying patch 'phabricator:20150312.filechunk.3.sql'...
Applying patch 'phabricator:20150317.conpherence.isroom.1.sql'...
Applying patch 'phabricator:20150317.conpherence.isroom.2.sql'...
Applying patch 'phabricator:20150317.conpherence.policy.sql'...
Applying patch 'phabricator:20150410.nukeruleedit.sql'...
Storage is up to date. Use 'storage status' for details.
Verifying database schemata...
Found no adjustments for schemata.

Restart MySQL service to take effect the changes.

service mysqld restart

Configure Firewall

We must allow apache server’s default port ’80’ through in-order to access the Phabricator’s Web UI from a remote machine.

To do that, edit /etc/sysconfig/iptables/:

vi /etc/sysconfig/iptables

Add the following line:

[...]
-A INPUT -m state --state NEW -m tcp -p tcp --dport 80 -j ACCEPT
[...]

Restart iptables service.

service iptables restart

Configure Phabricator Web UI

Now, we will configure the Phabricator Web UI.

Open up your Web browser and type: http://ip-address/ or http://domain-name/ in the address bar. You should see the following screen.

The first step is to setup Admin account. Enter the admin account name, Real name, and Password etc. Click Create Admin Account link in the bottom.

Welcome to Phabricator - Mozilla Firefox_001

Now, you’ll be redirected to Phabricator’s Dashboard. You may notice some unresolved setup issues on the top left corner. You have to resolve them before using Phabricator.

Phabricator - Mozilla Firefox_002

Click on the “Unresolved setup issues” link to view the list of issues.

☺ Setup Issues - Mozilla Firefox_003

Click on the each issue to see how to resolve the corresponding issue. For example, I clicked the first issue and it’s shows the following the method to resolve it.

☺ No Base URI - Mozilla Firefox_007

I opened the Terminal and ran the following command:

./bin/config set phabricator.base-uri 'http://192.168.1.150/'

After solving each issues, restart the following services to take effect the changes.

service httpd restart
service mysqld restart
./bin/phd restart

Then, click “Reload page” button on the right bottom corner.

Similarly, click on the each issue, Phbricator will display the way about how to resolve that particular issue.

After clearing all issues, you will see the following message:

Issue Resolved

This setup issue has been resolved. Return to Open Issue List

☺ Resolved Issue - Mozilla Firefox_008

Due to the lack of time and space, we can’t show how to resolve all issues.

After solving all issues, you will see the “Ready to use” message.

Check Phabricator

Just close the current window and open the new window, and navigate to http://ip-address/ or http:domain-name/.

Creating New Users

Let us create a new user. To to do that, click on the People link on the Dashboard and click “Create new user” link in the next window. Select Standard user and click Continue.

♟ Create New User - Mozilla Firefox_001

Enter the username, Real name, and mail-id etc.

♟ Create New User - Mozilla Firefox_002

Now, the new user will be created.

♟ senthil - Mozilla Firefox_003

A confirmation mail will be send to the user’s mail. To login to Phabricator, follow the confirmation link and set a password:

Welcome to Phabricator - Mozilla Firefox_004

Set new password:

Password - Mozilla Firefox_006

After you have set a password, you can login in the future by going here:

http://ip-address/ or http://domain-name/

Login to Phabricator - Mozilla Firefox_007

Phabricator - Mozilla Firefox_008

Reset admin user password

In case, you forgot the admin user password, you can reset it using command:

./bin/auth recover unixmen

Here, unixmen is my admin user password.

Sample output:

Use this link to recover access to the "unixmen" account from the web interface:

    http://192.168.1.150/login/once/recover/1/knwf6372sdcnjacq56ixlyadbhcutsv7/

After logging in, you can use the "Auth" application to add or restore authentication providers and allow normal logins to succeed.

Copy/paste the above link in your browser.

Click Login.

Account Recovery - Mozilla Firefox_009

Enter new password twice.

Password - Mozilla Firefox_010

That’s it. Now, you can login using the new password.

Cheers!

For more details, refer the Phabricator official documentation.

---------------------------------------------------------------------
Install Phabricator Software Development Platform In CentOS

Install OpenLiteSpeed Web Server On Ubuntu

$
0
0

OpenLiteSpeed is a free and open source HTTP server developed by LiteSpeed Technologie. OpenLiteSpeed is a high-performance, lightweight application gives the ability to free download, use, distribute, and modify its source code under the conditions of the third version of the GNU General Public License. It supports Apache rewrites rules via the Admin page and it is used to manage and serve sites.

In this article we will explain how to install and configure OpenLiteSpeed on an Ubuntu server.

OpenLiteSpeed features

OpenLiteSpeed has a large set of features where we can list the following ones:

  • It is characterized by its high performance coding using kqueue (FreeBSD and OS X), epoll (Linux), /dev/poll (Solaris), and poll.
  • and event-driven architecture with extremely low resource (CPU and RAM) overhead
  • It is a support light weight with a minimal CPU and memory footprint
  • It is compatible to Apache rewrite rules
  • It is also characterized by WebAdmin GUI with real-time statistics and High-performance page caching.
  • It has an easy virtual host configuration via templates

Before starting the installation, it is required to have a non-root user account configured on your server and complete with “sudo” privileges.

Installation of OpenLiteSpeed

We will start our installation by updating the local package index file and by installing all the needed components. So use the following command to update the file:

sudo apt-get update

And this command to install the needed components which will be used to compile the software:

sudo apt-get install build-essential libexpat1-dev libgeoip-dev libpng-dev libpcre3-dev libssl-dev libxml2-dev rcs zlib1g-dev

Now we will install the OpenLiteSpeed from its official website (http://open.litespeedtech.com/mediawiki/index.php/Downloads) it is recommended to install the version 1.3.10 to make its installation using this article. Copy the link address which will be used in the following commands to make the installation with the “wget” command:

cd ~
wget http://open.litespeedtech.com/packages/openlitespeed-1.3.10.tgz

After making the download extract the file and move to its directory using the following commands:

tar xzvf openlitespeed*
cd openlitespeed*

Then use the following command to configure the software and to compile it:

sudo ./configure
sudo make

And to start the installation of this software into your system use the following command:

sudo make install

You can find it under the /usr/local/lsws directory.

Now we will need the MySQL database to be able to store data. So if you haven’t an installed MySQL you can use the following instructions. You can make the installation of the MySQL database management system from the Ubuntu’s repositories using the following command:

sudo apt-get install mysql-server

Then, enter an administrative password while making the installation and initialize the MySQL directory structure using the following command:

sudo mysql_install_db
sudo mysql_secure_installation

After typing those commands, enter your made administrative password, you will have also the possibility to change or to keep the same password. Then press “enter” to accept the default suggestions.

Now we will start the web server. We will start by changing the administrative password using the following command:

sudo /usr/local/lsws/admin/misc/admpass.sh

By default, the “admin” username will be chosen and if you want you can change. After changing the password and the username use the following command to start the web server:

sudo service lsws start

Then access to the default web page by navigating to your domain name or IP address using the following command:

http://your_server_domain_or _your_IP:8088

After discovering and surfing through this site, we will move to the administrative interface using the following command:

https://your_server_domain_or_your_IP:7080

You will be informed that the SSL from the server can’t be validated, which is a self-signed certificate. Click through the available options to proceed to the site. You will be asked to enter the administrative name and password already done with the “admpass.sh”.

123

After the authentication you will be in front of the OpenLiteSpeed administration interface.

Now we will change the port from the one used by the default site “8088” to the conventional port “80”. So we will do as follow:

  • Under the “Configuration” menu item in the menu bar select the “listeners”.
  • Under the “listeners” click on the “View/Edit” button.
  • Click the edit button in the top-right corner of the “Address Settings” table and change the port “8088” to the port “80” then click “save”.

To restart the server, under the “Actions” menu select “Graceful Restart”.

12

Everything associated with OpenLiteSpeed can be found under the following directory.

/usr/local/lsws

If you want to stop the OpenLiteSpeed use the following command:

/usr/local/lsws/bin/lswsctrl stop

And if you aren’t satisfied and want to remove completely the installed directory use the following command:

rm -rf /usr/local/lsws

So you will lose nothing give it a try and discover this tool.

Conclusion

In this article, we gave you the instructions to fellow for installing the OpenLiteSpeed application and also MySQL database management system in an Ubuntu server. The OpenLiteSpeed is a great performance interface used to manage and serve site.

---------------------------------------------------------------------
Install OpenLiteSpeed Web Server On Ubuntu

How To Install OwnCloud In Linux

$
0
0

A brief Introduction about Cloud

Every one nowadays heard about cloud storage. This notion means the storage of data online in the cloud, it is where in a company’s data is stored in and accessible from multiple distributed and connected resources that comprise a cloud as it is defined by webopedia. Currently, It is all around us in our smart phones, on desktops and servers etc. It gives users the benefits of greater accessibility and reliability, protection for data, lower storage costs and rapid deployment. It is responsible for keeping the data available and accessible and the environment protected and running. There are four main types of cloud storage (personal, public, private and hybrid cloud storage) which will described in this article and we will just give you the instructions how to build your personal cloud storage using ownCloud application.

Types of Cloud storage

As it was mentioned in the introduction, there are 4 types of cloud storage described as below:

  • Public Cloud Storage: also called storage-as-a-service, on-line storage or utility storage, is a service model for data storage on a pay-per-use basis. It is where the company and storage service provider are separated. The cloud storage provider manages the enterprise’s public cloud storage.
  • Personal Cloud Storage: also known as mobile cloud storage is a subset of public cloud storage used to store an individual’s data in the cloud and providing the individual with access to the data from anywhere. Apple’s iCloud is an example of personal cloud storage.
  • Private Cloud Storage: also called internal cloud storage, is a service delivery model for storage within a large enterprise. It is a form of cloud storage where the enterprise and cloud storage provider are integrated in the enterprise’s data center.
  • Hybrid Cloud Storage: is a combination of public and private cloud storage where some critical data resides in the enterprise’s private cloud while other data is stored and accessible from a public cloud storage provider.

Advantages of Cloud Storage

From the advantages of using Cloud Storage we can list the following ones:

  • Cost: Online storage services reduce much of the cost associated with traditional backup methods, providing ample storage space in the cloud for a low monthly fee.
  • Security: Storing confidential or sensitive information in the cloud is often more secure than storing it locally, especially for businesses. With online storage services, data is encrypted both during transmission and while at rest, ensuring no unauthorized users can access the files.
  • Invisibility: Cloud storage is invisible; with no physical presence, it doesn’t take up valuable space at home or in the office
  • Automation: Online storage services make the tedious process of backing up easy to accomplish through automation.
  • Accessibility: You can access your account from any internet connection, whether you are on a mobile browser or your work computer
  • Sharing: one file or an entire folder can be easily shared with just a few clicks.

In this article, we will explain how you can build your personal Cloud Storage using ownCloud applications. In fact the ownCloud is a free, open-source and powerful web application for data synchronizing data, sharing file, and remote storing of files. Its open architecture is extensible via a simple but powerful API for applications and plugins and works with any storage.

Installation of ownCloud in Linux

Before starting the installation of this application it is required to have LAMP stack already installed. So if you are working with Debian, Ubuntu or Linux Lint you have to use the following commands:

# apt-get install apache2 apache2-doc apache2-utils mysql-server mysql-client php5 php5-mysql php5-curl

But if you are working with Redhat or CentOS or Fedora, you have to use the following command:

# yum install httpd mysql-server mysql-client php php-mysql php-curl

Then use the following command to login to your database:

# mysql –u root -p

Use the following command to create a database:

mysql> create database cloud ; 
Query OK, 1 row affected (0.00 sec)
mysql> grant all on cloud.* to tecmint@localhost identified by 'your_password'; 
Query OK, 0 rows affected (0.00 sec)

Now you can download the ownCloud application from its official website, you can use wget or apt or yum command to make the download of this application. So let’s start:

# wget https://download.owncloud.org/community/owncloud-8.0.0.tar.bz2

After finishing the download replace this package to your Apache working directory using the following command if you have Debian system:

# cp owncloud-8.0.0.tar.bz2 /var/www/

And the following command if you have RedHat system:

# cp owncloud-8.0.0.tar.bz2 /var/www/html/

Then use the following command to extract the package:

# tar -jxvf owncloud-8.0.0.tar.bz2

And the rm -rf command may be used to remove the archive after the extraction of the package:

# rm -rf owncloud-8.0.0.tar.bz2

And change the permission of your ownCloud file using the following command. We will use 777 which means that we give read, write and execute permission which is temporary because we need to have it now. Then after the installation we will change it.

# chmod -R 777 owncloud/

Now use the following command to enable the “mod_rewrite” and “mod_headers” under Debian which is by default enabled under RedHat:

# a2enmod rewrite
# a2enmod headers

Then open the Apache global configuration file under Debian using the following command:

# vi /etc/apache2/sites-available/default

And the following command if you are working under RedHat:

# vi /etc/httpd/conf/httpd.conf

Then use the following commands to change the “AllowOverride None” to “AllowOverride All”:

AllowOverride None
AllowOverride All

And use the following commands to restart your Apache under Debian system:

# service apache2 restart

And the following command under RedHat system:

# service httpd restart

Now you can access your personal cloud storage using the following commands:

http://localhost/owncloud

Or:

http://your_address_IP/owncloud

Then you have to create your admin account and where you will store your files and folders. After that you have to enter your MySQL database username, password and database name. if you enter all that you will be able to start using your personal cloud storage by clicking the finish button.

Later if you want you can add users and import users account, give each user a specific role and allocate space using the Gear icon located at the left bottom of the interface.

Conclusion:

With this article you can install and configure your own personal cloud storage and start storing your data and folders in a protected environment. Even if you have your own cloud storage application, try using this new application OwnCloud and give us your feedback.

---------------------------------------------------------------------
How To Install OwnCloud In Linux

X2Go: An Open Source Remote Desktop Solution For Linux

$
0
0

About X2Go

X2Go is an Open Source remote desktop application for GNU/Linux that uses NX technology protocol. The main difference between X2Go and other remote desktop applications is it provides secure standalone remote desktop sessions via SSH. So, each session connected using X2Go is strongly encrypted and safe. X2Go allows you mainly to connect to Linux systems from Linux, Windows, or Mac OS systems. Also, many clients can simultaneously connect and use single X2Go server. It comes with two components, namely X2Go server and X2Go client. X2Go server is a system that is being accessed from a client system. And, the X2Go is a system which can be used to access the X2Go server. This Client will be able to connect to X2Go server(s) and start, stop, resume and terminate (running) desktop sessions. X2Go Client stores different server connections and may automatically request authentication data from LDAP directories. Furthermore it can be used as fullscreen loginscreen (replacement for loginmanager like xdm).

X2Go server package can only be installed in Linux systems, whereas X2Go client package can be installed on many OS, including Linux, Windows, and Mac OS X.

Features

  • Graphical Remote Desktop that works well over both low bandwidth and high bandwidth connections;
  • The ability to disconnect and reconnect to a session, even from another client;
  • Support for sound;
  • Support for as many simultaneous users as the computer’s resources will support;
  • Traffic is securely tunneled over SSH;
  • File and printer Sharing from client to server;
  • Easily select from multiple desktop environments (e.g., MATE, GNOME, KDE);
  • Remote support possible via Desktop Sharing;
  • The ability to access single applications by specifying the name of the desired executable in the client configuration or selecting one of the pre-defined common applications;
  • Server-side list of available applications is displayed on the client, and you can run any number of them from within the same session like Citrix MetaFrame/Presentation Server/XenApp;
  • The ability to access a Windows computer that supports RDP via X2Go-proxied RDP;
  • X2Go client can also serve as a graphical front-end to a client-side rdesktop/xfreerdp installation;
  • A Thin Client Environment is available;
  • A Session Broker that supports centralized configuration and load balancing;
  • And many.

Install X2Go Server

X2Go server and client installation is much easier compared to other remote desktop applications. X2Go development team has made separate repositories for different operating systems.

The following instructions describes how to install X2Go server on various distributions. As I mentioned before, the X2Go can only be installed in Linux based systems.

On Ubuntu 14.04:

Run the following commands to add X2Go repository and install it in Ubuntu 14.04 or higher versions.

sudo apt-get install software-properties-common
sudo add-apt-repository ppa:x2go/stable
sudo apt-get update
sudo apt-get install x2goserver x2goserver-xsession

On Ubuntu 12.04:

For Ubuntu 12.04 and previous versions, you can add X2Go repository and install it as shown below.

sudo apt-get install python-software-properties
sudo add-apt-repository ppa:x2go/stable
sudo apt-get update
sudo apt-get install x2goserver x2goserver-xsession

On Debian 7:

First add X2Go repository. To do that, edit,

sudo vi /etc/apt/sources.list.d/x2go.list

Add the following lines:

# X2Go Repository (release builds)
deb http://packages.x2go.org/debian wheezy main
# X2Go Repository (sources of release builds)
deb-src http://packages.x2go.org/debian wheezy main

# X2Go Repository (nightly builds)
#deb http://packages.x2go.org/debian wheezy heuler
# X2Go Repository (sources of nightly builds)
#deb-src http://packages.x2go.org/debian wheezy heuler

Add X2Go GPG key:

sudo apt-key adv --recv-keys --keyserver keys.gnupg.net E1F958385BFE2B6E

Then, update software repository list and install X2Go server using the following commands:

sudo apt-get install x2goserver x2goserver-xsession

On Fedora 19 and later:

X2Go server and client packages are available in the default repositories of Fedora 19 and later versions. So, install X2Go server using command:

sudo yum install x2goserver

On RHEL 7/Scientific Linux 7/CentOS 7 systems:

Add EPEL repository first.

yum install epel-release

Then, install X2Go server package using command:

yum install fuse-sshfs
yum install x2goserver x2goserver-xsession

On RHEL 6/Scientific Linux 6/CentOS 6 systems:

Similarly, add EPEL repository in CentOS/RHEL/Scientific Linux 6.x systems:

yum install epel-release

Then, install X2Go server package using command:

yum install fuse-sshfs
yum install x2goserver x2goserver-xsession

On openSUSE systems:

Add X2Go repository as shown below. Replace the version number with your own.

zypper ar http://packages.x2go.org/opensuse/<distro-version>/extras x2go-extras
zypper ar http://packages.x2go.org/opensuse/<distro-version>/main x2go-release

Then, install X2Go server using command:

zypper in x2goserver x2goserver-xsession

On SUSE systems:

Add X2Go repository as shown below. Replace the version number with your own.

zypper ar http://packages.x2go.org/sle/<distro-version>/extras x2go-extras
zypper ar http://packages.x2go.org/sle/<distro-version>/main x2go-release

Then, install X2Go server using command:

zypper in x2goserver x2goserver-xsession

OpenSUSE 11 and SLES/SLED 11 do not support /etc/sudoers.d as a place for custom sudoers config files.

If you are using any of these distributions and are having issues regarding running Qt applications with elevated privileges (e.g., via kdesu or sudo), please use this workaround.

Copy the contents of the “x2goserver” file residing in the documentation directory /usr/share/doc/packages/x2goserver.

Get elevated privileges. Either via:

su

or

sudo -i
Then, launch:
visudo
Paste the previously copied content at the end of the sudoers file. Save and exit your editor.

On Gentoo:

Currently X2Go cannot connect to an openssh server compiled with the HPN patch. To make sure x2goserver works on your Gentoo server, you must recompile net-misc/openssh with HPN support disabled. Add the following line to /etc/portage/packages. use:

net-misc/openssh -hpn

Then recompile net-misc/openssh, update the configuration file, and restart the sshd server, as follows:

emerge -1 net-misc/openssh
dispatch-conf
/etc/init.d/sshd restart

Note: A local X.Org installation is not required on the X2Go Server

Install X2Go Client

X2Go Client is available for Windows, Mac OS X, and many Linux distributions.

Add X2Go repository as shown above in the X2Go server installation section depending upon the distribution you use.

Then, install X2Go client using command:

On Debian and Ubuntu like systems:

sudo apt-get install x2goclient

On RHEL and CentOS like systems:

yum install x2goclient

On SUSE and openSUSE like systems:

zypper in x2goclient

Usage

From your client systems, launch X2Go client either from Menu or Unity Dash.

Enter the Session name, remote system’s IP address, remote system’s user name, and desktop environments (Ex.LXDE,  KDE etc.).

For example, here I select “Connect to local desktop” session.

Finally, click Ok to continue.

Session preferences - Lubuntu 14.10 Desktop_001

Click on the session name to continue.

X2Go Client_002

Now, enter the remote system’s password and click Ok to continue.

X2Go Client_003

You might the get the following warning message.

Host key verification failed

Host key for server changed.
It is now: 192.168.1.150:22 - 8a:b6:ca:43:fb:fe:e2:53:2f:39:89:31:0b:23:04:0e
This can be an indication of a man-in-the-middle attack.
Somebody might be eavesdropping on you.
For security reasons, it is recommended to stop the connection.
Do you want to terminate the connection?

Just ignore the warning by clicking on the “No” button and continue.

Host key verification failed_005

Click Yes to continue.

Host key verification failed_006

Select the type of access: Full or view only.

Here, I select “Full access”.

X2Go Client_004

Congratulations! Now, you can access your remote desktop. This is how my Lubuntu 14.10 remote desktop session looks.

Lubuntu 14.10 Desktop_007

Now, you can explore your remote system as the way you do locally. Also, you can create multiple different sessions with different DEs. And, many users can access the same session simultaneously.

Conclusion

X2Go is a perfect tool for thin client environment. While testing this tool, I faced some problems. I can’t access other desktop environments like Unity, KDE, LXDE. But, I hope there must be a work around to solve those issues. Apart from that, other session types, such as Openbox, Terminal, Internet browser are worked well as expected. X2Go has options to select different resolutions for the remote sessions. Also, you can mount local shares to remote sessions if you want. All traffics are forwarded via SSH, so security won’t be big issue while using X2Go.

In case of any problems, X2Go team offers both community and professional support. If you have any problems, post your queries there.

Give it a try. I hope you won’t be disappointed.

Cheers!

---------------------------------------------------------------------
X2Go: An Open Source Remote Desktop Solution For Linux

Install Atomia DNS On Ubuntu

$
0
0

Atomia DNS is a system to provision and improve administration of DNS settings across several DNSservers. DNS-servers can be geographically spread and are optimized to handle large amounts of DNSdata by using a local database instead of zone files.

Sans titre

The local databases of individual DNS-servers are updated from a main database which contains data for all servers.

Atomia DNS provides a API which lets applications update DNS-data in a very simple way.

Atomia DNS is a DNS system which enables easy management of DNS zones through a programmatic SOAP interface. The system consists of several parts which are described below.

atomia


Atomia DNS Features

The main features of Atomia DNS are:

• Programmatic interface: you can integrate Atomia DNS with your application by using the SOAP interface of Atomia DNS.

• Scalability: you can scale the DNS system up by adding more servers.

• Realtime updates: Support for massive amounts of zones without reconfiguration downtime

• Always valid DNS-data: it is impossible to add bad zone-data to the database

• Several data centers: administrate DNS servers in different data centers

Atomia DNS functionality

The Atomia DNS system consists of:

1. Atomia DNS Master server: The master server includes the Atomia DNS API that is used for communicating with nameservers and also used by external applications to provision DNS-data. Also on the master server is the Atomia DNS database which contains DNS-settings for all nameservers. It’s possible to install the Atomia DNS API and Atomia DNS database on different machines.

2. Atomia DNS PowerDNS Nameserver: The nameserver includes the popular PowerDNS nameserver configured to use a local MySQL database for zone data. All nameservers will also have the Atomia DNS PowerDNS Sync application installed which provisions changes to the local database and also settings and keys needed for DNSSEC.

3. Optional Atomia DNS Bind-DLZ Nameserver: The nameserver includes the popular BIND nameserver configured to use a local database instead of zone files. All nameservers will also have the Atomia DNS Sync application installed which provisions changes to the local database and also settings for BIND from the data in the Atomia DNS database.

Atomia DNS Master server default installation

This guide will install the Atomia DNS Master server using a default installation on Ubuntu 12.04 TLS. This means that both the Atomia DNS database and Atomia DNS API will be installed.


Before you start the installation, you should be a root user.

sudo su -

Then the second step is to add the Atomia APT Repository to the server using:

repo="$(wget -q -O - http://public.apt.atomia.com/setup.sh.shtml | sed s/%distcode/`lsb_release -c | awk '{ print $2 }'`/g)"; echo "$repo"

If you want to test if it’s ok with executing our APT repository install script, and then:

echo "$repo" | sh

Now you can install the Atomia DNS Master:

apt-get install atomiadns-masterserver

Before you start using the Atomia DNS client, If you would like to use the atomiadnsclient command line tool you will need to add the following parameters in /etc/atomiadns.conf:

  1. soap_uri = http://localhost/atomiadns
  2. soap_username = same as auth_admin_username
  3. soap_password = same as auth_admin_password

Install the Atomia DNS web app

Now we will install the Atomia DNS web app on the same machine as the Atomia DNS Master server.

Use the following command to run the installation

apt-get install atomiadns-webapp

If you haven’t yet installed your first nameserver by following the guide at Install and configure a name server (PowerDNS), then you need to create your nameserver group for the webapp to work. You can do this by executing the following command:

atomiadnsclient --method AddNameserverGroup --arg default

You will also have enable authin atomiadns.conf and create an admin user.

The admin user name must be formatted as an email address.:

  1. require_auth = 1
  2. auth_admin_user = admin_user@name.com
  3. auth_admin_pass = admin_password

Then restart apache service and start atomiadns-webapp.

service apache restart
service atomiadns-webapp start

Now add your first user (CURL example). For X-Auth, use the admin username and password set in atomiadns.conf:

curl -i -X POST -d '[ "new_user@name.com", "new_password" ]' -H 'X-Auth-Username: admin_username' -H 'X-Auth-Password: admin_password' 'http://localhost/pretty/atomiadns.json/AddAccount'

Finally , open your browser and  log to to the webb app in with the newly created credentials:

http://ip-of-your-server:5380

For more informations, you can visit atomia dns website.


---------------------------------------------------------------------
Install Atomia DNS On Ubuntu

Viewing all 1264 articles
Browse latest View live